


Publishing Depthkit captures to 8th Wall with streaming geometry sequences
With Depthkit 0.8.1, captures can now be exported directly from Depthkit into a streaming geometry format which can be played back in natively in a web browser and WebXR using 8th Wall.
This format is built on top of native HTML Media and Google’s Draco codec, and has wide support for a variety of desktop and mobile web browsers.
To render Depthkit captures in a web browser without 8th Wall, see the WebGL > Depthkit.js section of our documentation. Otherwise, read on to see how to get Depthkit captures into WebXR with 8th Wall.
Export Streaming Geometry Sequences out of Depthkit
- Launch Depthkit (requires version 0.8.1 or newer), login with a valid Depthkit license, and load your Depthkit project.
⚠️ Depthkit projects are not backward compatible. Depthkit projects opened in 0.8.1 will not open in earlier versions of Depthkit.
- In the Edit tab, load a capture.
- For Export Type, choose Textured Geometry Sequence.
- Adjusting texture settings may be necessary, since unlike Depthkit’s Combined per Pixel format, Textured Geometry exports can not make use of Depthkit’s Dynamic Texture Blending. Adjust Fixed Texture Blending and Texture Spill properties to generate the clearest textures and reduce harsh edges and artifacts from self-occlusion.
- There is now a Preset option which allows you to recall presets for visual effects (VFX) or real-time WebXR playback. Select the WebXR Preset - This loads settings optimized for streaming playback in browser on mobile devices and headsets.
- You can optionally adjust the export settings available. For more information, see the Textured Geometry Sequences section of Exporting Depthkit Studio assets documentation.
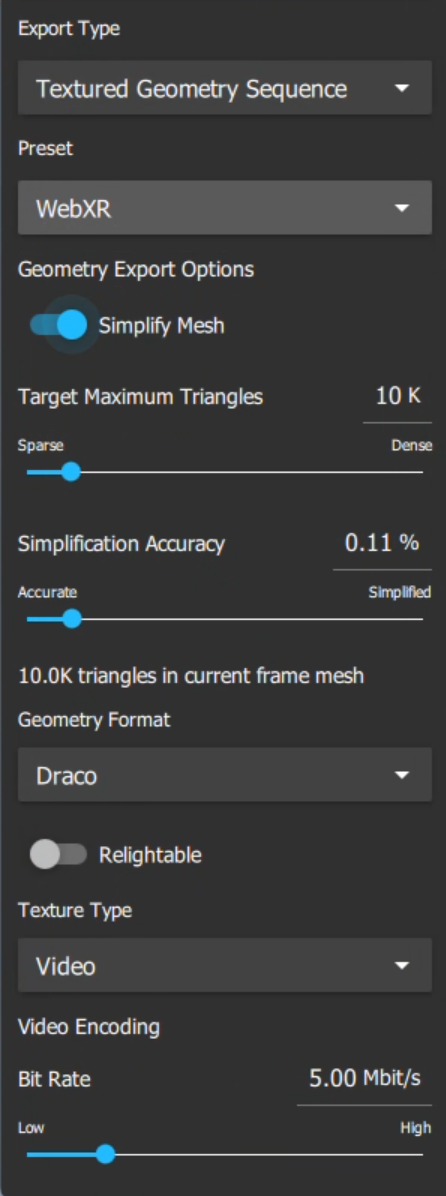
- Click Export to export the streaming geometry sequence to the specified Export folder.
⚠️ Ensure that all of the frames of your export include some geometry. Depthkit may crash if it attempts to export meshes of an empty volume - We are currently working to address this issue.
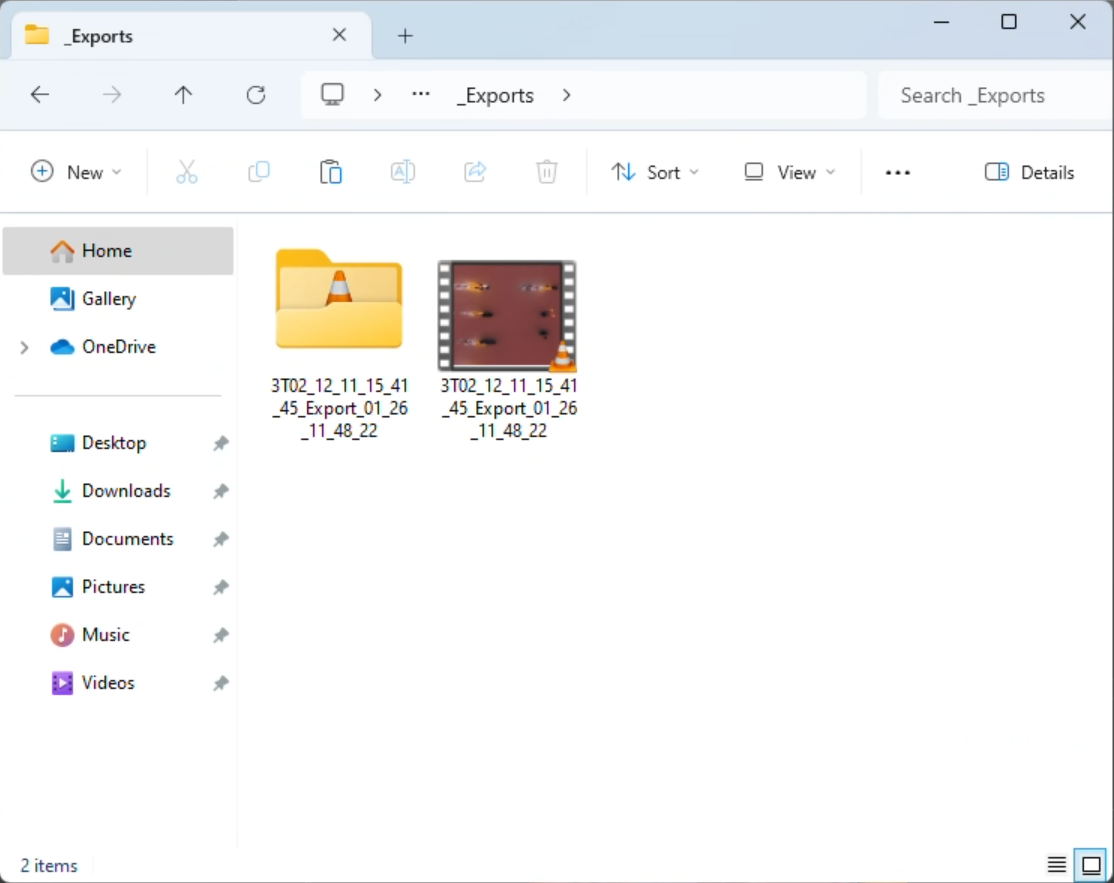
- You’ll now find your export composed of the following elements in your export folder:
* One texture HEVC (H.265) MP4 video file
* A folder containing a Draco mesh file for each frame.
- To add audio to your asset, open the texture video in the video editing software of your choice, create a composition/timeline that matches the resolution and framerate of the original video. Add the texture video and audio to the timeline, and export in the same HEVC (H.265) MP4 codec with a similar bitrate to the original. Replace the original video with the audio-included version for any subsequent steps of this workflow.
- Alternatively, you can follow our FFmpeg Audio guide for embedding audio into the video, which avoids re-encoding the asset, resulting in better-preserved quality.
Follow the steps in the next sections to set up a WebXR or Three.js scene to playback and render these assets in a web browser.
Upload Depthkit Streaming Geometry Sequence for Web Playback
- Start with a the files from a Depthkit capture exported with the WebXR preset new in 0.8.1. This includes a video file and a folder full of geometry (.drc) frames.

⚠️ Feel free to rename the files for readability as we have done here.• Ensure that the name of the video file and its associated folder of frames match exactly and can be case sensitive.• Ensure there are no spaces in the name.
- Log into Amazon S3 account.
⚠️ If you do not have an Amazon S3 Account, you can set one up very easily. If you’d like to use another content delivery network to host your assets, feel free! There’s nothing unique about the way the player uses S3 as a web accessible CDN.
- In the next steps, you’ll setup a new bucket (or prepare an existing bucket) to be accessible from anywhere by navigating to the bucket’s Permissions tab.
- In the bucket’s Permissions > ‘Block public access (bucket setting)’ section, click ‘Edit’ and clear all of the check boxes.
.png)
- Click ‘Save changes’ and confirm using the dialog. The section should now look like this, with ‘Block all public access’ set to ‘⚠️ Off’:
.png)
- In the bucket’s Permissions > ‘Cross-origin resource sharing (CORS)’ section, click ‘Edit’:
.png)
- Paste in the following JSON:
[
{
"AllowedHeaders": [],
"AllowedMethods": [
"GET"
],
"AllowedOrigins": [
"*"
],
"ExposeHeaders": []
}
]
- Click ‘Save changes’. The section should now look like this:
.png)
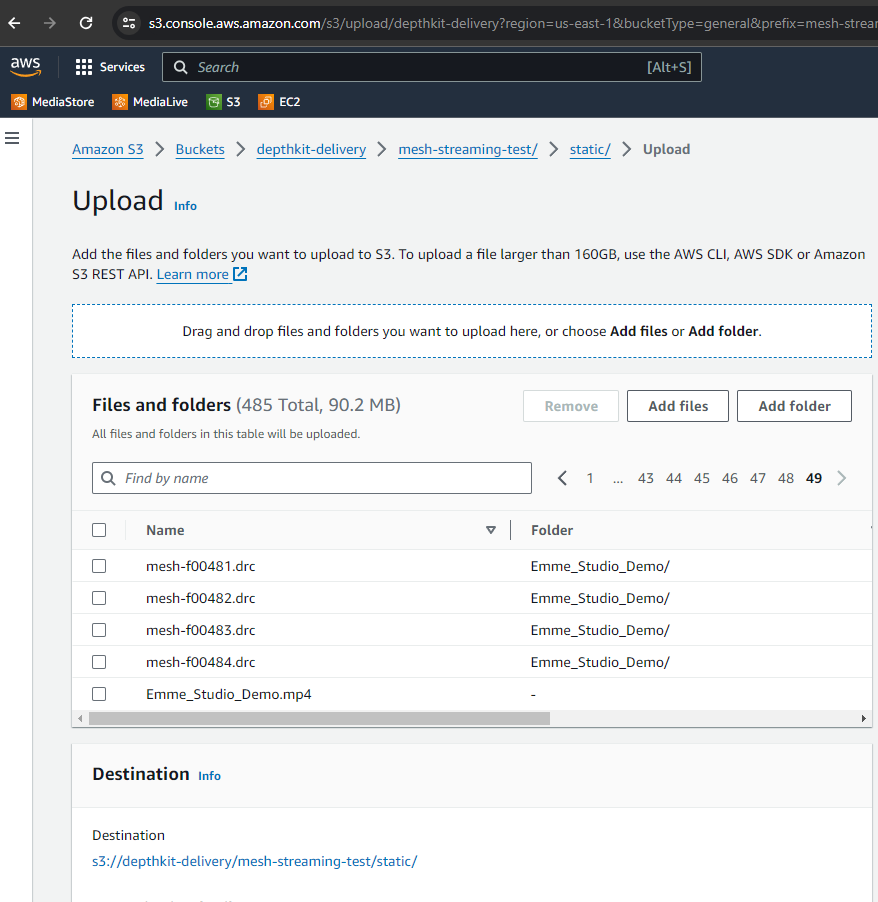
- Next, we’ll upload the assets to the cloud. Setup a new folder within the bucket to contain your captures.
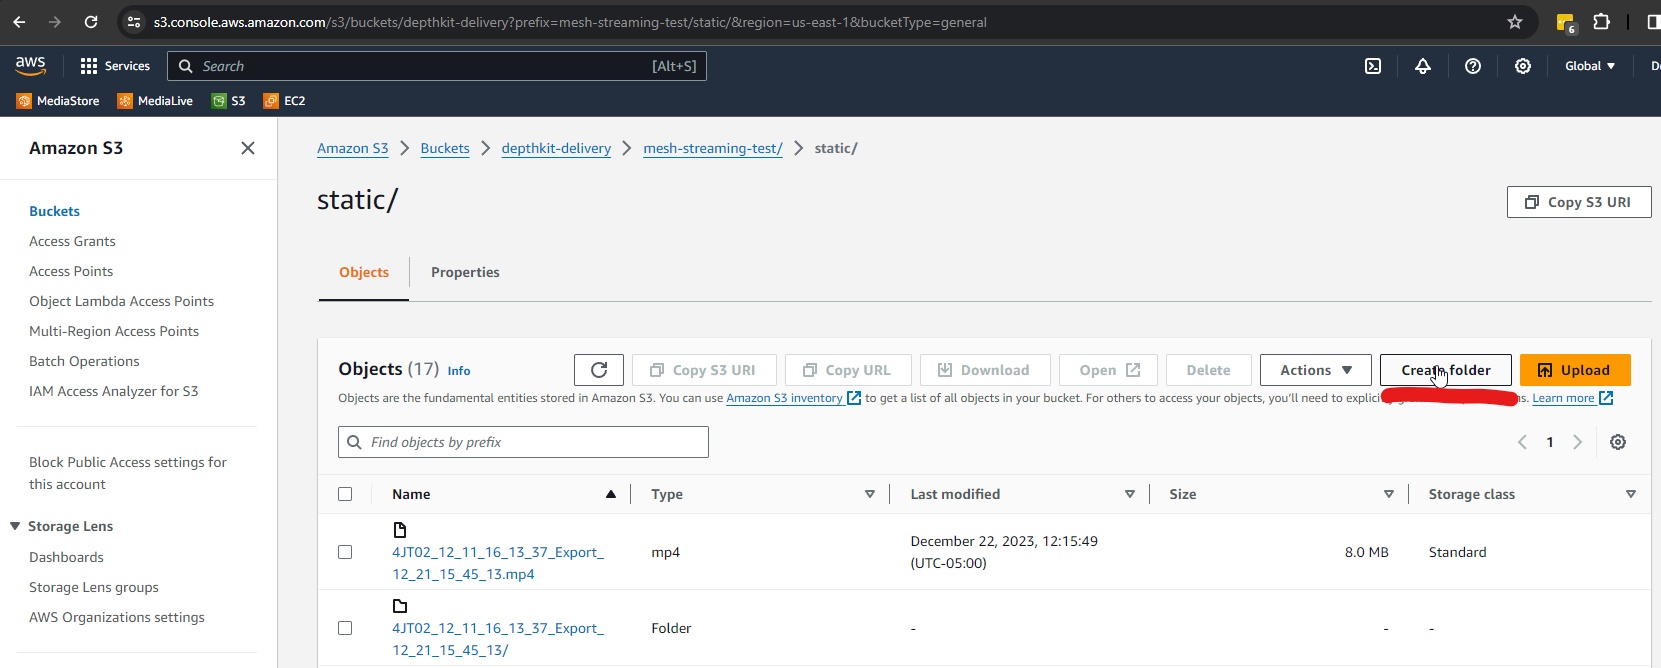
- Within that folder, upload the video to your folder by clicking upload
- Click Add files and select the video file.
- Click Add folder to add the folder containing all the geometry frames (.drc files). The files will be staged for uploading as you see below:
- Scroll down and set permissions to public, checking the box in the callout acknowledging the risks of making the files public.
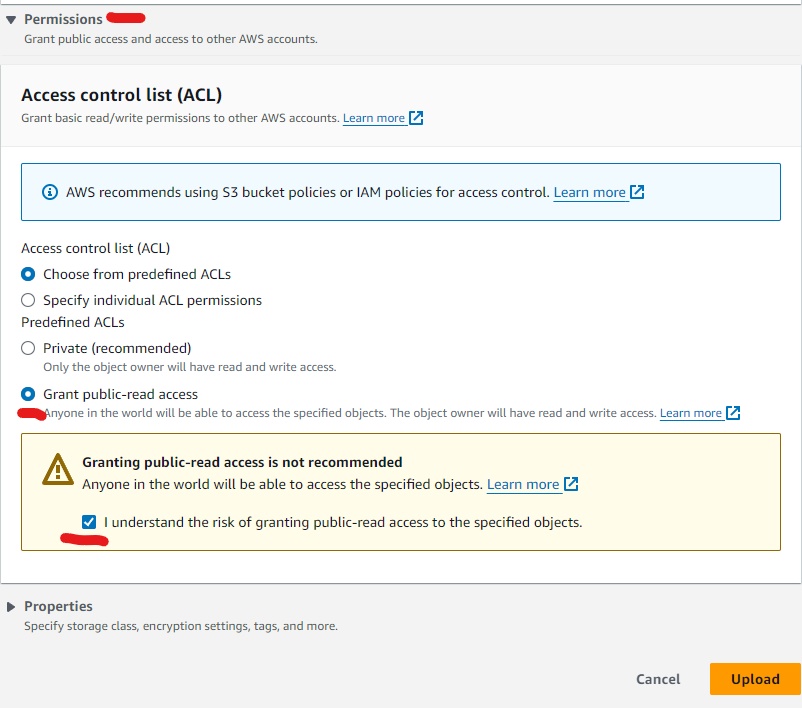
⚠️ This is an important step that is easy to miss! Setting permissions after the files are uploaded can be time consuming, as it will require paging through multiple pages of frames for long sequences.
- Click Upload. Wait for your files to upload and ensure the process completes without error.
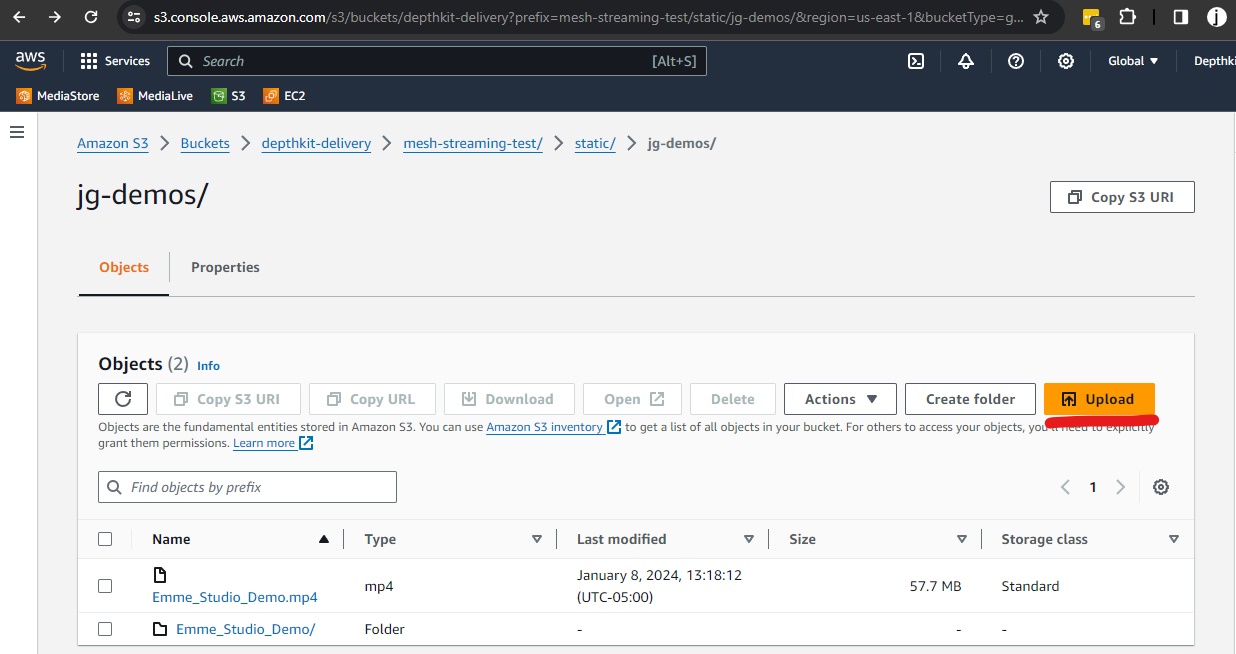
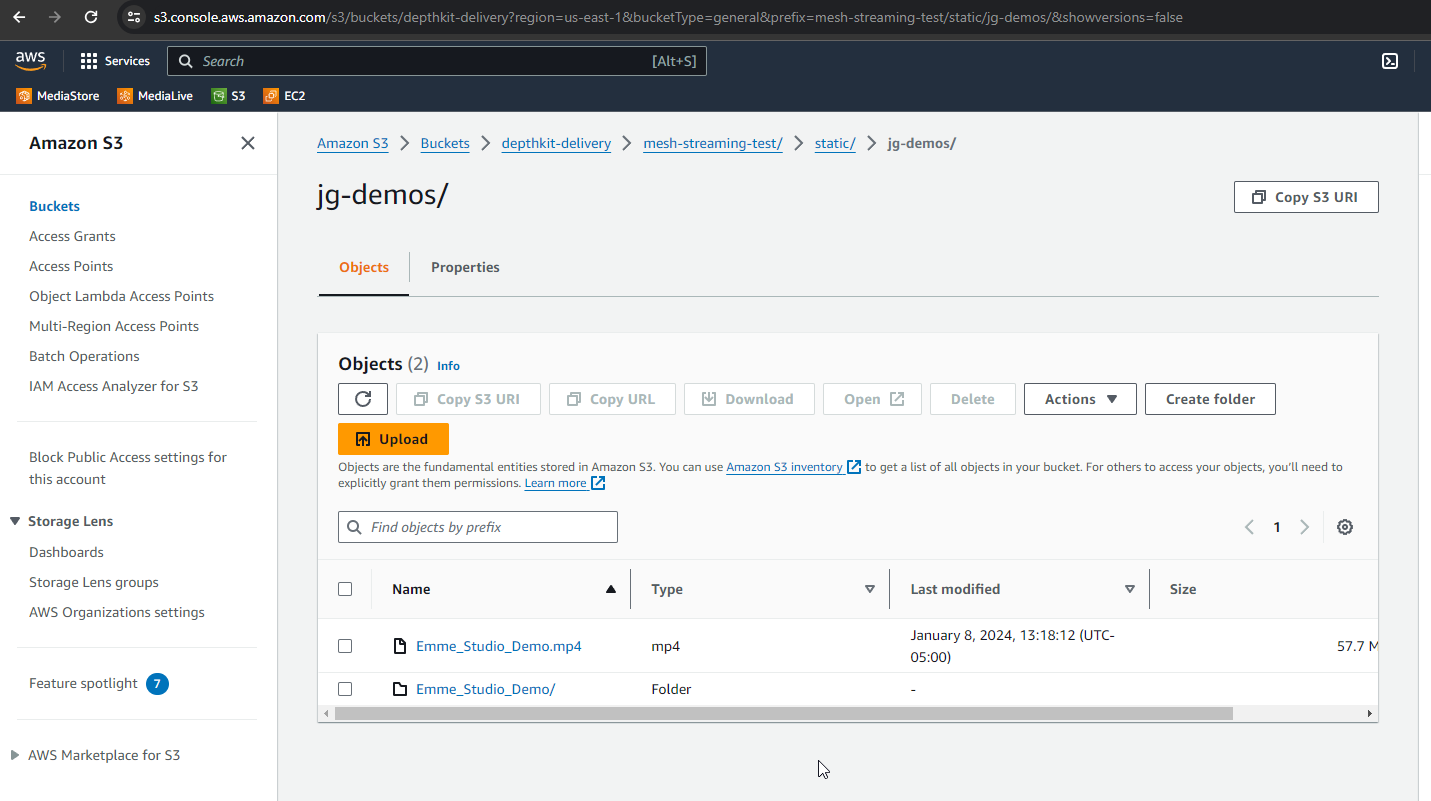
- Confirm that files are in your folder look like the below:
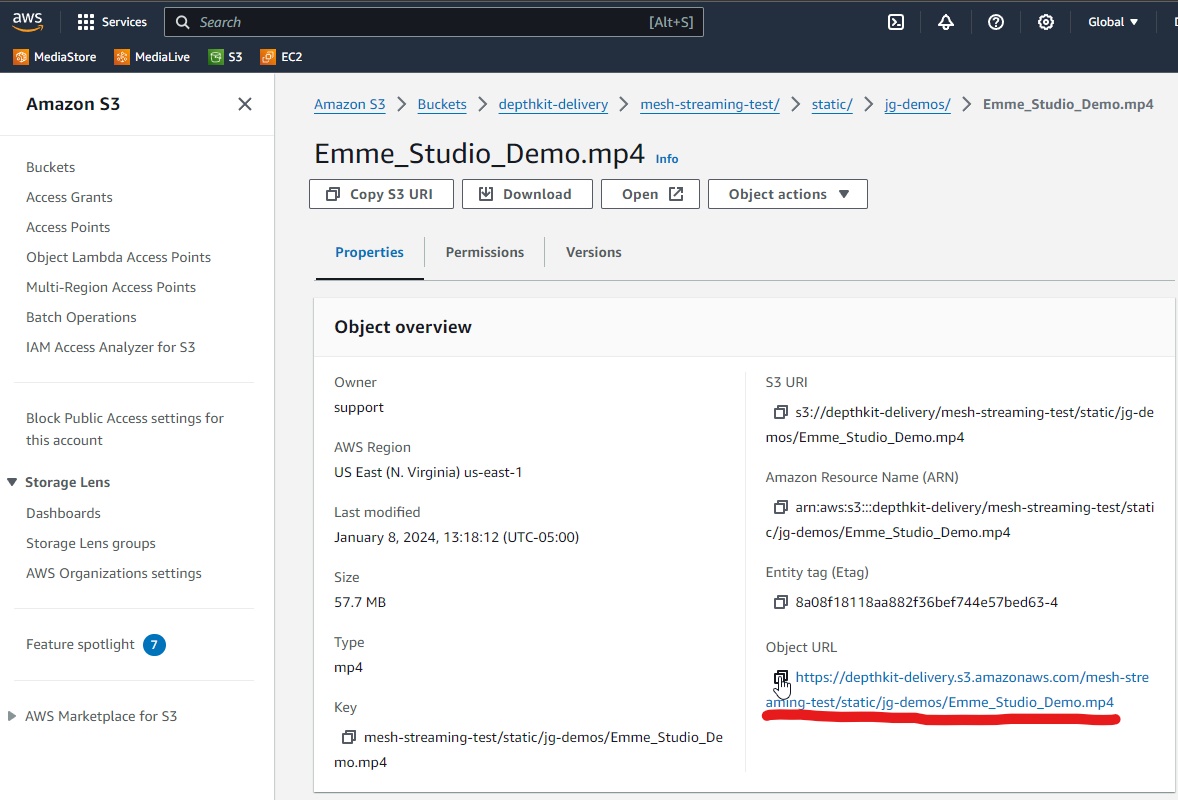
- Click on the video asset and copy the Object URL in the Properties(e.g. https://depthkit-delivery.s3.amazonaws.com/mesh-streaming-test/static/jg-demos/Emme_Studio_Demo.mp4 ) - You’ll need this later to set up the player.
Playback Depthkit Streaming Geometry Assets in 8th Wall
Once you’ve uploaded assets to S3 and made it public in the way described above, you can create an 8th Wall project to view them in Augmented Reality!
- Setup an 8th Wall account if you haven’t done so yet.
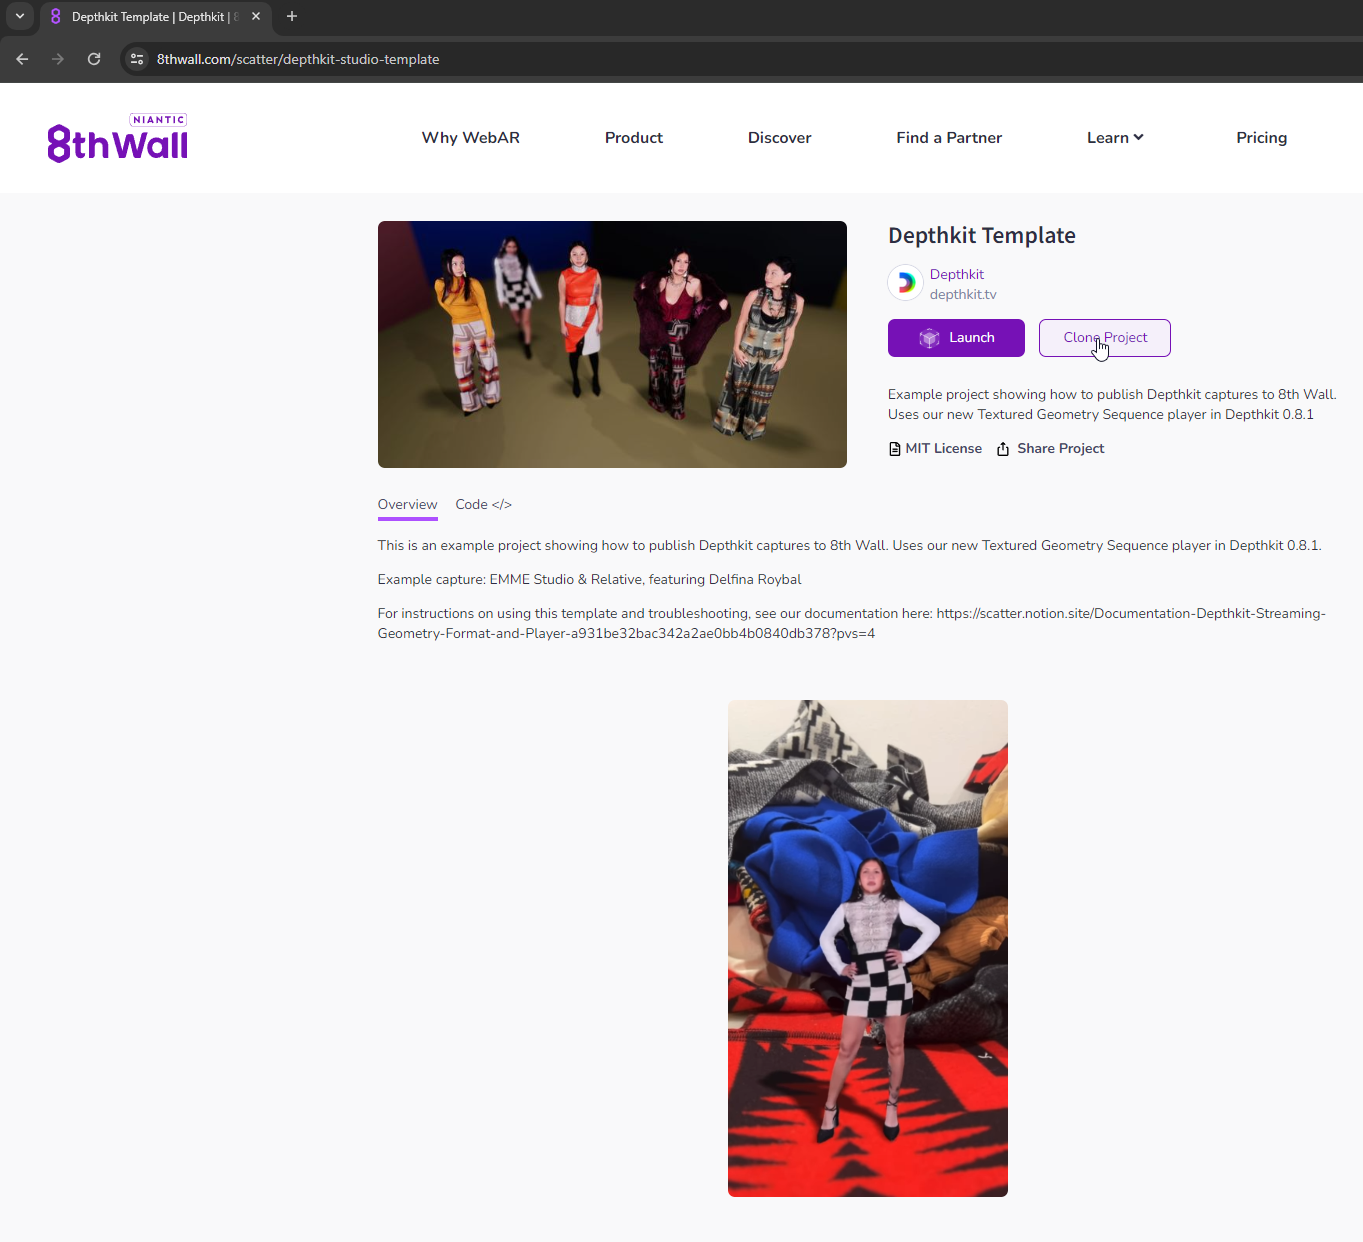
- Clone our Depthkit (Single-Clip) Template 8th Wall Project.
- Go to your workspace under
Manage Workspaceson the top right drop down under your account name. - Click the project just created when you cloned the Depthkit Template project.
- Click
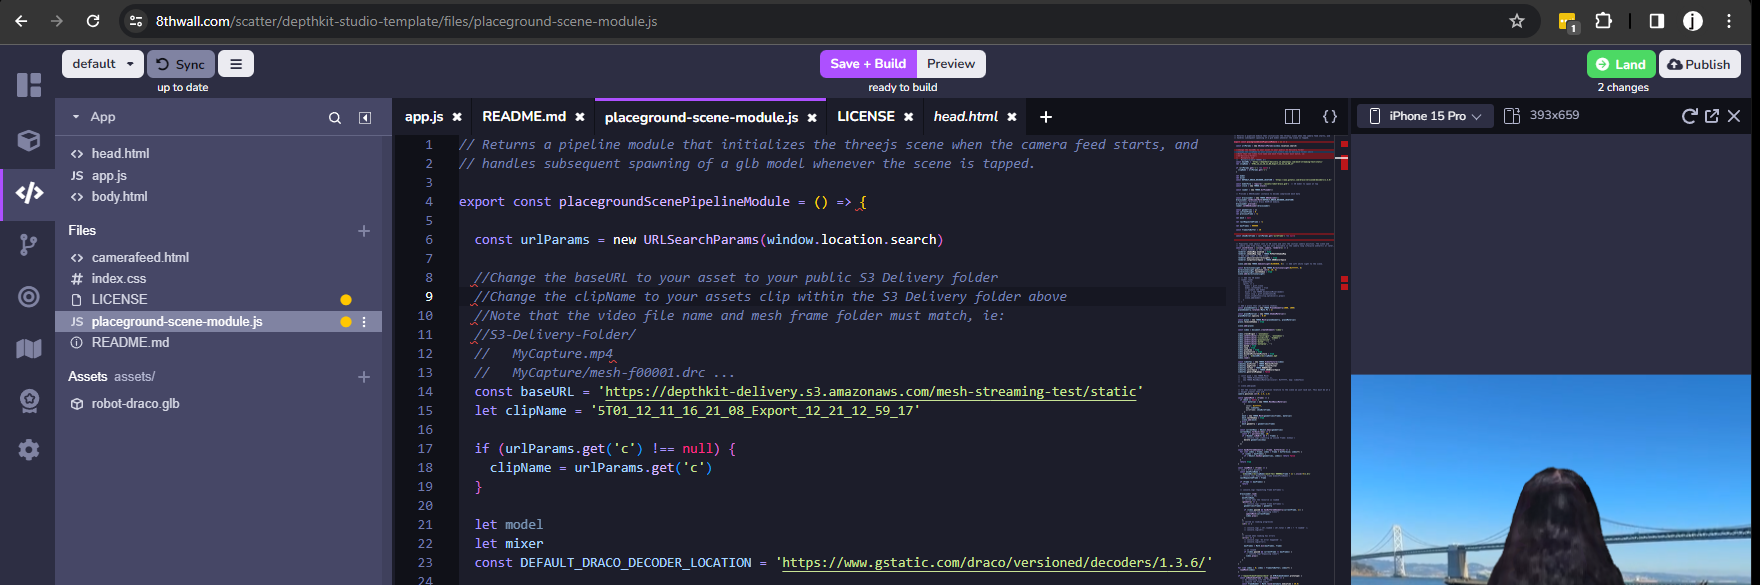
Open Editorand then select theEditortab, - Navigate to
placeground-scene-module.jsfile - With the
Object URLcopied from S3 above, replace the following variables:
-baseURLwithObject URLpath we copied earlier. Remove the video file name and the trailing slash/.
-clipNamewith the name of the asset without the.mp4- This is case-sensitive, so be sure to enter it exactly. Reminder that theclipNamemust match the video file name and the frames folder.
- Publish the project! You’ve just deployed your capture 🎉
- Add any other functionality you’d like through by following the 8th Wall tutorials, documentation and other sample projects.
Troubleshooting
Issue: Depthkit fails to export the entire clip, or crashes during export.
Possible Resolution:
- Ensure that all of the frames of your export include some geometry. Depthkit may crash if it attempts to export meshes of an empty volume - We are currently working to address this issue.
Issue: My capture won't load at all in 8th Wall.
Possible Resolutions:
- Double check the S3 URL and asset name used in the 8th Wall project to ensure that they perfectly match the asset hosted on S3.
- Double check that the bucket in which the assets are hosted, as well as the assets themselves, are configured for public-read access:
- Ensure the bucket’s permissions are set to public by following the sections above covering configuration of S3’s ‘Block public access (bucket setting)’ and ‘Cross-origin resource sharing (CORS)’ sections.
- If the assets are set to standard (non-public permissions), you can make them public by selecting them, clicking ‘Actions > Make public using ACL’:
- Ensure you are running a compatible browser and device. We have seen some issues with Android based Chrome and Firefox.
Issue: My asset only loads the first frame and does not play
Possible Resolutions:
- Ensure that your permissions are set correctly on the video file and frames
- Ensure you are running a compatible browser and device. We have seen some issues with Android based Chrome and Firefox.
- Ensure that your internet connection is sufficiently fast, slow internet may
- Ensure that your exported assets followed the WebXR preset for sufficient compression, including max triangle count, video bit rate and resolution
Issue: The clip plays back normally, but then the geometry freezes halfway through.
Possible Resolutions:
- Ensure the permissions are set correctly on all frames. In particular, if permissions were configured after export, make sure that frames on all pages in S3 folder viewer are also correctly set.
- Check the sequence of meshes that were exported from Depthkit to see if there are any gaps or missing frames in the sequence. If there are, re-export the clip.