


An introduction to Depthkit capture: Depthkit Core, Azure Kinect and the Refinement Algorithm
In this tutorial, you’ll learn how to do Depthkit’s Sensor Capture workflow with the Azure Kinect and, paired with the Refinement Workflow, learn how to get the maximum quality out of your volumetric footage. The Azure Kinect offers the highest color and depth resolution on the market today, and this control over quality is doubled by Depthkit’s own image enhancement algorithm in the Refinement Workflow. This algorithm generates a refined depth map to match the color video resolution, meaning you can export the highest quality results possible, making your volumetric video look better than ever.
Check out the tutorial video or explore the text walkthrough below.
(500 MB Video)
Getting started with Depthkit
1. Make sure your Azure Kinect is powered and connected to your computer.
2. Launch Depthkit Core (formerly Depthkit Pro) and create a new project.

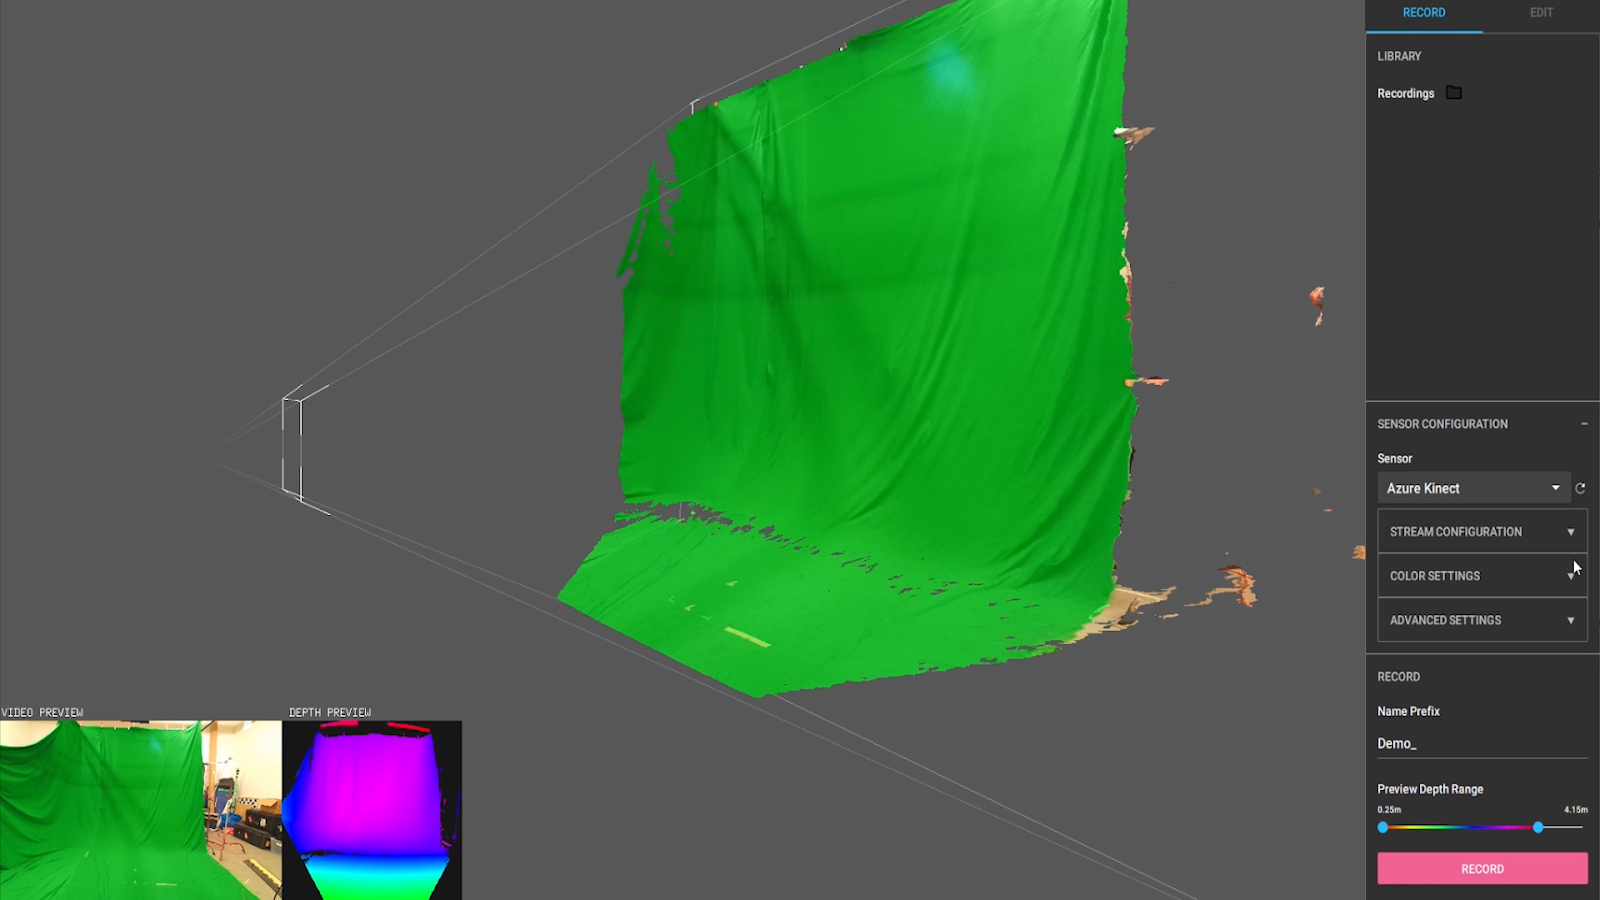
3. Once your project has been generated, you will be greeted by the Record panel. This panel consists of a primary 3D viewport, which represents the 3D space of your capture environment. In the lower left corner, notice a color and depth preview from your sensor. On the right, you have the library where your recordings will be stored as takes. Below the library is the sensor configuration menu. Here you will be setting your sensor resolution, color settings, advanced settings, and depth preview.
Sensor configuration with the Azure Kinect
Sensor configuration
1. Under the Sensor drop down, make sure your Azure Kinect is selected.
2. Under Stream Configuration, set your sensor video color resolution along with the depth mode. This is one of the key benefits of the Azure Kinect: the flexibility over resolution and capture quality. For best practices, we recommend setting your color resolution to 1080p, as it is performance friendly and ideal for just getting started. For this tutorial, we are going to set our resolution to 4K, or 2160p, to show a full resolution, refined export with the help of the Refinement Algorithm. For Depth Mode, we recommend the default 640x576 Narrow raw for highest quality depth data. With this format, you will be shooting with a narrow field of view.

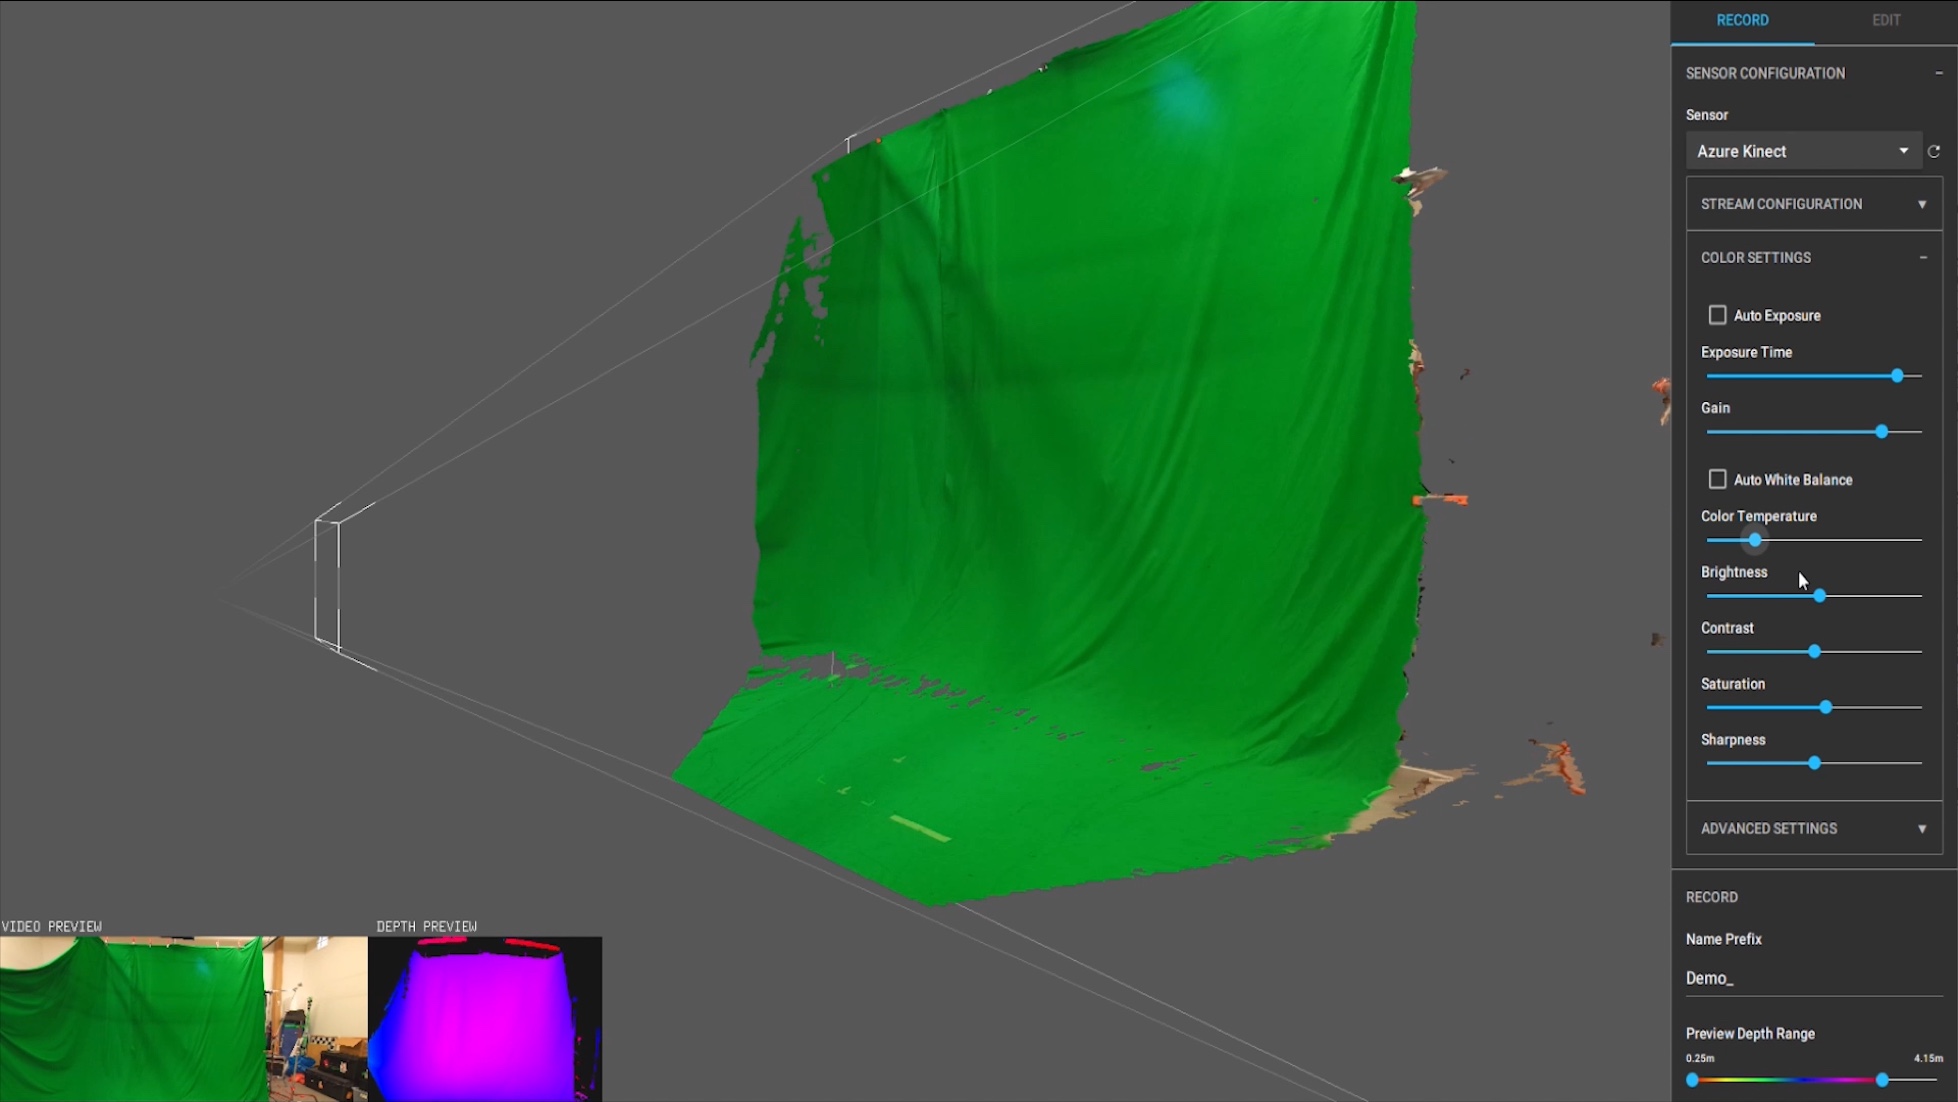
3. Next it is time to adjust your Color Settings. Here we have a range of sensor video settings that reflect traditional camera color and quality parameters. Adjust these settings to complement your capture lighting conditions.
Note: Color temperature should be used to compensate for your capture lighting environment. Sharpness can be used to increase sharpness of the sensor video: this will be most noticeable in high contrast areas of the video.
4. For the moment, leave Advanced Settings at default, especially if you are just getting started.
Record
1. In the Record panel, feel free to edit the name prefix of your take. Note that each take will adopt the recording timestamp after this prefix.
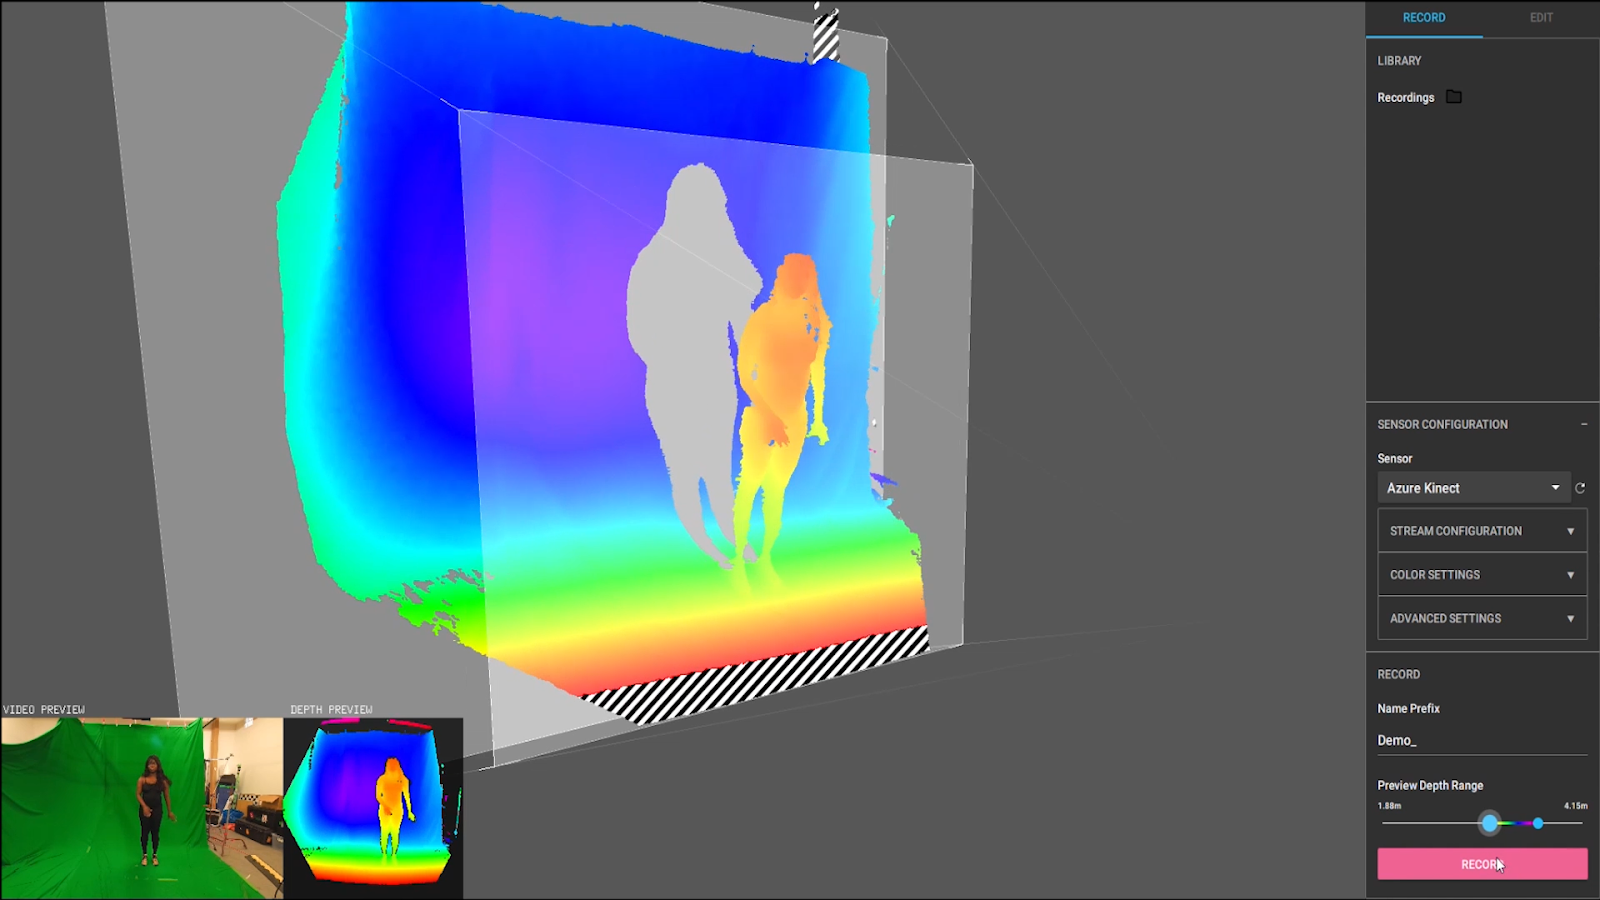
2. The Depth Range Preview displays the full range of the sensor with a near and far plane representing the minimum and maximum distance that you can record from the sensor. This preview acts as a reference and is non-destructive. Non-destructive means that all the data is being captured, you are simply changing what is being previewed. Rest assured if your subject is within the frustum view of the sensor, it is being recording no matter what your depth range is set to.
When adjusting these planes, it reveals the hue encoded depth values. We will cover this more when we are in the Edit panel, when this range becomes essential to editing your clip.
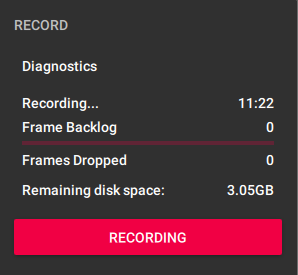
3. Now you are ready to record your subject! When recording, you will notice a diagnostics panel that pops up under the record button. This is super helpful in tracking clip duration, performance, and how much space remains on your hard drive while recording. If you notice increasing dropped frames or experience a “Low Performance Warning” we recommend that you check out these computer performance recommendations.
Editing your Depthkit Clip
Isolate
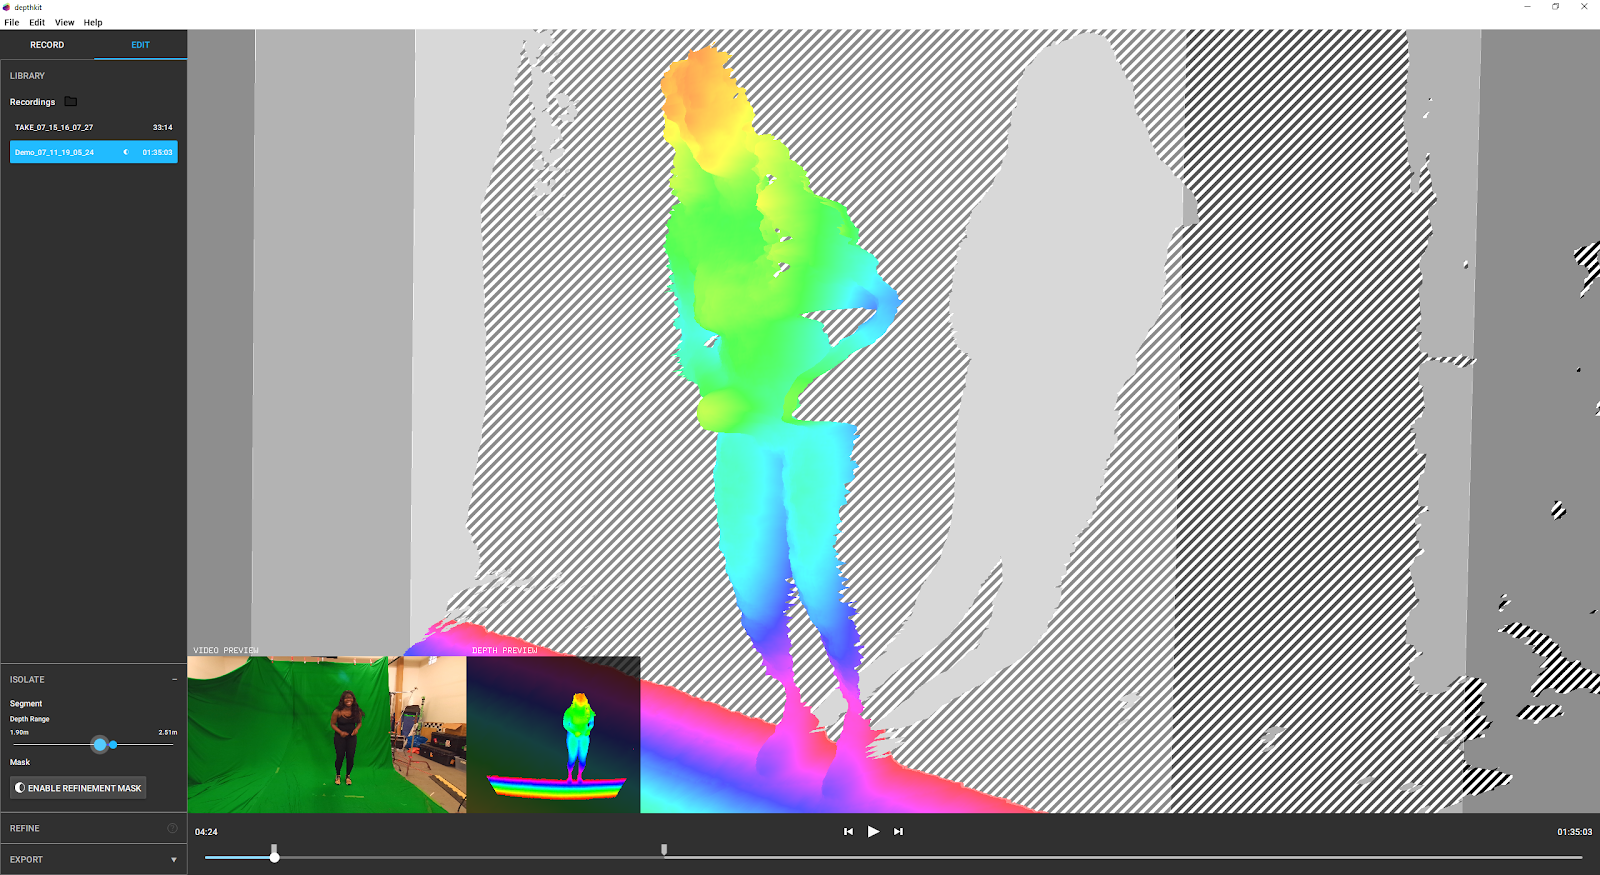
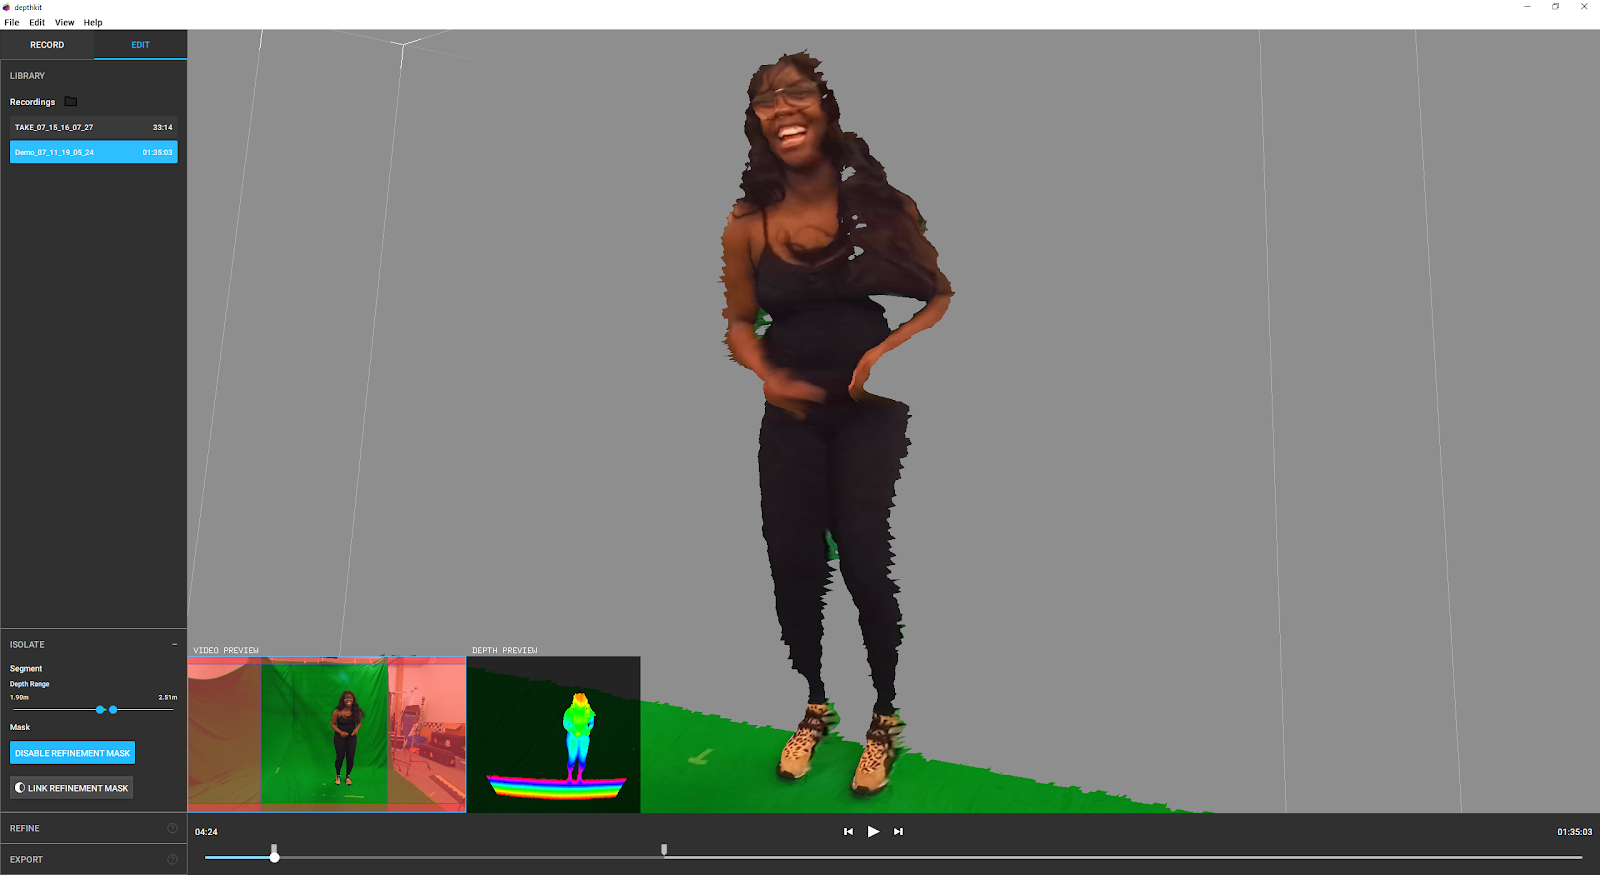
1. Now that you have a clip recorded, double click on the take in the library or click the Edit panel in the upper right corner. This takes you to the Edit window. Here you can isolate, refine, and edit our volumetric footage in preparation for export for either game engines or a VFX workflow. Let’s begin by isolating the subject from the background.
2. Expand the Isolate panel to adjust your minimum and maximum depth planes. In preparation for recording this was used as a reference, but in editing, this range sets the final min/max depth ranges for export. As you adjust these values, you will once again see the hue encoded depth values. Since these are key for an optimized export, let’s talk more about how we use these.
The hue encoding maps each depth value across the color spectrum. We do this for two reasons. First, Depthkit captures a RAW 16bit format for depth, while the export format is a standard 8bit color format. So just as when you convert from RAW, we have to select the range of interest. Our hue encoding can represent up to 1.5 meters. If your depth range is larger than that you’ll start to notice a loss of resolution in the Z axis of your exports. That is why we recommend to set your depth min/max planes based on the performance of your subject. In this way, you will most likely be pulling the range closer towards that 1.5 meters.
The second point is that hue encoding helps when exporting into our combined per pixel format. Bringing the near and far planes in further to maximize the diversity of color on the subject, will help reduce compression artifacts introduced by h.264 compression. At this point you could export your clip and get an okay-quality export, but before exporting we're going to provide a refinement mask to the capture to increase the quality.
Creating a Refinement Mask
Now you are ready to take your clip through the Refinement Workflow, the process of generating a refined depth map to match the color video resolution. In our case, we will be exporting in 4K, using Depthkit’s image enhancement algorithm. This process not only ensures high resolution exports, but also reduces depth noise and artifacts while improving edge quality of the exported asset.
The first step in this workflow is to create a refinement mask from your sensor video. You can do this in any video editing tool. See below for creating a refinement mask in After Effects.
1. Import your sensor video in After Effects. Create a new composition from the video.
2. Using the pen tool, generate a garbage mask to remove areas of your clip that are not within the green screen.
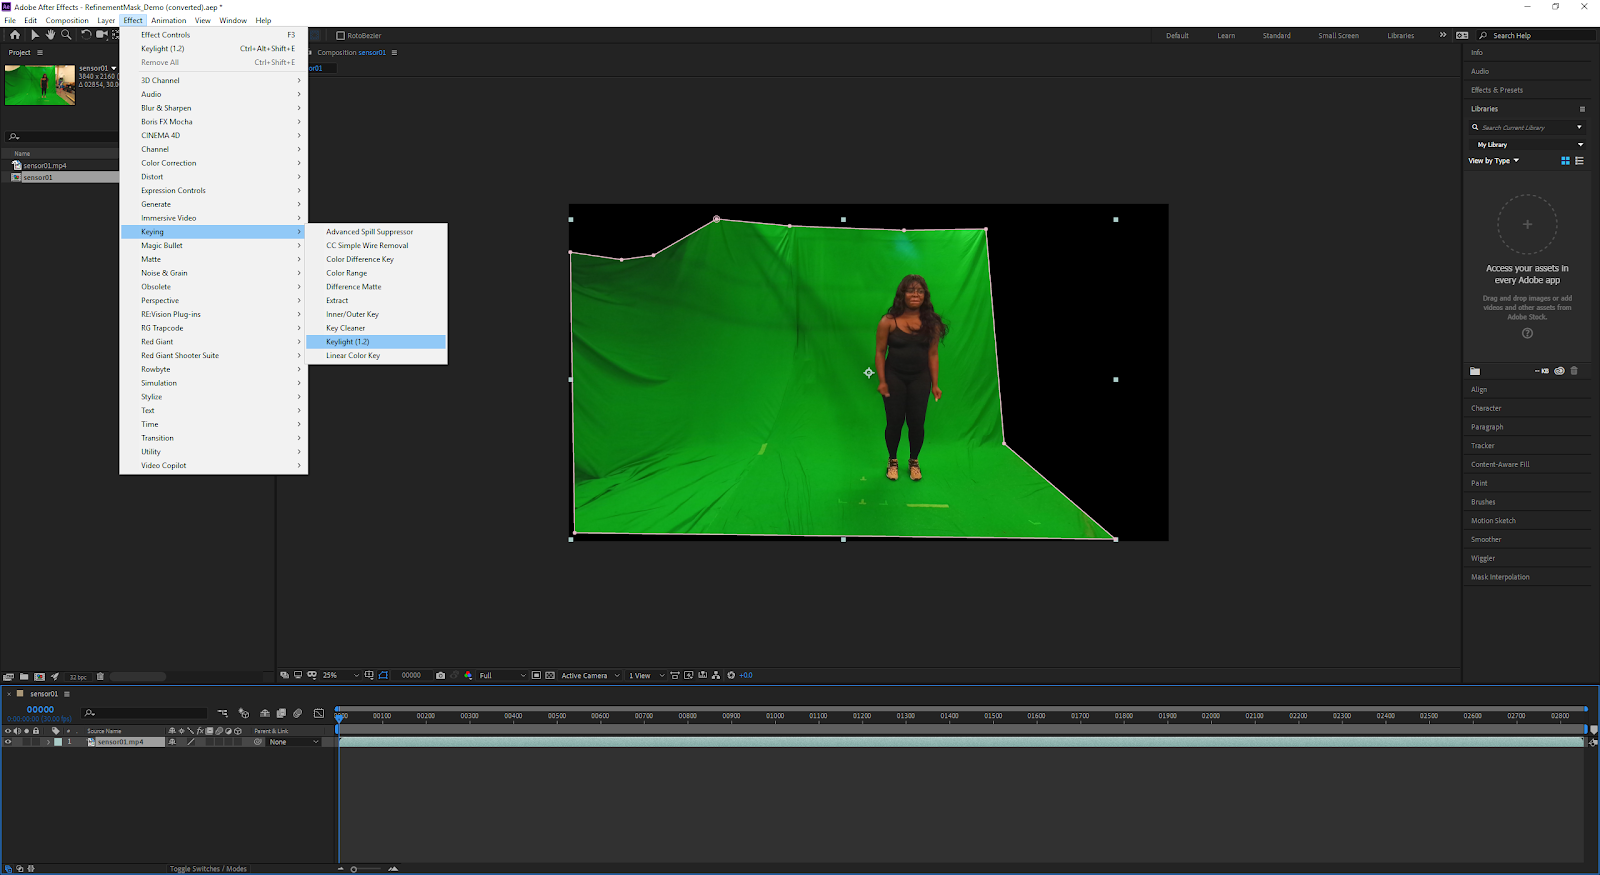
3. In the Effect menu, selecting Keying, followed by Keylight. In the Keylight panel under Screen Color, select a midtone green to remove the bulk of the background from your clip.
4. In the same menu, under View, change the Final Result to Combined Matte. This will change the output to the black/white representation that we are looking for in the mask.
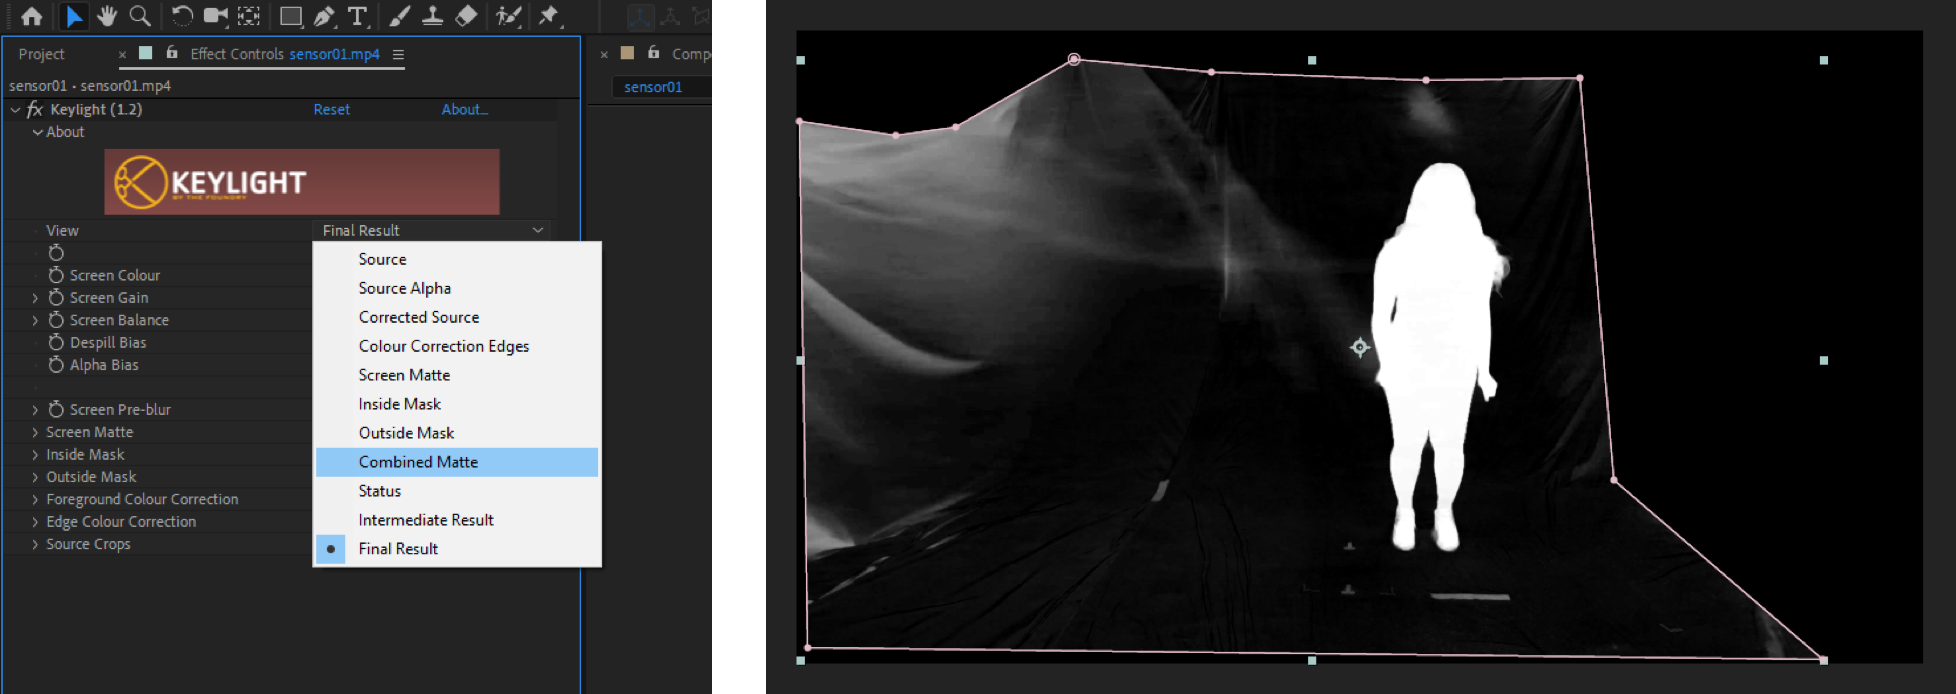
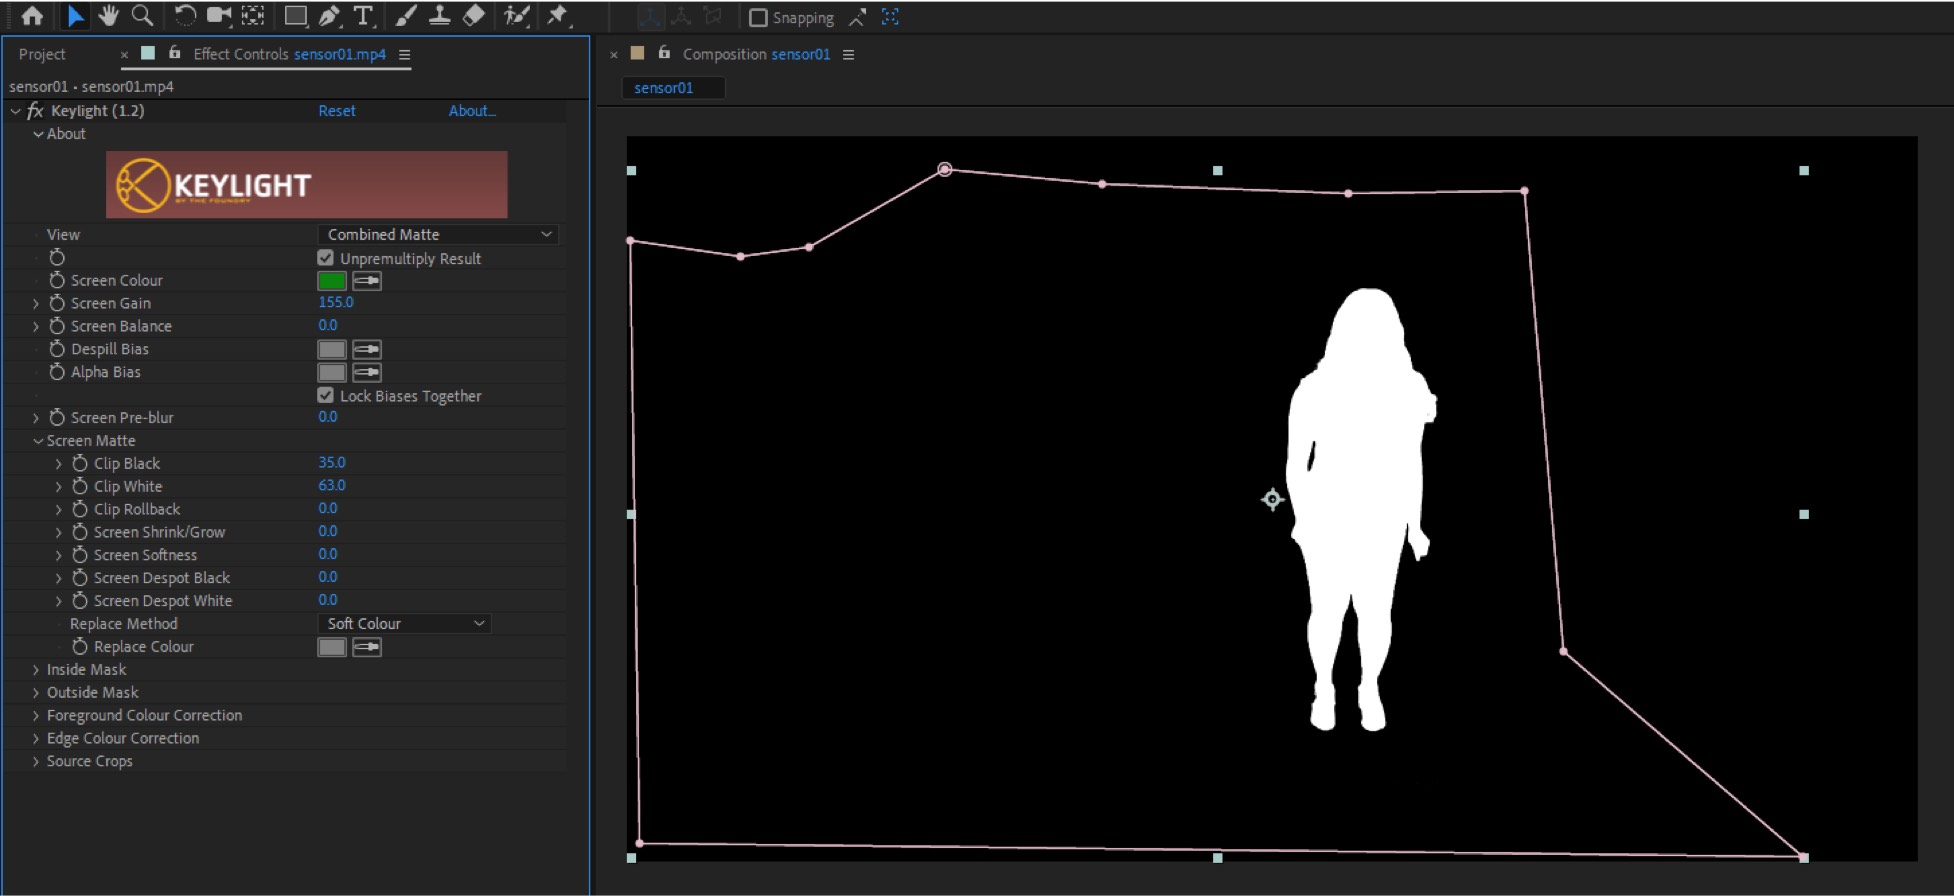
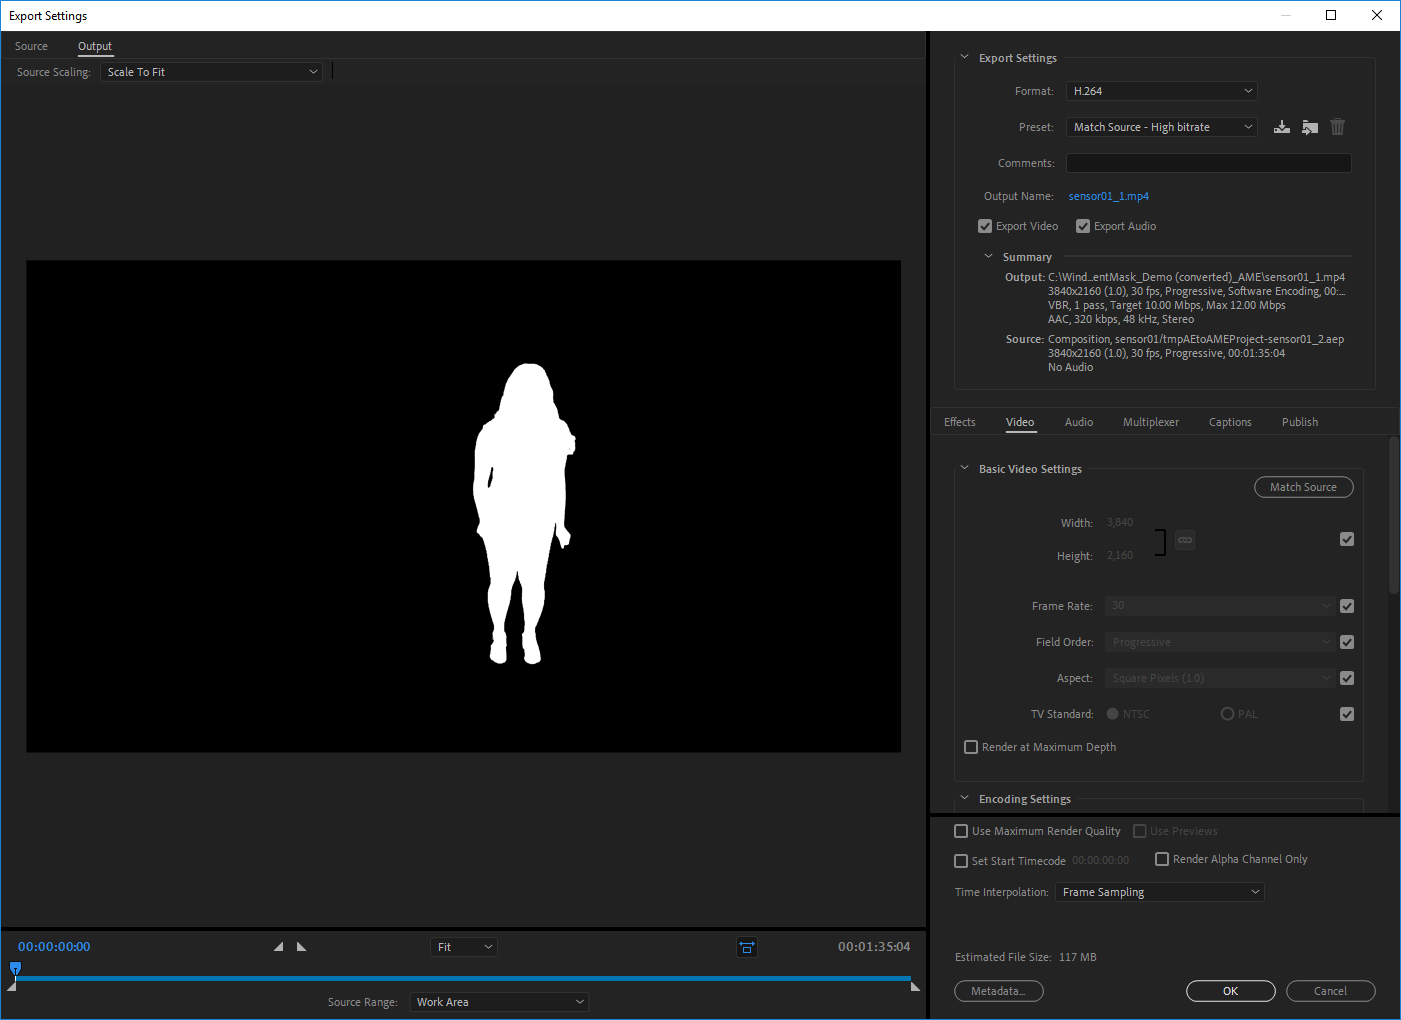
5. The goal is to now clean up this mask so the areas that you want to include in your clip are 100% white, while the background that you want to remove is 100% black. You can clean up your results with the Keylight parameters including Screen Gain, Screen Balance, and Screen Matte. The end result should provide a clean, high contrast black/white mask as seen below.
6. Now you are ready to export the mask. It is important to maintain your source video settings for the clip duration, resolution, codec, and container. When exporting with Adobe Media Encoder, set the format to H.264 with a container of mp4. Keep the resolution at the default “Match Source”.
Refinement
Back in the Depthkit Edit window, you are now ready to link up the mask that you just created in order to isolate your subject and activate the Refinement workflow.
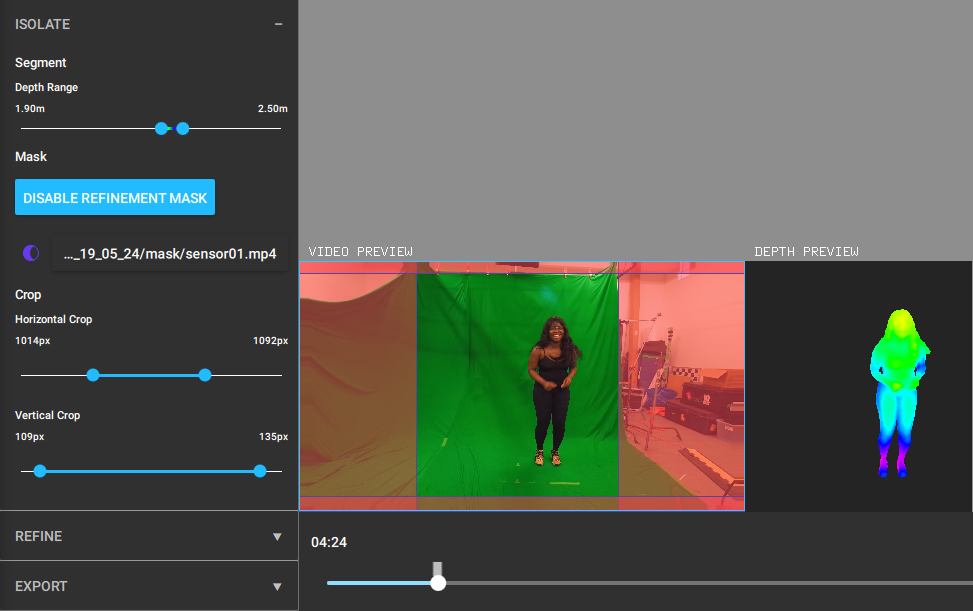
1. In the Isolate panel under Mask, click the Add Refinement Mask button followed by the Link Refinement Mask button. Select the mask that you just created.
2. Now that the mask is applied, you will see that the background has been removed. You can see in the difference between the screenshot above and below that the subject is isolated in general, with the feet being clearly defined instead of being "seen" as part of the floor. In addition a crop parameter has been enabled in the Isolate panel. This acts as an optimization for your exports, especially when exporting for Unity so you are only exporting the data that you want. The lower pixel dimension will provide more performance friendly playback in the game engine.
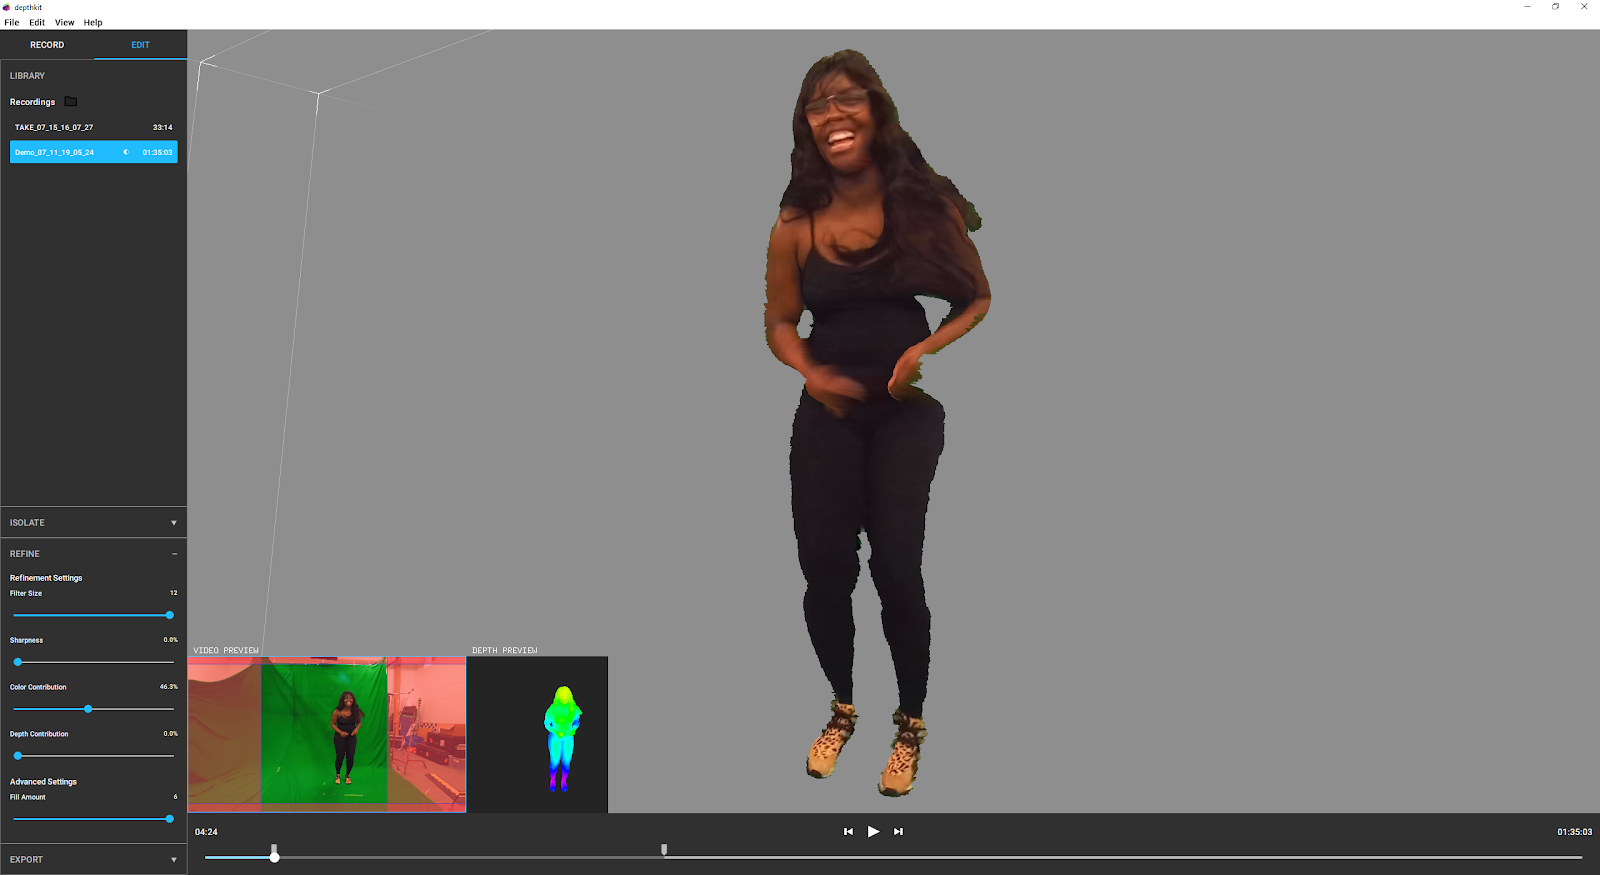
3. Now you are ready for the Refine panel. Expand this section to expose the following Refinement settings:
- Filter Size: reduces depth noise. It is best to start with a moderate value, as it can over smooth your depth details.
- Sharpness: represents sharpness along edges and between hue encoded depth ranges. This is most visible when areas of the subject overlap in order to avoid artifacts caused by occlusion.
- Color Contribution: is the percentage of how much the color video with influence the depth data. In many cases, this creates a smoothing of your depth data similar to a Gaussian blur. Like the Filter Size, when this is set to a high value, it can also over smooth depth detail and is best to use in moderation.
- Depth Contribution: is the percentage of how much the depth data influences the refinement algorithm. At 100% contribution, your data will reflect the look of the raw depth data. Decreasing the value will smooth out your data, putting more weight onto the other enhancement parameters.
- Fill Amount: complements the Filter Size by providing a secondary fill value for missing depth information. Leave at the default value of 4 unless you are dealing with excessive holes in your depth data.
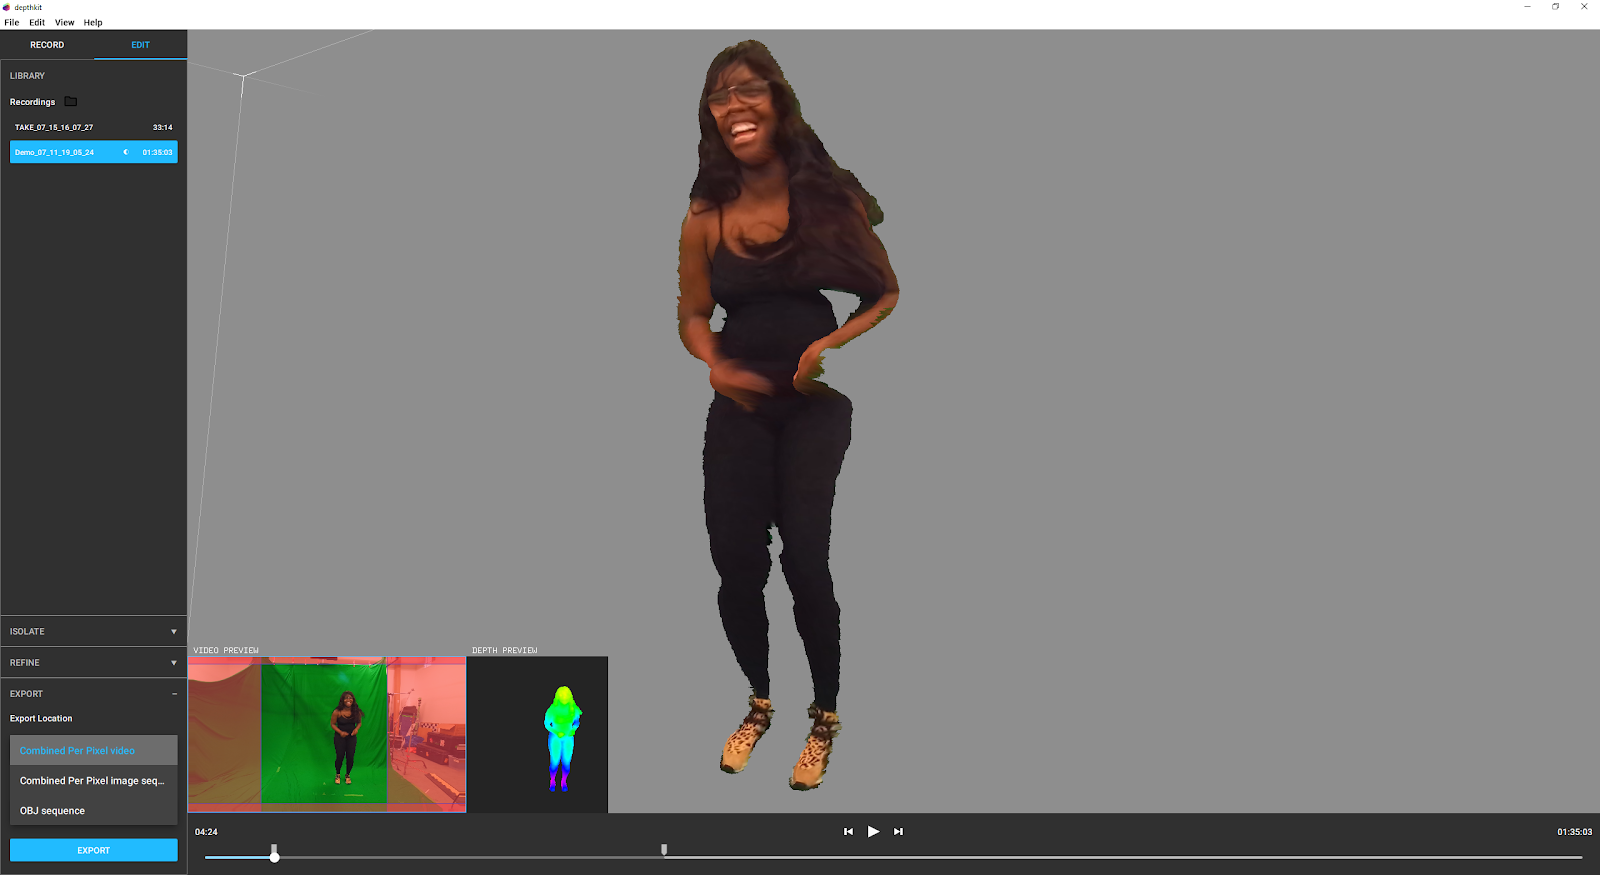
- With the proper settings, you should be able to easily see the difference between the original video and the video with a refinement mask. IN the image below, you can see that the holes in LaJuné's hair have been filled and overall the edges around the capture are smoother and more defined (instead of being jagged).
Export
Now that your footage is refined you are ready to export your clip!
1. In the timeline, set the in and out points to make a select for export.
2. Expand the Export panel and select your preferred export type. Depthkit Core (formerly Depthkit Pro) currently offers combined per pixel and OBJ sequence formats. If working in Unity, our combined per pixel format is optimized for performance friendly playback in the game engine with the Depthkit Unity Plugin. You can export this format as a video or image sequence, which is handy if you are planning to take the clip into another video editing tool or if you need a different codec beside H264.
3. If working in a VFX workflow, you can export OBJ sequences to help you take your volumetric footage into tools like After Effects, C4D, Houdini, or any other 3D content tool of your choice.
4. Click Export and you're good to go! Congratulations, you've produced a refined clip!
Thanks for reading this tutorial! You're now equipped to get the highest quality volumetric footage from Microsoft's Azure Kinect! To learn more about other Depthkit workflows and export formats, check out our other tutorials here.
Lastly, thanks so much to LaJuné McMillian for being in this tutorial! You can find out more about them by checking out the interview they did with Eyebeam here.