


Using Depthkit OBJ Sequences with Depthkit Core, After Effects and Plexus
In the tutorial below, you'll learn how to take an OBJ sequence exported from Depthkit and bring it into After Effects and use the Plexus plugin for further processing. You can either watch the tutorial video or use the text walkthrough below.
Before you start, download the tutorial asset below. It contains an After Effects project file you can work out of as well as a Depthkit OBJ sequence to use in your project. You'll need to either purchase Plexus or use the trial, both of which can be found here.
NOTE: Mobile users will need to use a desktop computer to download this file.
( 20MB )
A note on FPS
Make sure the frame rate of your composition matches the frame rate of the frame rate of your exported Depthkit assets. By default this is 30FPS. However, in this tutorial, a different workflow was used so our assets are 29.97fps.
If you are only using OBJ files, they do not have a native frame rate. However, if you are working with textures, and using PNG sequences or MTL files, matching the frame rates will be essential for texture and mesh alignment.
Importing a Depthkit asset into After Effects with Plexus
1. Create a new composition with your desired settings. Be mindful of the frame rate match with the exported Depthkit assets. The Depthkit demo assets are 29.97fps.
2. Create a new solid. Name this Plexus or something similar, to help your own layer organization.
To add the Plexus effect:
3a. Click on the solid Plexus layer, and go to Effect > Rowbyte > Plexus.
3b. Alternatively, in the Plexus Object Panel (which can be docked anywhere in your After Effects interface), you can click the button that says “Add Plexus”
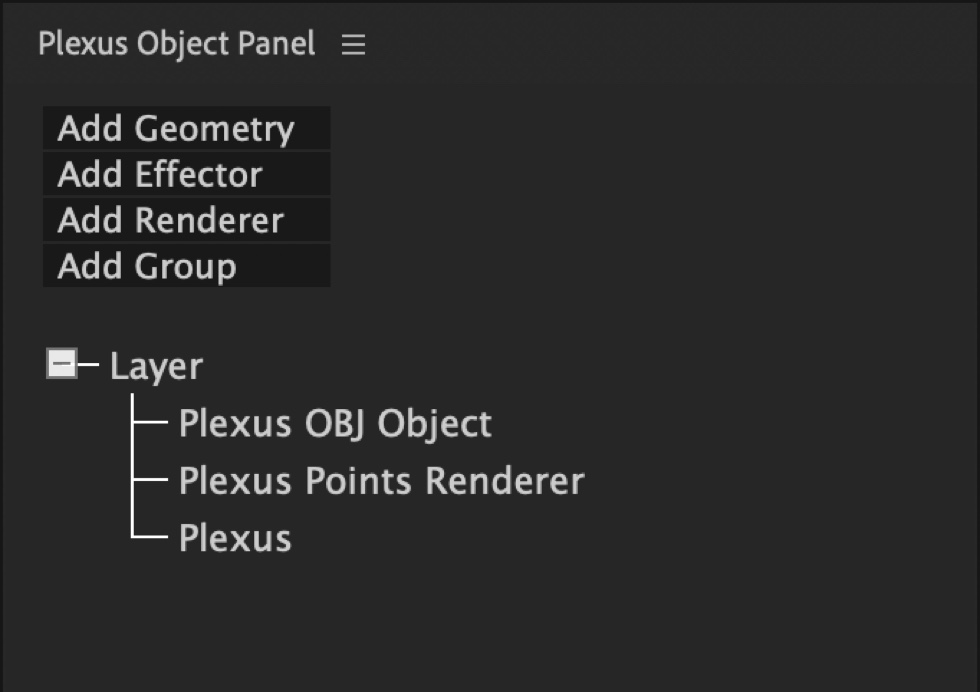
4. In the Plexus Object Window, you will see a small panel with these options:
- Add Geometry
- Add Effector
- Add Renderer
- Add Group
5. Click “Add Geometry” and select the “OBJ” option.
6. Import your Depthkit OBJ assets by going to File > Import > File. Navigate to your Depthkit Asset folder on your computer, in the case of the demo assets this is labeled Demo OBJ, and we’re using the assets inside the subfolder: “S6_T103_15_16_17_39_Export_06_12_15_02_17_eight_short”
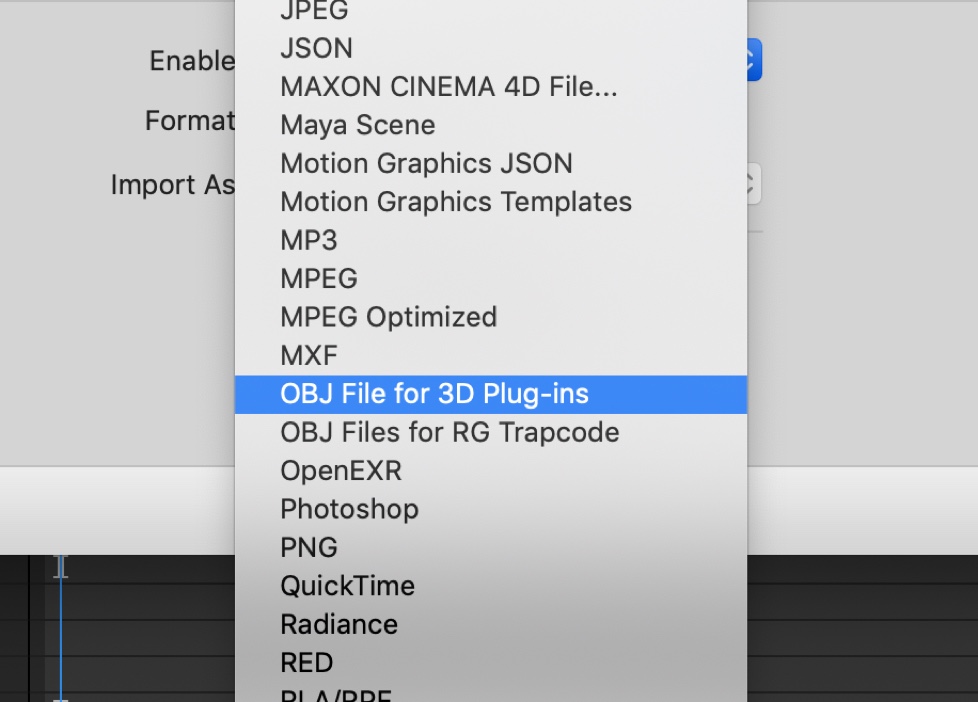
7. In the “Enable” field of the pop-up window, select “OBJ File for 3D Plugins”
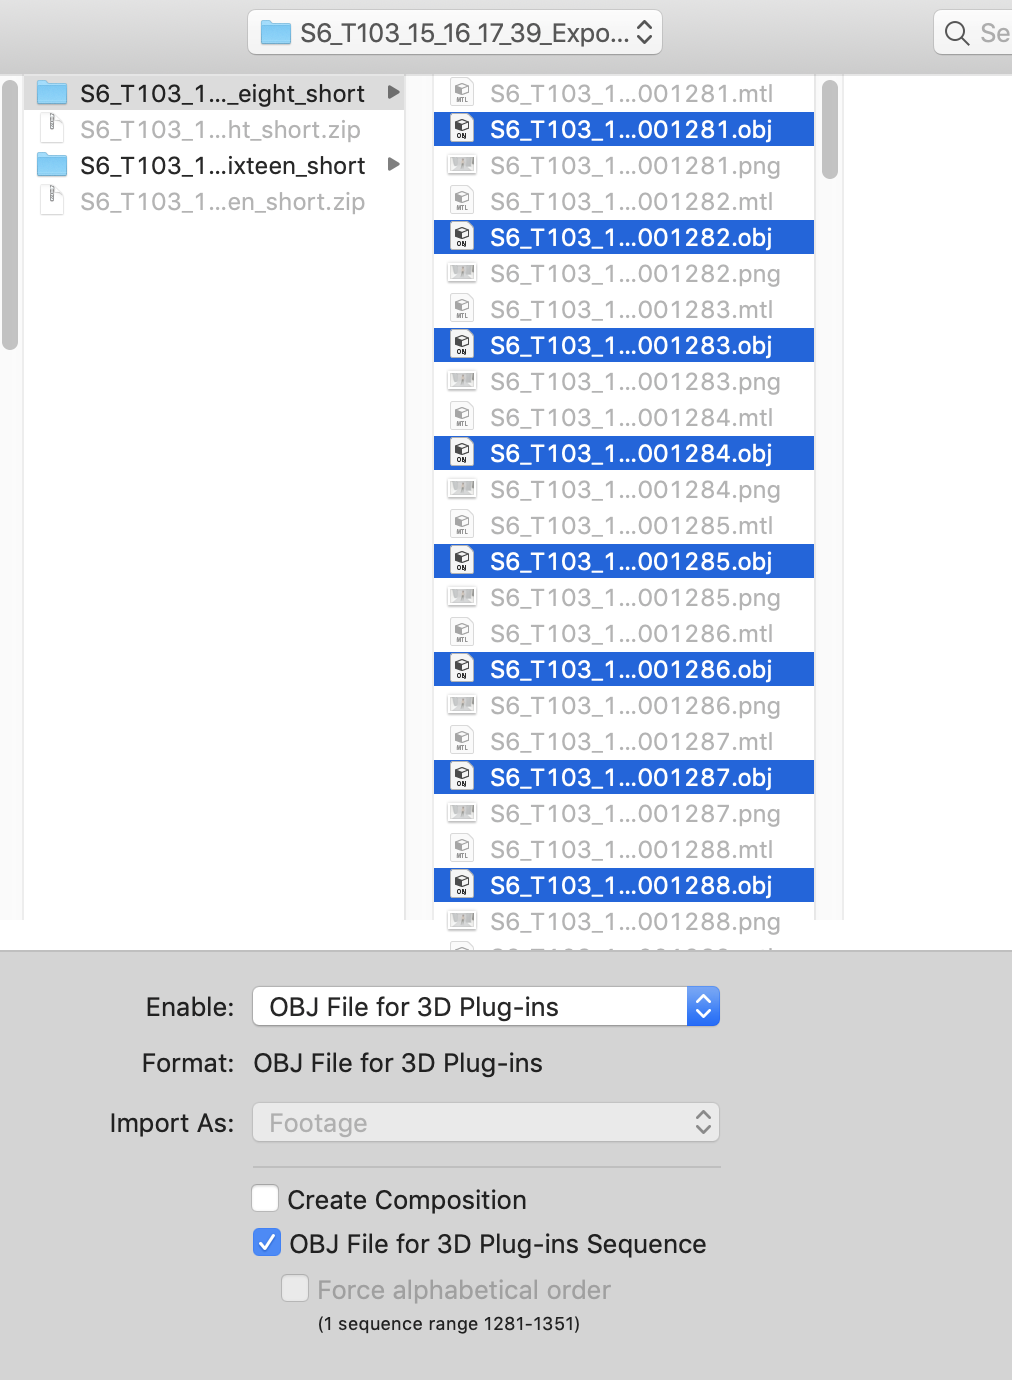
8. Select all OBJ files in that folder, and you will see a checkbox that says “OBJ File for 3D Plugins Sequence.” Make sure this is checked. This will import ALL the OBJ files in that folder, as a sequence.
9. Drag your OBJ sequence into composition as a layer, and place it above the Plexus layer.
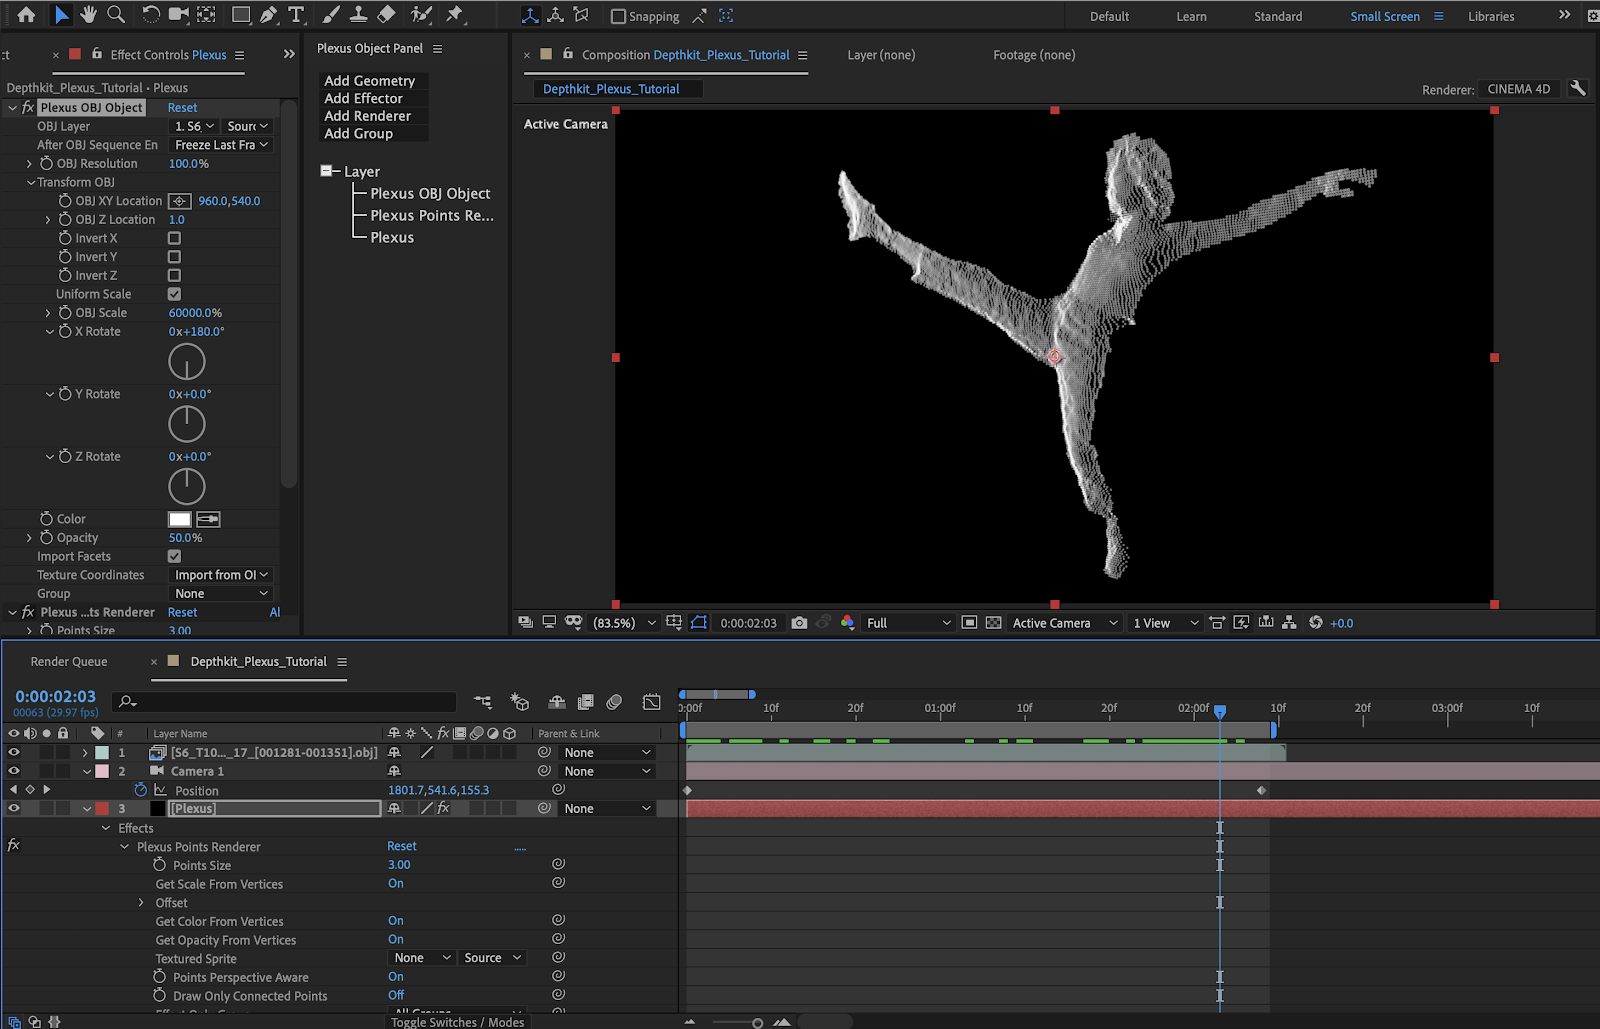
10. In the Effect Controls panel of your Plexus Layer, you’ll see the “Plexus OBJ Object.” Expand that field and you’ll see “OBJ Layer.” It will be set to None by default.
11. In the OBJ Layer, choose the layer that contains your OBJ sequence.
12. Depthkit default units are meters, so our OBJ assets need to be scaled up to be visible in After Effects' coordinate system, and also needs to be rotated by 180 degrees on the X Axis to face the camera. Increase the scale by using Transform OBJ > OBJ Scale. Rotate using X Rotate, and type in 180 for the degrees.
Creating a Plexus Look:
1. You will notice in the Plexus Object Panel that a Plexus Points Renderer has been added by default. This is how your Depthkit asset will appear visually when you have properly imported, scaled, and rotated them.

2. If you want to render the mesh itself, instead of the points, you need to add a Facets Renderer, found when you click the “Add Renderer” button in the Plexus Object Panel. You can hide any of the renderers at any point, by clicking the “FX” box in the Effects Control Panel, next to each renderer. Experiment with the other renderers to see different looks.
3. Create a Camera (Layer > New > Camera) to navigate around your Depthkit asset! 24mm or 35mm are good options. Select the Camera layer, and hit “C” which brings up the Unified Camera tool, and you can click and drag to move around your asset. Hit “C” again will change your camera tool to XY, Z, or orbit.
4. You can change the view in the Composition window from 1 view to 2 views Horizontal, which will allow you to see the Camera object, and you can create keyframes to create a camera path, to animate a “fly through” with your asset.
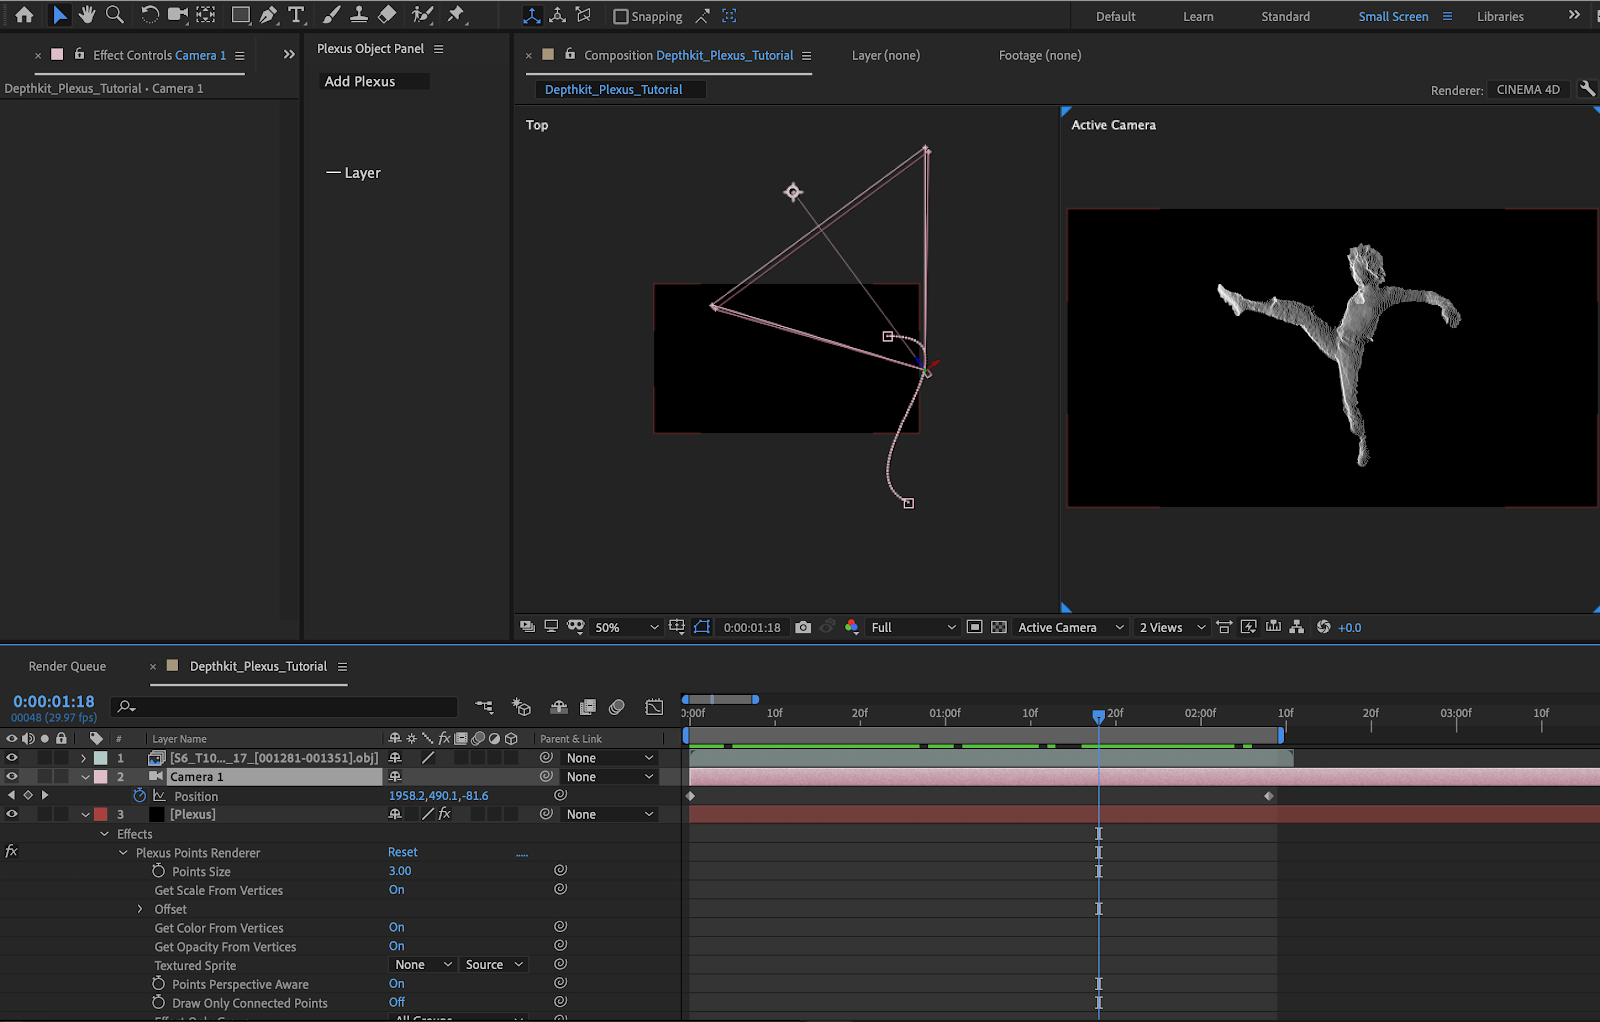
5. The view from our final camera position:
6. Explore the other Renderers, add a Noise Effector to affect parameters such as position, color, and scale, and experiment with lights by using a Shade Effector and adding a Point Light! We encourage you to experiment and get crazy with your Depthkit captures!
Thanks for reading our Depthkit + After Effects + Plexus recipe! If you're looking for an easy way to start incorporating volumetric capture into your VFX workflows, we hope this page helped you get started. To learn more about how Depthkit works in VFX workflows, see our Depthkit for Visual Effects page here.