


Depthkit Holoportation via Webcam
At Scatter we've created Depthkit Studio to empower creative companies worldwide to make their own volumetric video powered apps and experiences. One of the new features of Depthkit Studio that we are so excited about is Livestreaming holograms. Livestreaming lets you publish volumetric video in realtime, either locally to an app running on your computer, or even broadcast over the internet to an audiences running interactive 3D applications anywhere in the world.
It's truly magical and feels like teleporting! One of the most fun and accessible uses of the Livestreaming feature is to spice up your webcam chats with a holographic live feed that features you as a hologram in an interactive 3D world. This live feed can be published right to Zoom, Google Meet or even Facebook Live or Twitch, as if it's a normal webcam.
This tutorial is going to show you how to set it up for yourself.
What can you do with a holographic webcam?
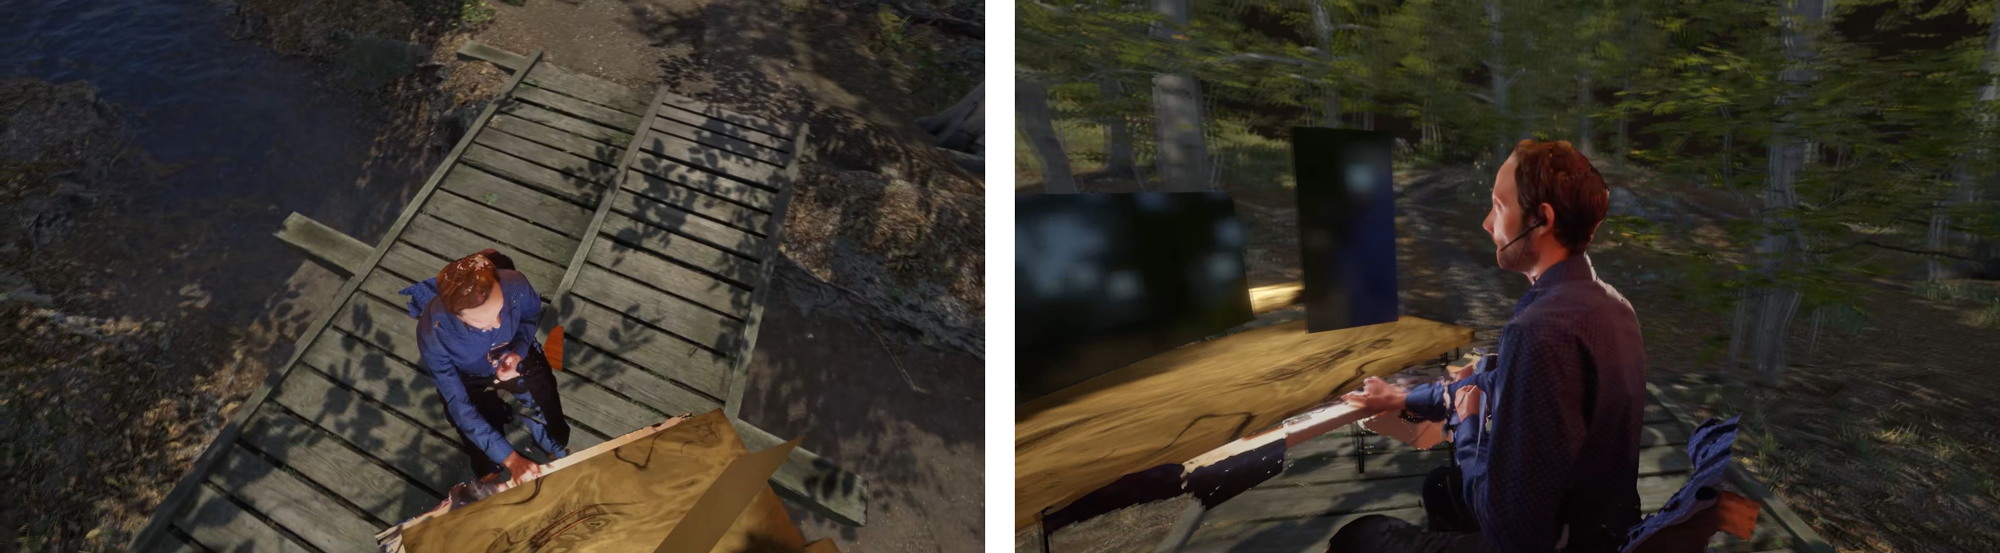
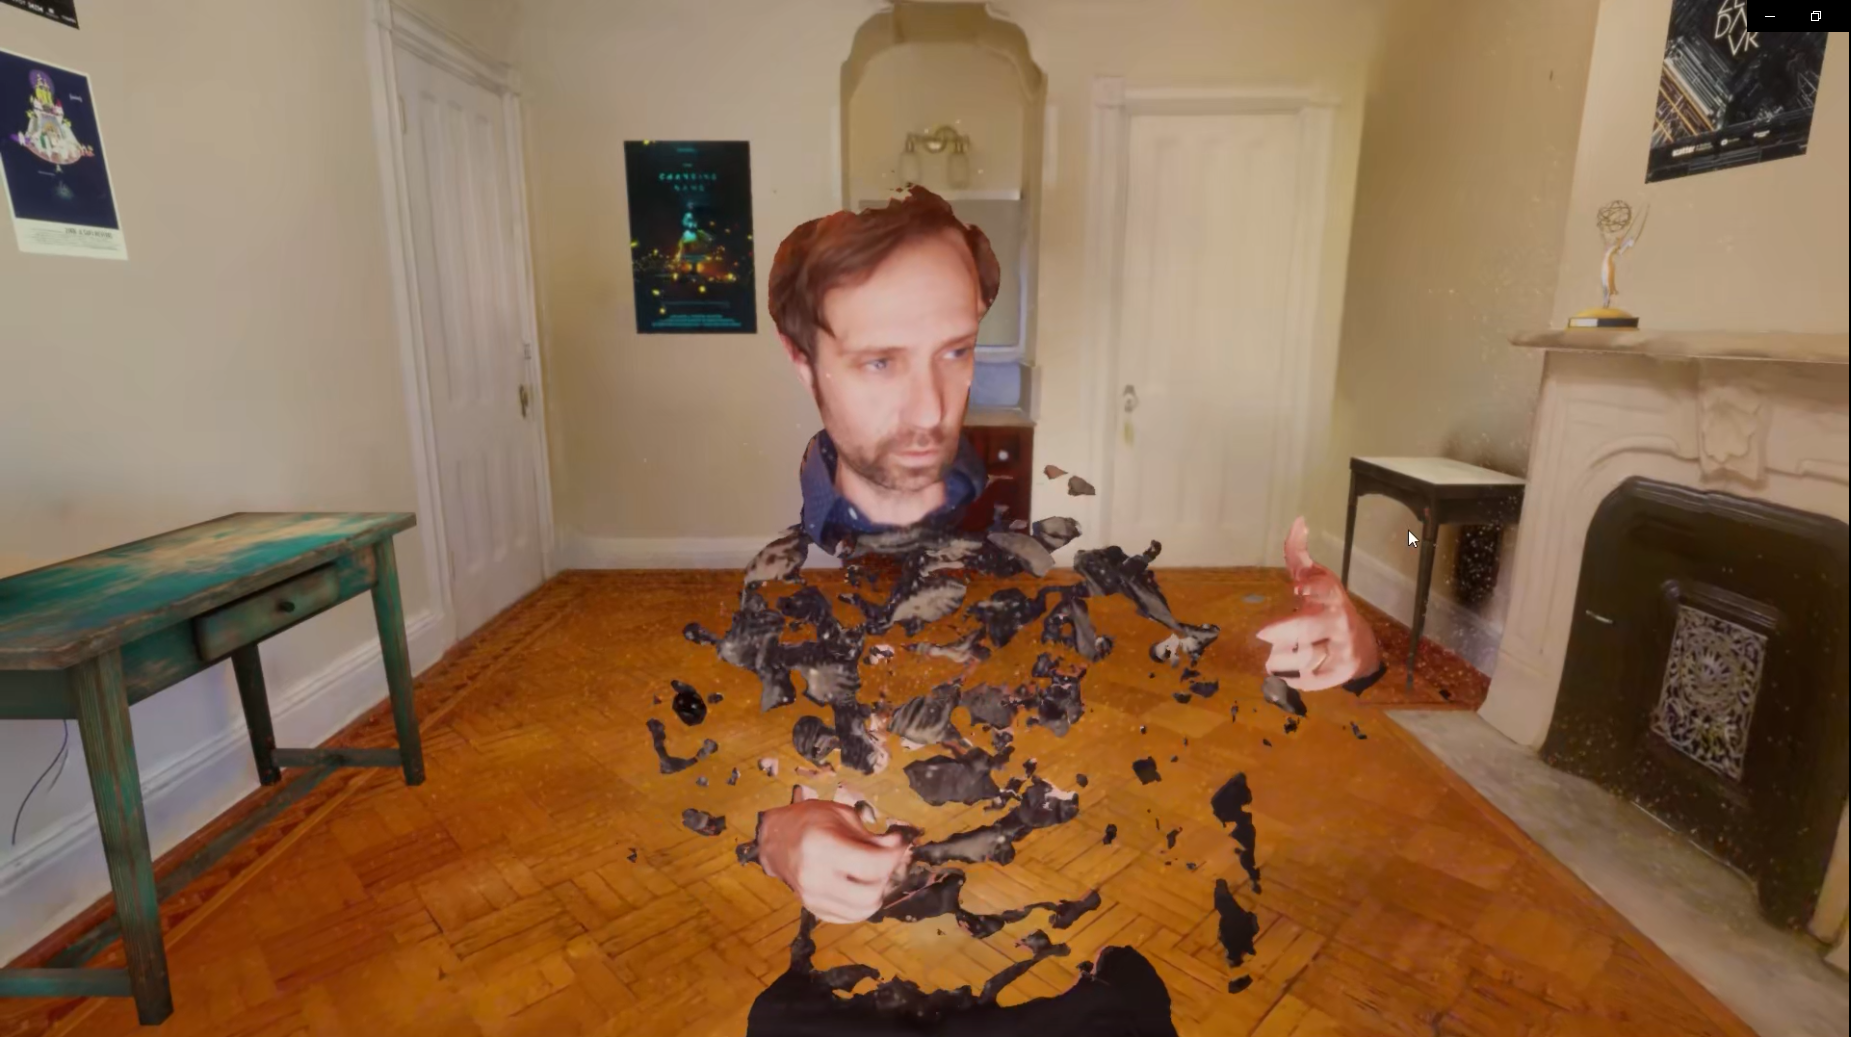
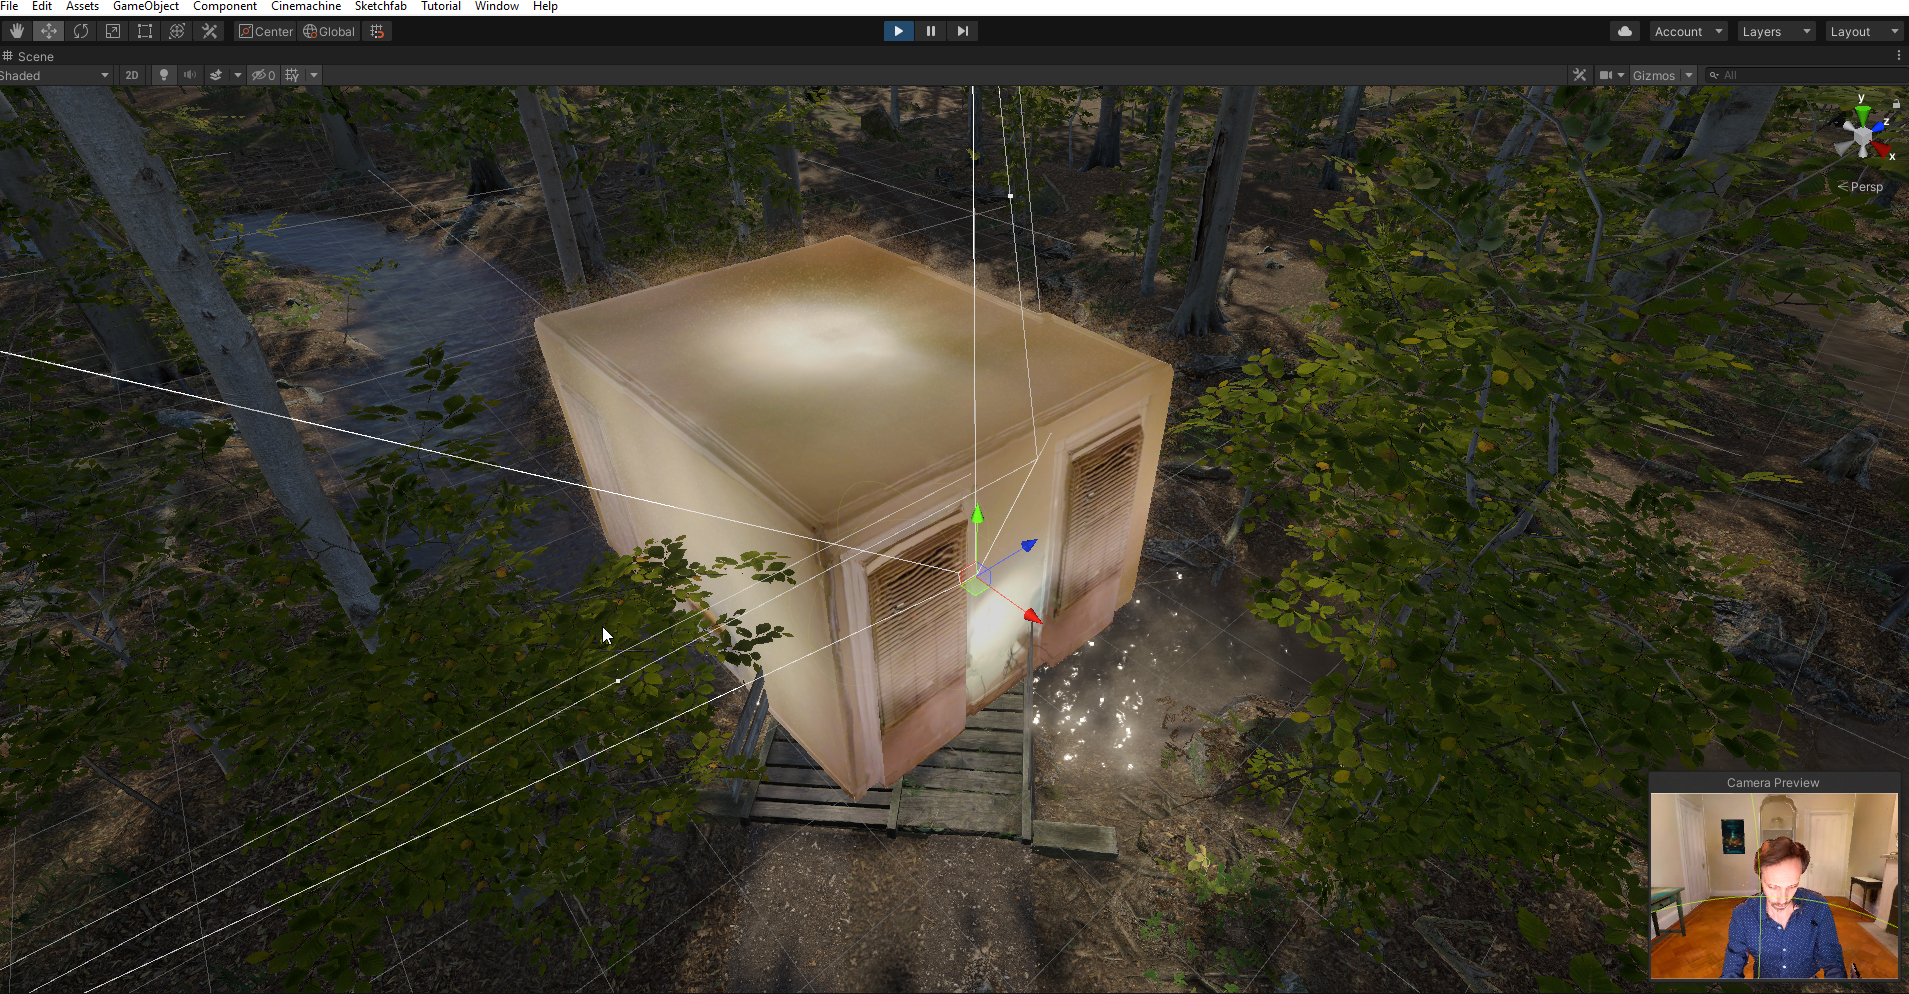
At first it looks like any old Zoom virtual background- but you can do more than just change the background. You can fly around my space. You don't have a drone in your house, it's a hologram!
It also lets you teleport to different location, like a beautiful forest in spring time. Fresh air!
In this tutorial, we're going to cover the following:
- How to get the right equipment and setup for a holographic streamer home office.
- Tips & Tricks for calibrating your setup quickly and effectively
- How to set up your Unity scene with Depthkit Live to get the best quality
- Then, how to publish your Unity scene through Spout and OBS, plus cool 3D effects
- The full project files will be uploaded and a written tutorial for you to follow along.
This tutorial assumes you have Depthkit Studio license and want to set up livestreaming at home.
Not a Studio user yet? Read more about Depthkit Studio and join the Pilot program by filling out this application here.
The physical setup
Equipment
The holographic streamer set up can be configured with a frontal-orientation using one or three Azure Kinect cameras. It can also be a complete 360 with five Azure Kinect cameras. The more cameras, the more complete the hologram - opening up possibilities for a greater diversity of environments and effects.

5-Sensor setup provides a full 360° hologram.
For the sake of this tutorial, I'll be focusing on the five camera set up since it's the most complete. You can see what a single and 3-Sensor set up look like below:
3-Sensor frontal-biased set up works well, too and takes up less space in your room
For details on Depthkit workstation, check out the Hardware requirements guide in our Depthkit Studio Documentation. Note that the Livestreaming workflow does not require a greenscreen.
Once you have the basic Azure Kinects, Computer and cabling for the Depthkit set up of choice, the following list of extra accessories are needed to complete the holo-streamer setup:
- USB Webcam ($50) – Buy on Amazon →
- USB On-Ear Headset ($80) – Buy on Amazon →
- Halo Light ($230) – Buy on B&H →
- Mini Tripod for Halo Light ($13) – Buy on Amazon →
- Magic Arm ($125) – Buy on B&H →
- 2x Super Clamp ($40) – Buy on B&H →
- 4x Amazon Basics Light Stands ($65) – Buy on Amazon →
- 5x Tripod Ball Head ($150) – Buy on Amazon →
Camera layout
See below for more detailed photographs and description of the physical layout of the cameras.
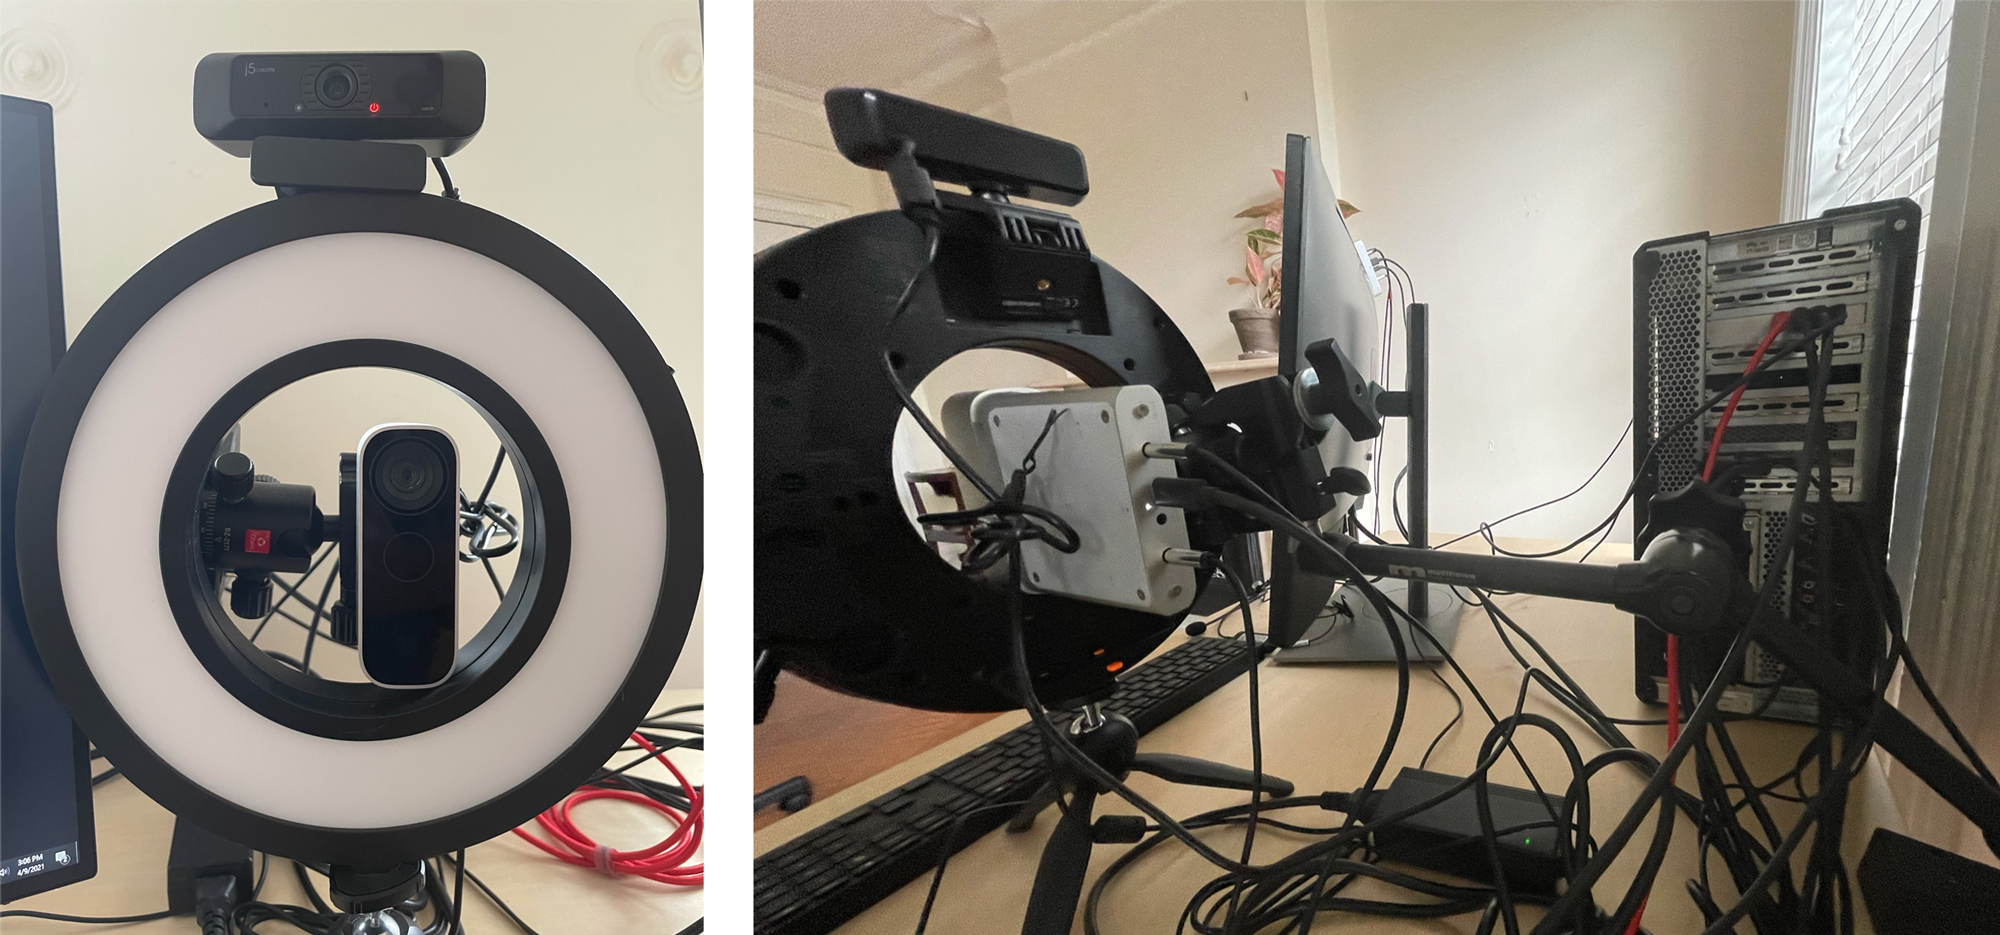
Tip: Get the front facing camera as close as possible to your face 🙃📹.
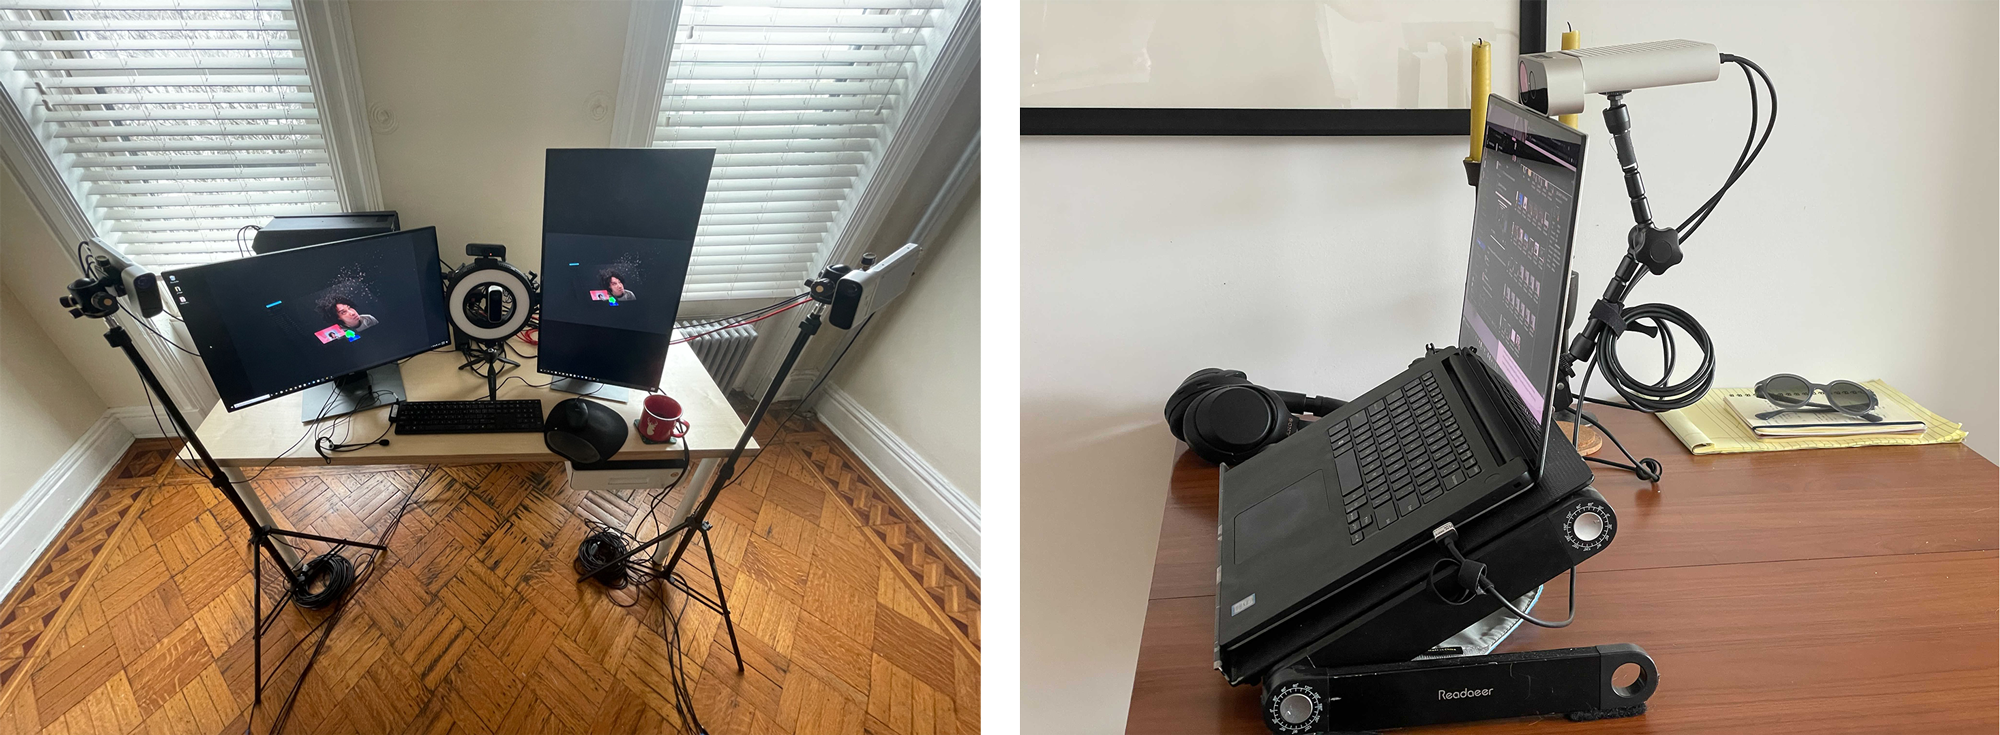
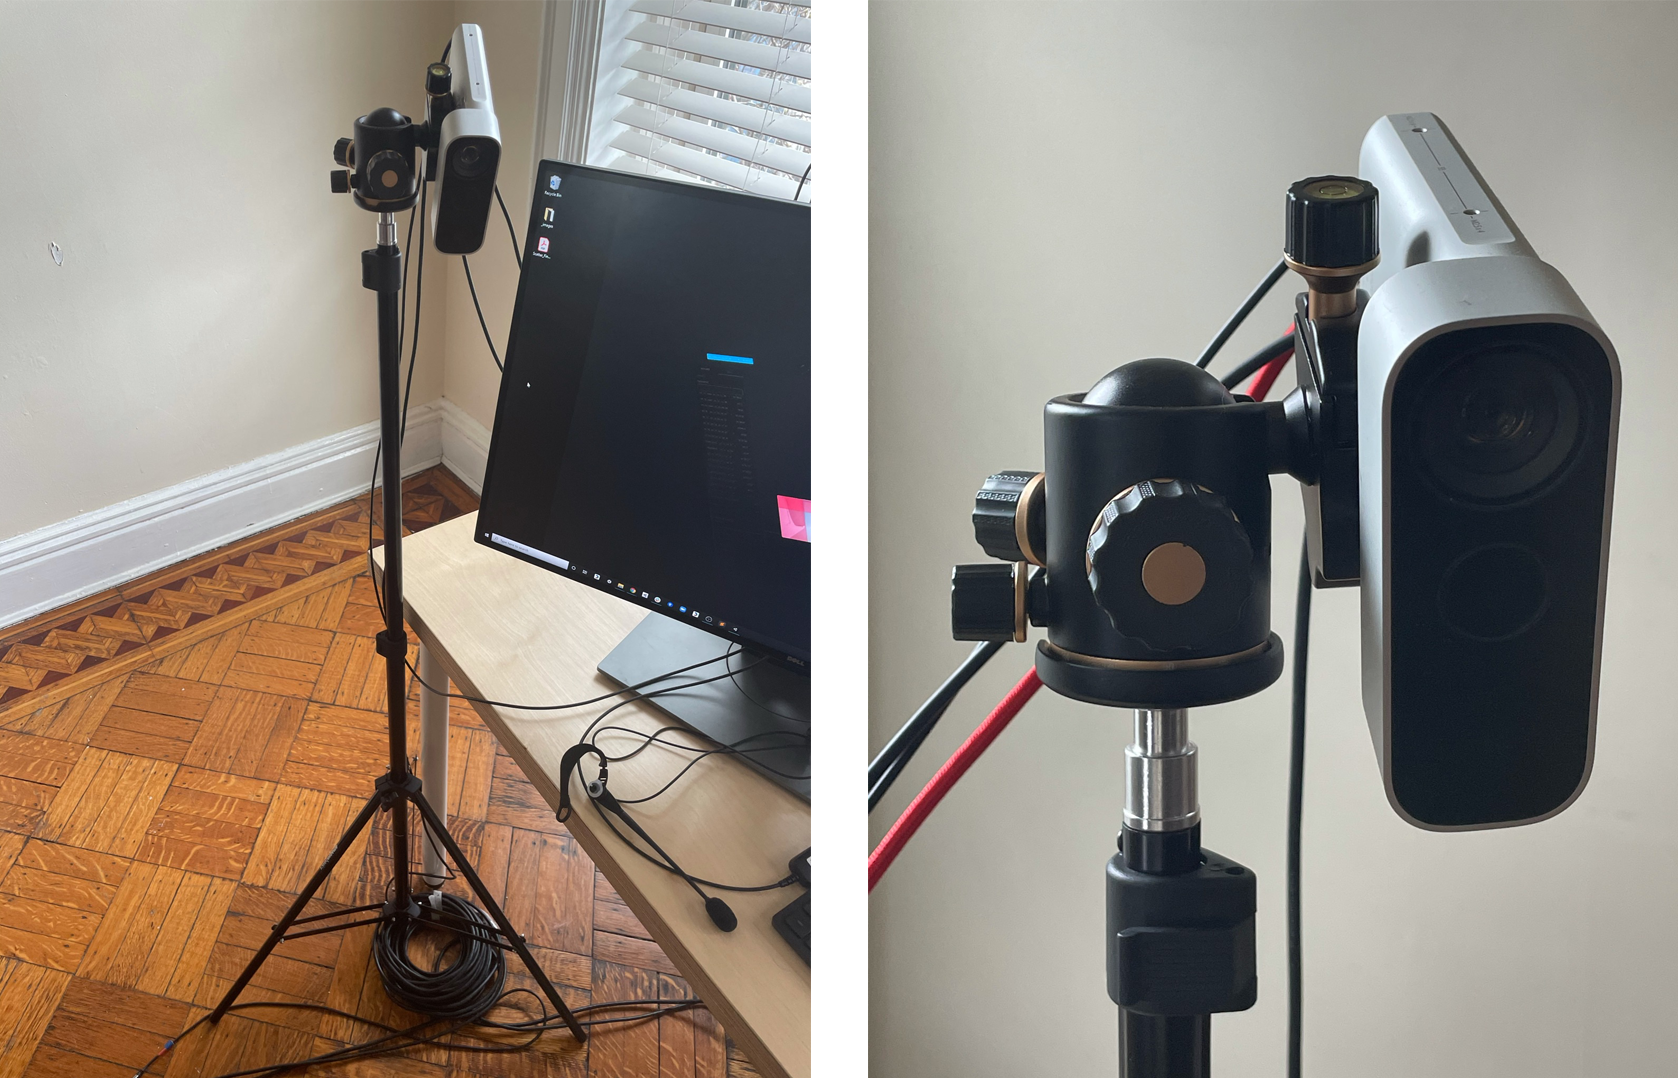
Front Azure Kinect + webcam
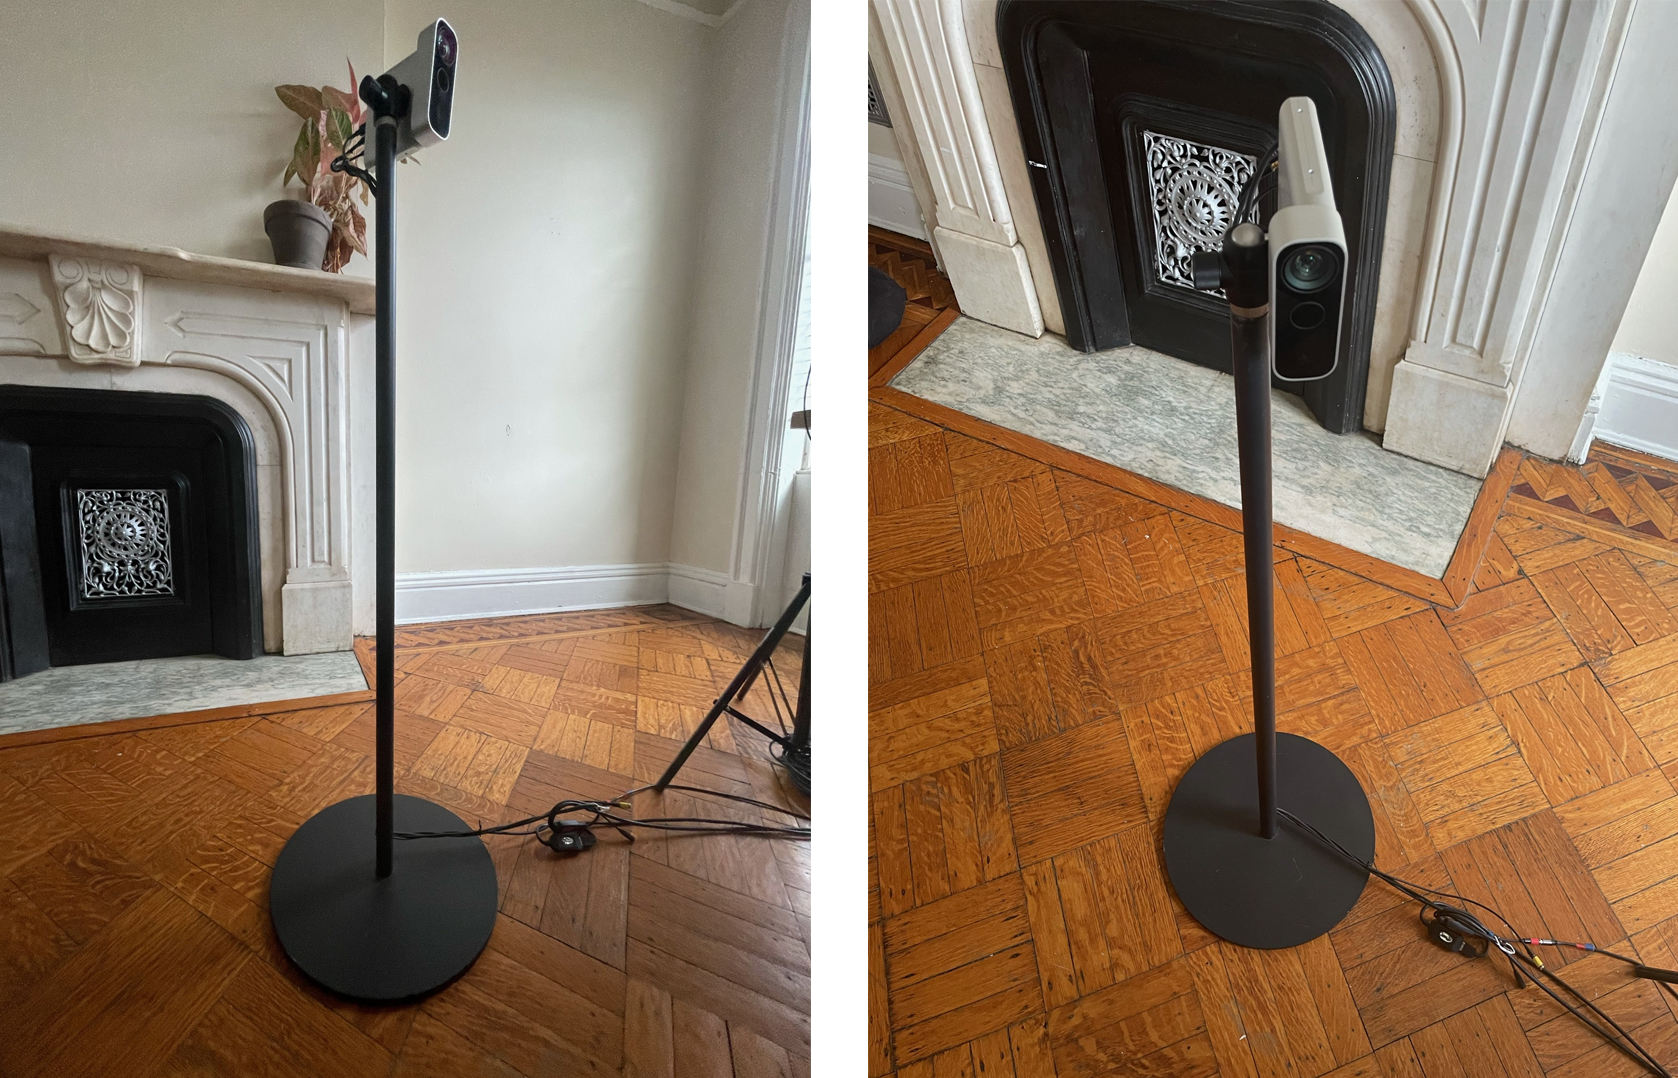
Surrounding Azure Kinects + stands
The four other cameras are on tripods to your front left, front right, and behind left and right. I like to use the Amazon Basics light stands because they have a very low-profile base allowing the cameras to get very close, increasing quality and decreasing the likelihood you will kick one. The drawback is they can be less stable than a wider base tripod- so you may want to sandbag them.
The front stands should be a little higher and angled down than the back stands in order to give you better coverage of the top of your head.
Stand measurements:
- Front camera from face: 20 Inches
- Stand sistance from volume center: 29 inches
- Front stands height (floor to baseplate): 49 inches
- Back stand height (floor to baseplate): 40 inches
At Scatter, we've retrofit metal stanchions with weighted bases, where the cables run through the pole. These provide a nice aesthetic alternative to the Amazon Basics stands, but are pricier and require fabrication.
Recommend streamer attire
A few fashion tips for your holographic streaming adventures. Watch and read below for what NOT to do... 🤦♂️
1. Avoid glasses
The fine details of glasses don't get picked up in the depth cameras, and the results make it look like you're wearing weird aviators. Maybe you're into that, if so go for it! In general, we recommend putting in contacts before streaming so as not to distract your viewers. Glasses also have the nasty habit of reflecting the halo light.
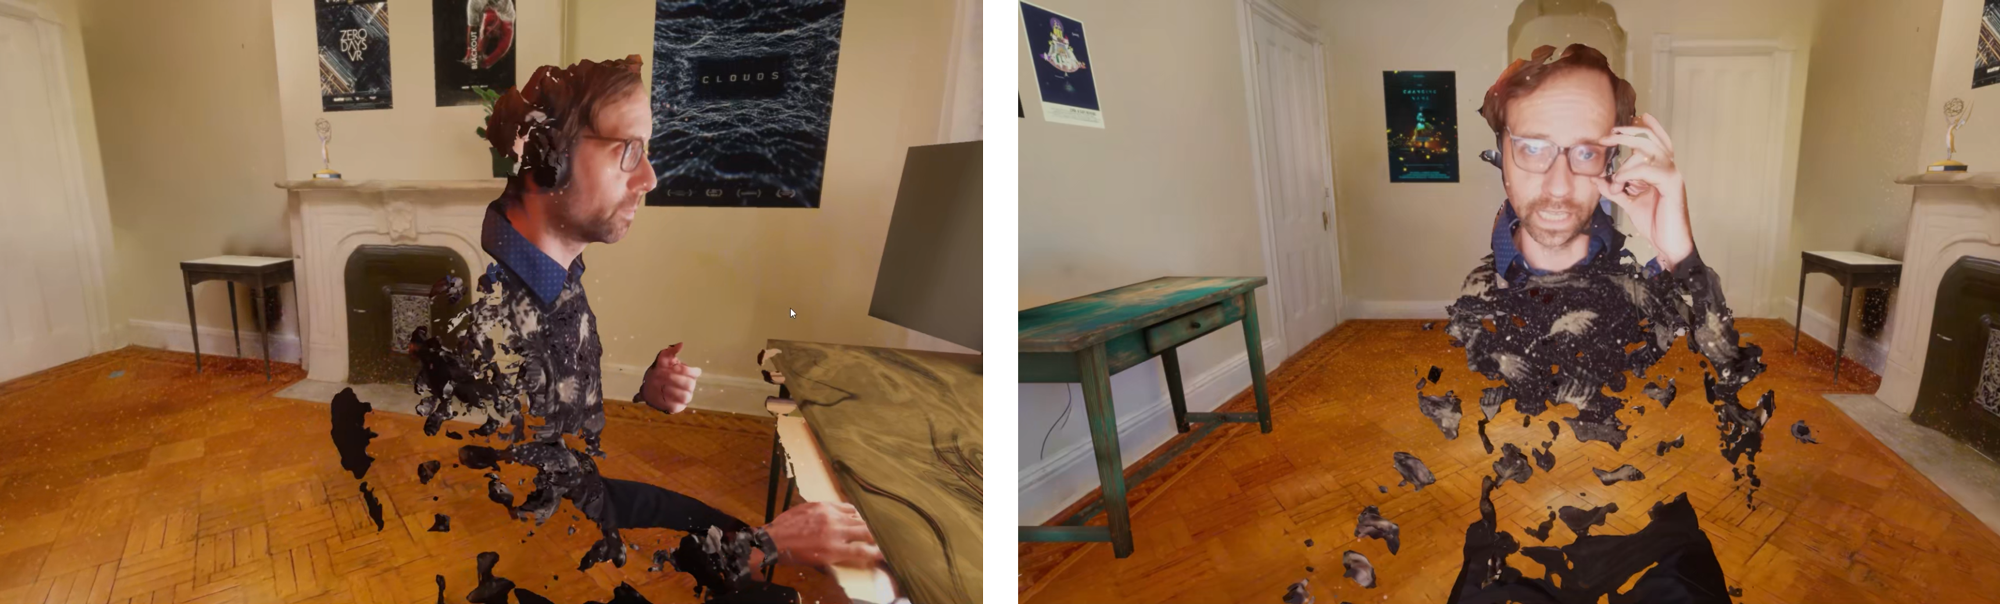
2. Avoid large headphones
Many common headphone brands use plastics that absorb infrared light and can't read on the depth cameras. This translates to a really big hole right through your head, which can raise questions and distract your audience.
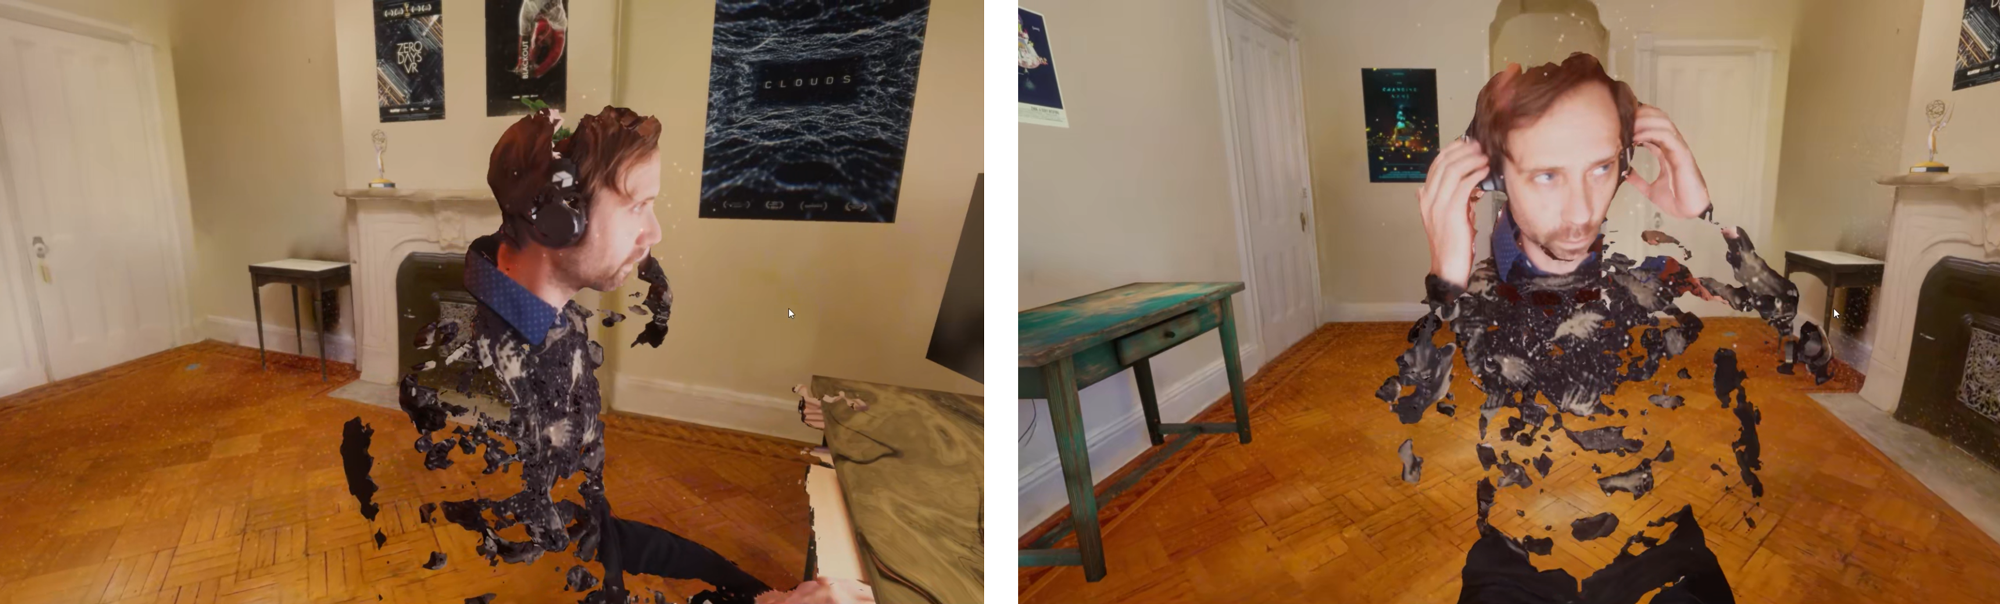
3. Avoid IR absorbent materials
Similar to the issue with headphones, some materials just don't show up in the depth camera. These are often darker fabrics that absorb IR. It's best to just avoid these materials while streaming.

Depthkit Studio software setup
Precise sensor placement
Now that your cameras are all set up and plugged in, we'll need to perfectly align them before you calibrate.
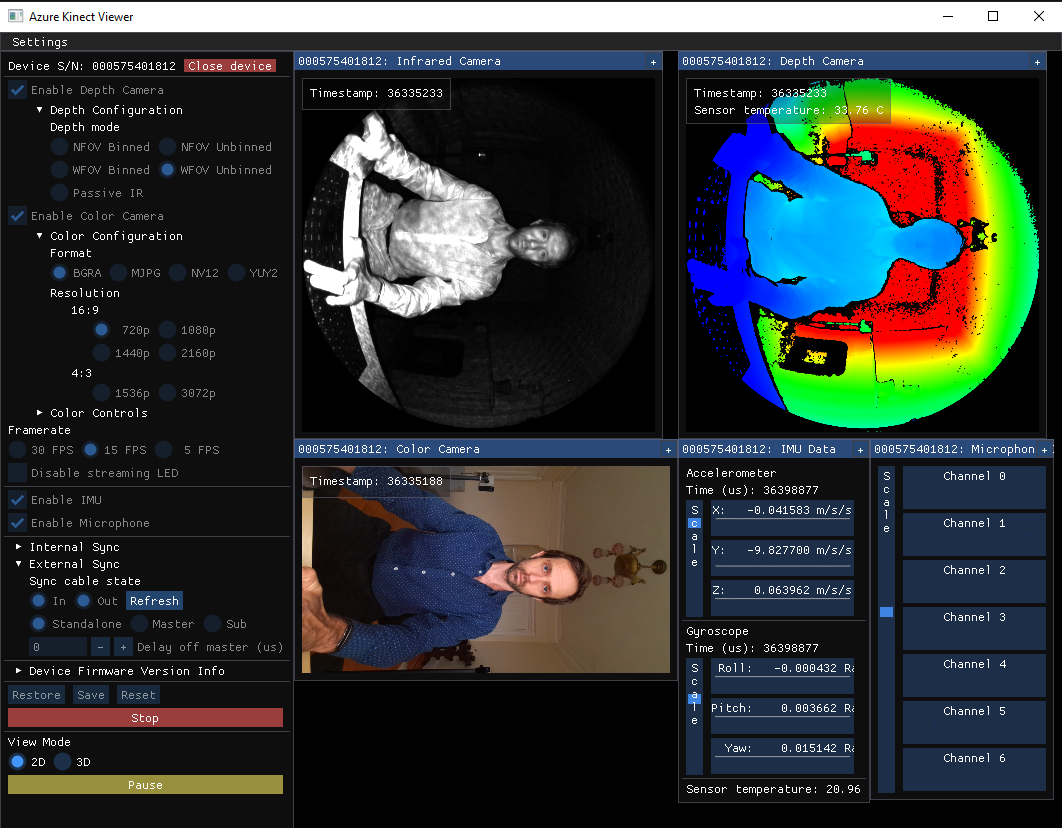
If you have replicated the measurements of my set up above, you'll be using the Azure Kinect's wide mode, which in combination with the color camera creates a landscape aspect mode image. We want to turn the cameras sideways (portrait) to maximize the effective depth and color regions for a sitting subject. When you do this, make sure the color camera is on the top. The reason for this is that more depth artifacts occur on the side of the depth image opposite the color camera, and this puts those at the bottom of edges.
Before starting Depthkit, open the Azure Kinect Viewer and for each camera start it in wide mode and move the cameras so that you are seated in the center of the volume.

Once the cameras are placed, ensure the ball heads, tripod, and magic arms are all firmly tightened! Once you calibrate, there is no going back. Any bumps or jiggles will ruin your quality.
Calibrating sensors
Now that we are all squared away with camera placement, it's time to calibrate! A full tutorial on calibration is out of the scope of this guide, but we will provide some tips and tricks that pertain to this specific set up. So if this is your first calibration, please head on over to our Documentation to learn the basics of a Depthkit Studio Calibration.
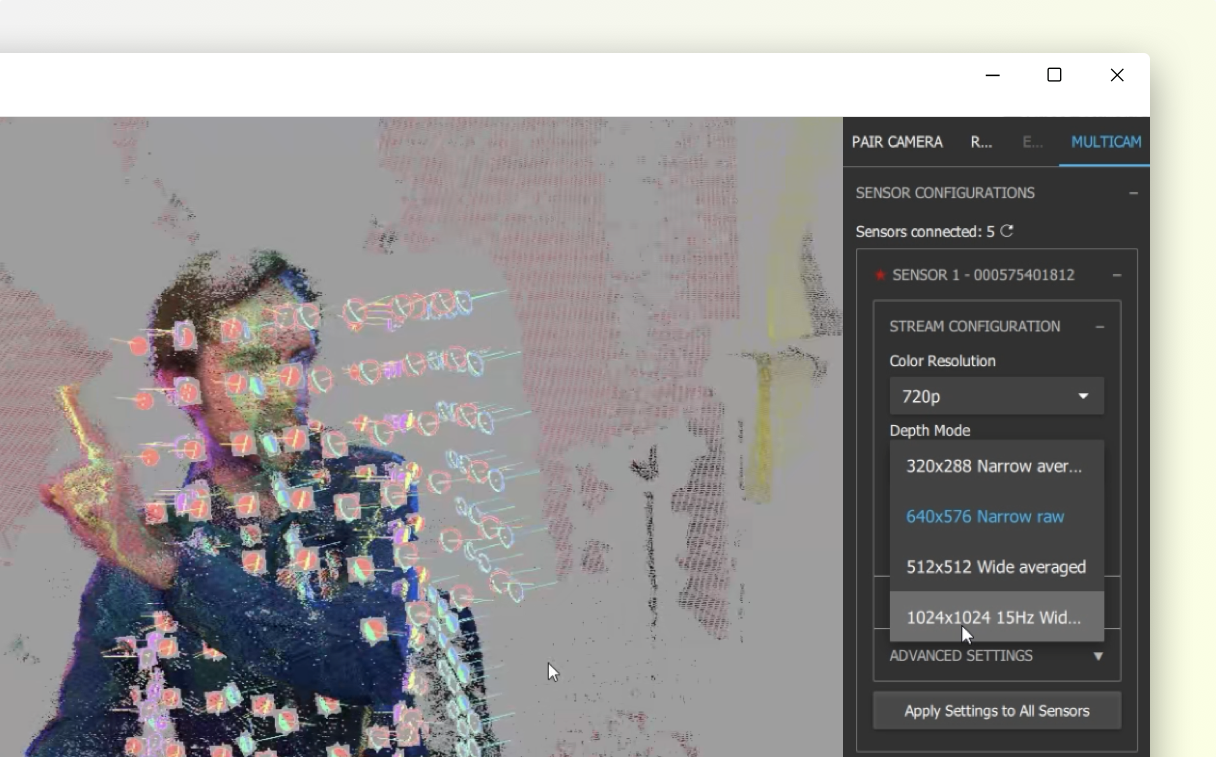
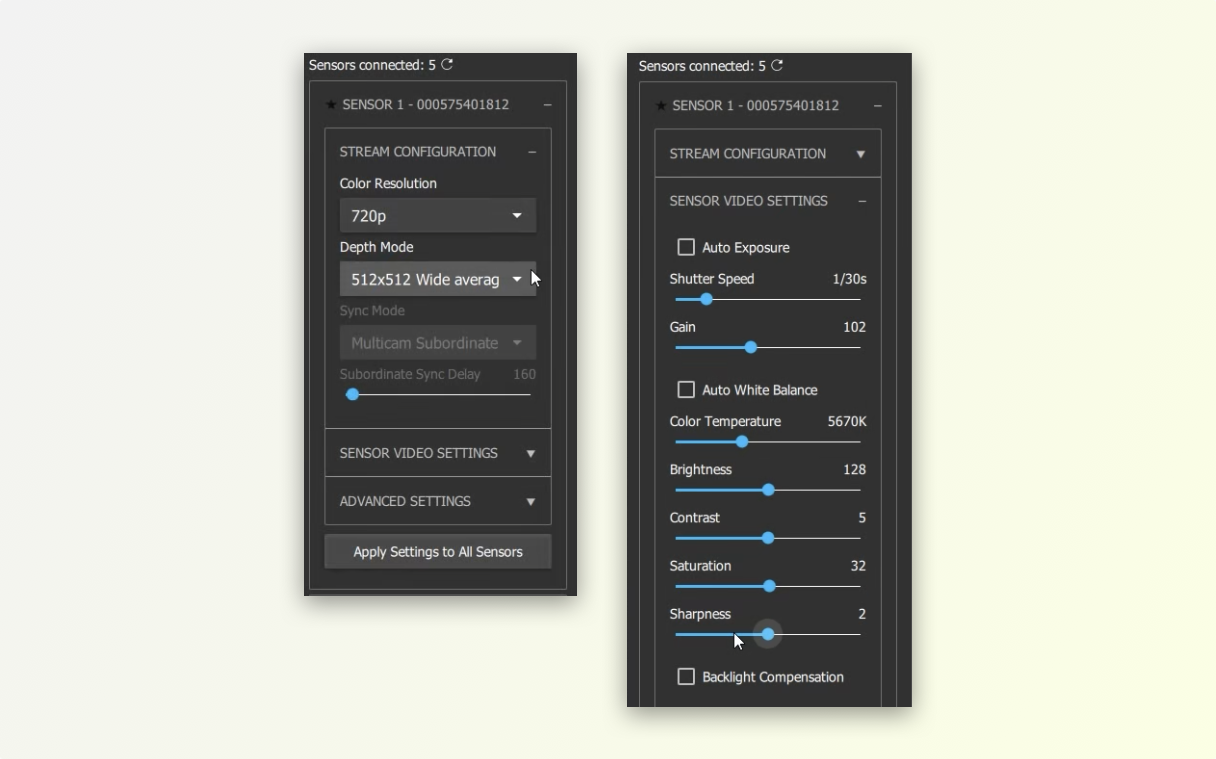
Calibration stream configuration
For the calibration stage, we set our depth stream configuration to 1024x1024 Wide Unbinned, which provides the greatest depth resolution at the wide aspect ratio, which is needed for the close proximity set up. Leave color at 720p for the sake of performance.
Sometimes you may see interference between sensors, which looks like large noise pulses in the depth image. These can hinder calibration quality. An easy remedy is to change one of the interfering cameras to manual 1/60 shutter speed, while the others all remain at 1/30.
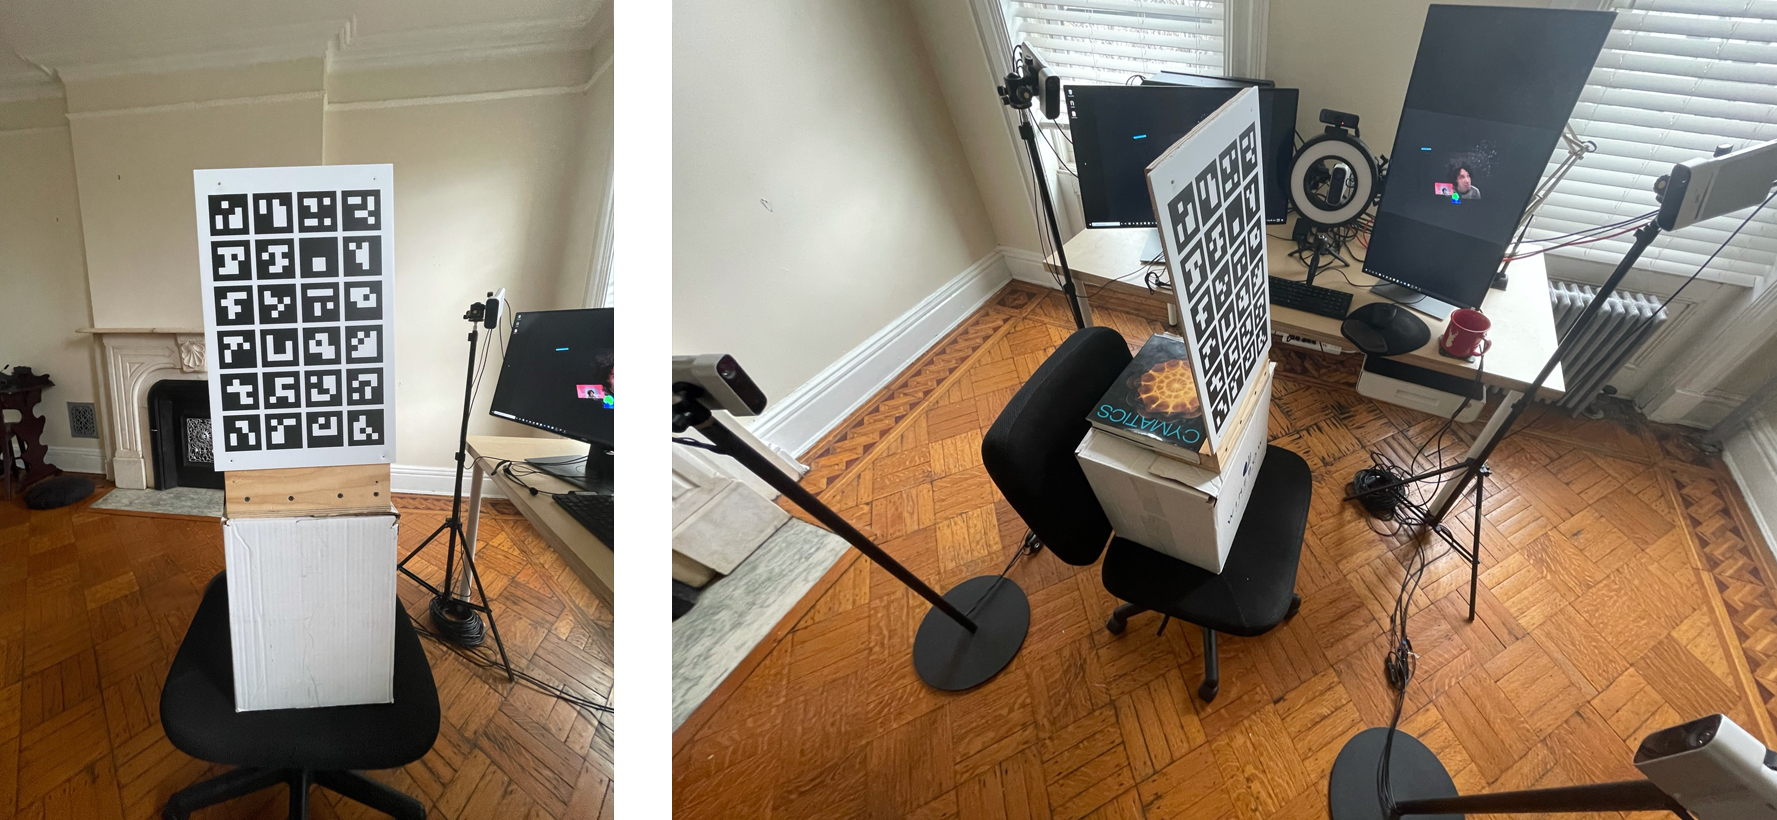
Calibration sample capture
Our calibration strategy uses the calibration chart on an office chair.
The calibration chart pictured below is a 11" x 17" foam board printed at Vistaprint. We have nailed it to a board with a lip that we can weight. We have used a box on an office chair to get the elevated samples.
We calibrate sensors pair-wise in the following order, creating 4 links:
- Link back left sensor to front left sensor
- Link front left sensor to center sensor
- Link center sensor to front right sensor
- Link front right sensor to back right sensor
For each of the above sensor pairs we take four samples, ensuring that our sampling is as close to the capture volume center, where we will be sitting while streaming:
- Elevated close sample
- Elevated far sample
- Lower close sample
- Lower far sample
Calibration validation
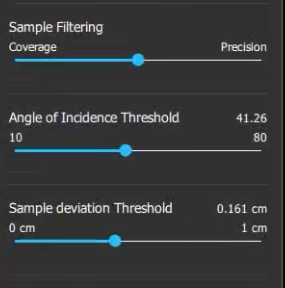
Adjust the Angle of Incidence and Sample Deviation thresholds to almost as low as possible without breaking the links. The values from our calibration can be seen on the right.
Be aware that overly aggressive Angle of Incident filtering may cause a worse calibration, due to the close nature of the sensor setup eliminating all close samples. A value between 40-50 is recommended.
We like to use a single index finger to validate calibration quality. The images below show a pretty good calibration. We will further validate calibration once we have the livestreaming set up into Unity.
Configure Livestreaming
After you have a great calibration, switch your streams back to 512x512 Wide Averaged, keeping color at 720p. Currently the Livestream set up uses the depth image as the basis of the output stream resolution, so additional color resolution over 720p is lost.
Once you start streaming, we'll need to first edit the Depth Preview Range to isolate the streamer (that's you!). This ensures no extra noise gets into the stream and also ensure the depth data is of highest quality, as large capture volumes stretch resolution across a wider depth range causing artifacts.
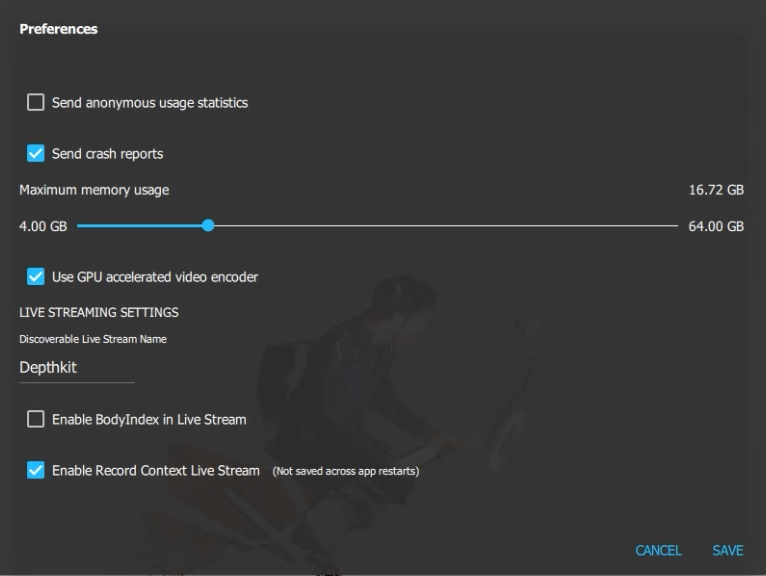
Now you are ready to turn on the Livestreaming feature. Open up Preferences and check Enable Record Context Livestream.
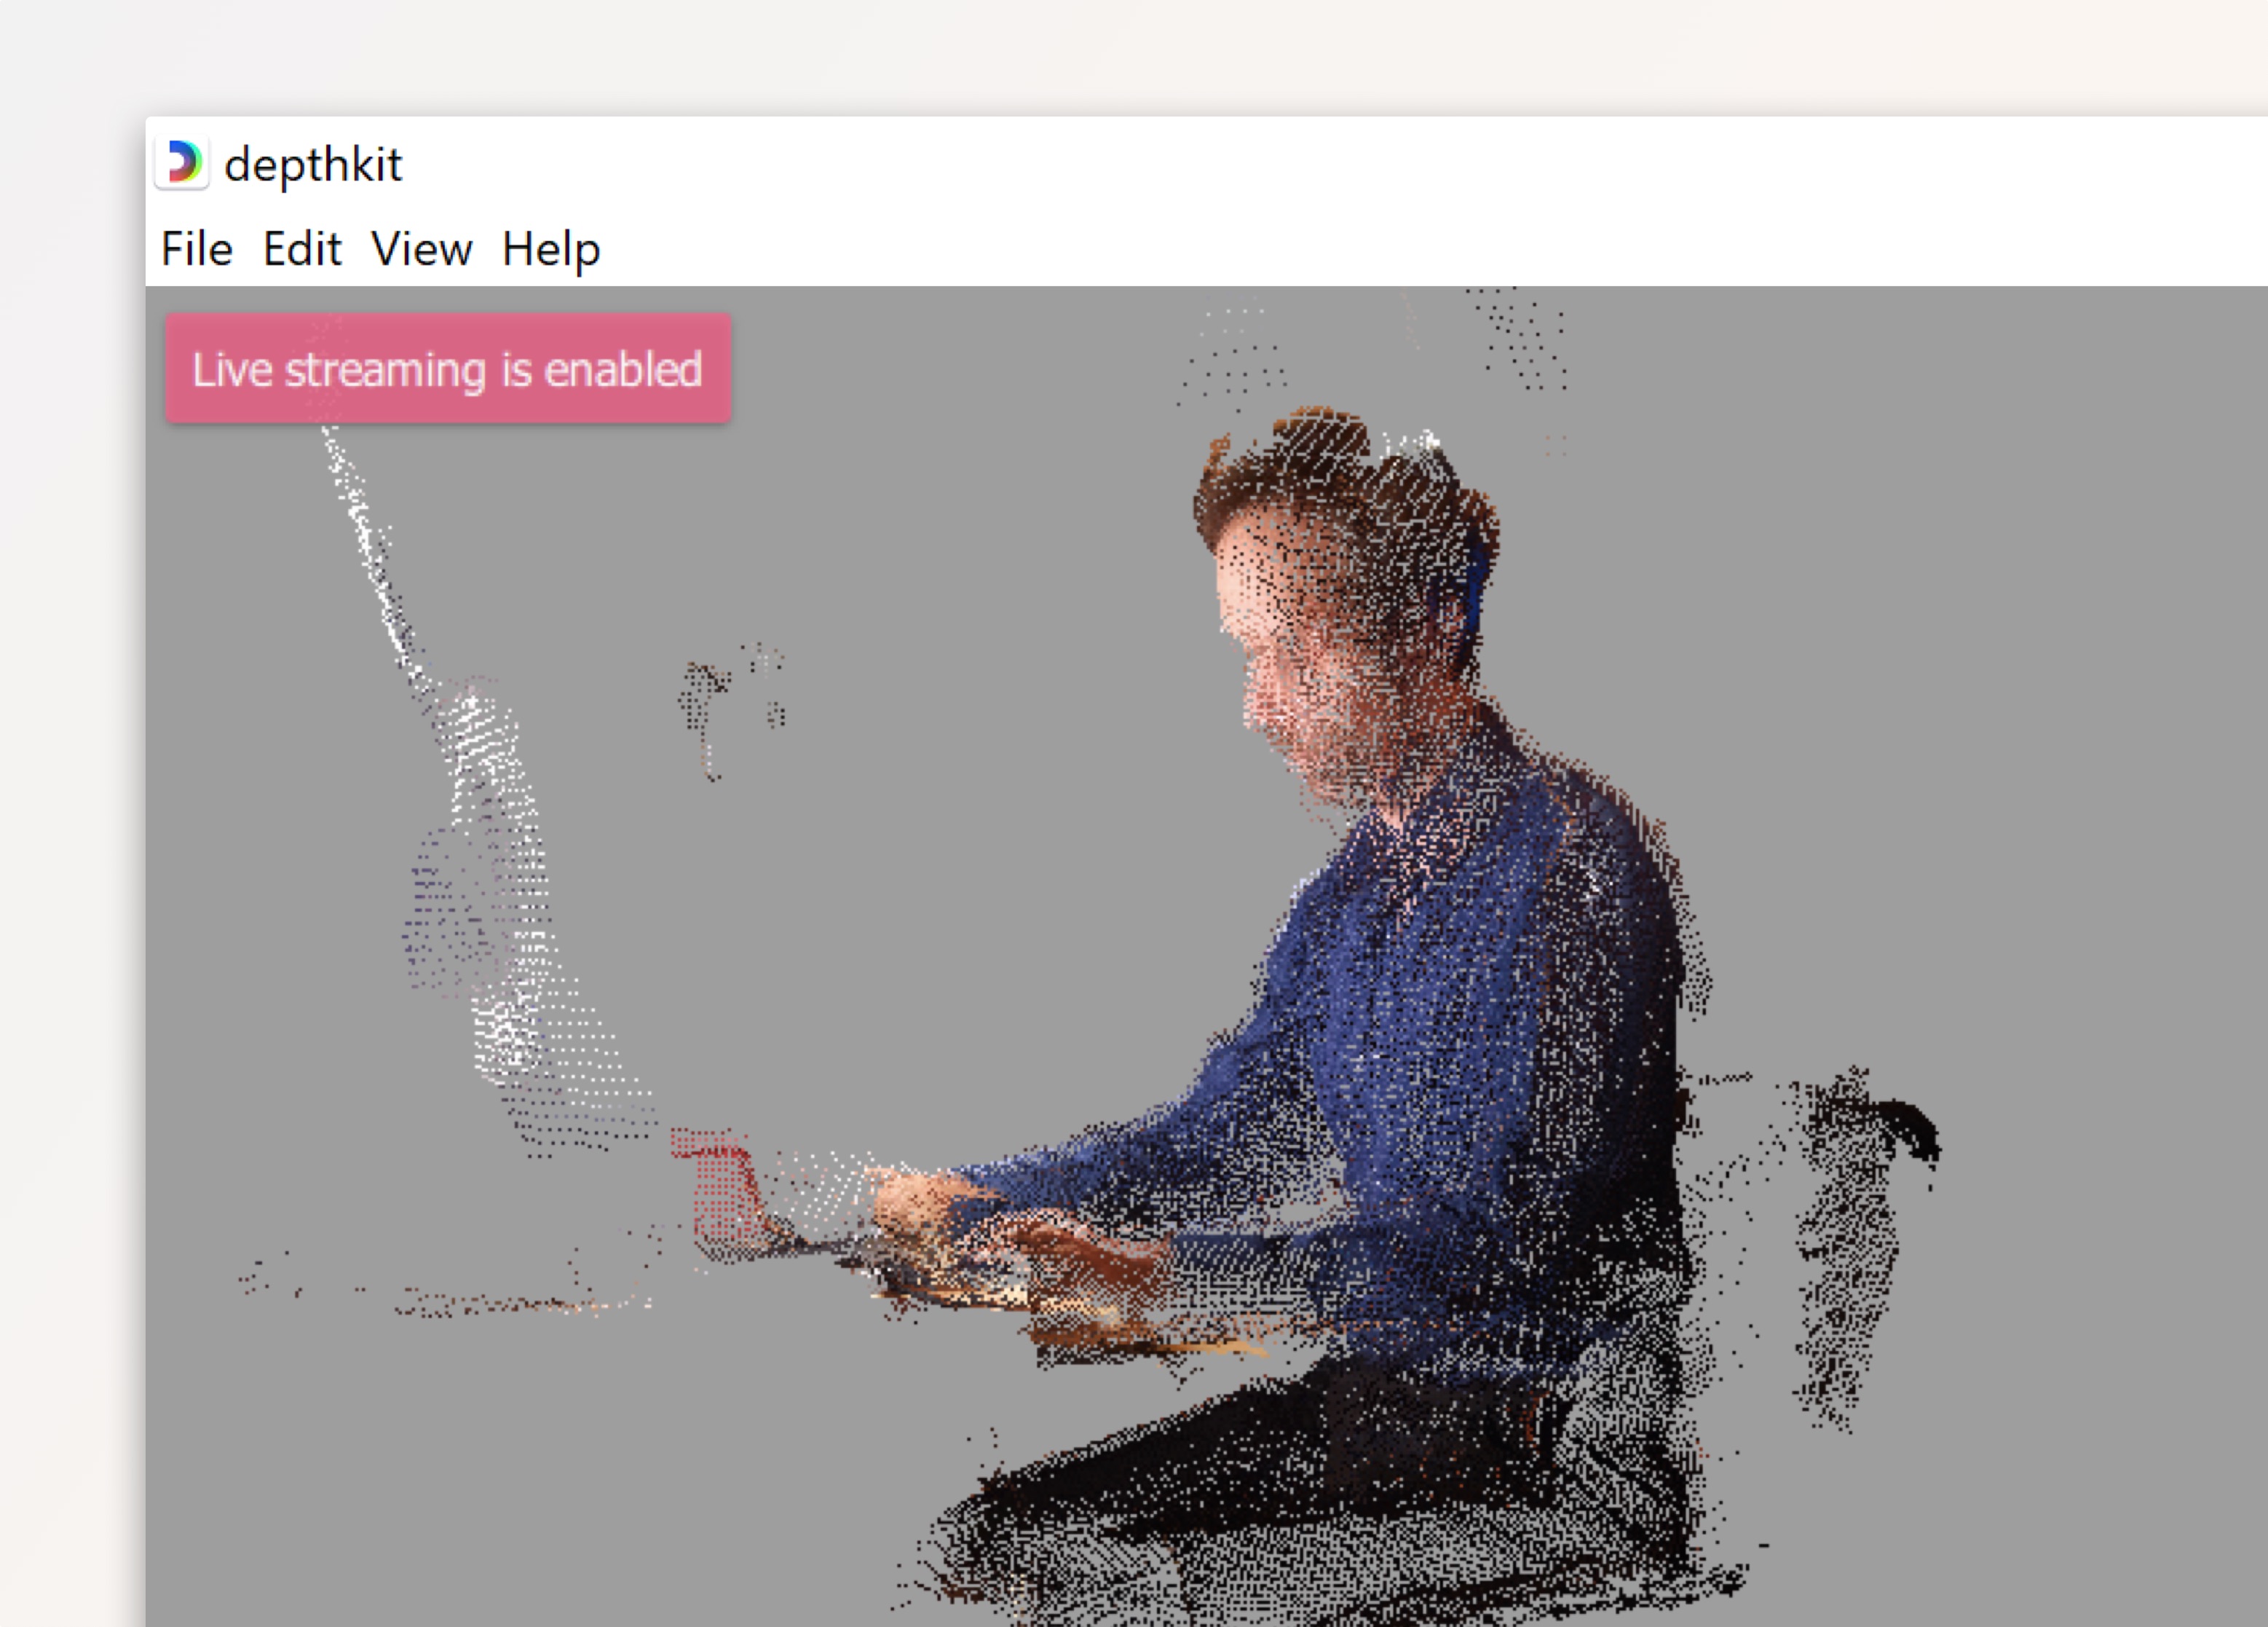
Now you are streaming. Next stop: Unity.
Unity broadcasting setup
The system works by taking the scene from Unity containing the streamer's hologram and publishing it as a webcam. To do this, we recommend using OBS's Virtual Camera feature. OBS is nice because it allows you to switch between other inputs, such as a normal webcam (for those rare moments when you don't want to be a hologram) without having to fiddle with video settings on Zoom.
A diagram of the whole streaming flow is below.

Streaming Depthkit into Unity
Fire up Unity and create a new project. This tutorial assumes 2019.4 LTS using URP, but the system will work for HDRP and the Built-in Render Pipeline as well.
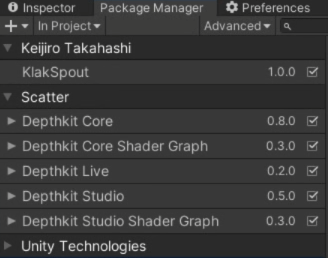
First things first, once your project is created is to follow our Depthkit Studio Expansion Package for Unity guide to get your packages imported.
Most importantly ensure that the Depthkit Studio and Depthkit Live packages are imported. Don't forget that the Depthkit Live package relies on Klak.Spout.
Back in your Depthkit project folder under _Exports/, you'll find a livestream_multicam_meta.txt file was created when you started the sensors streaming with Livestreaming enabled. Copy this file into your Unity folder.
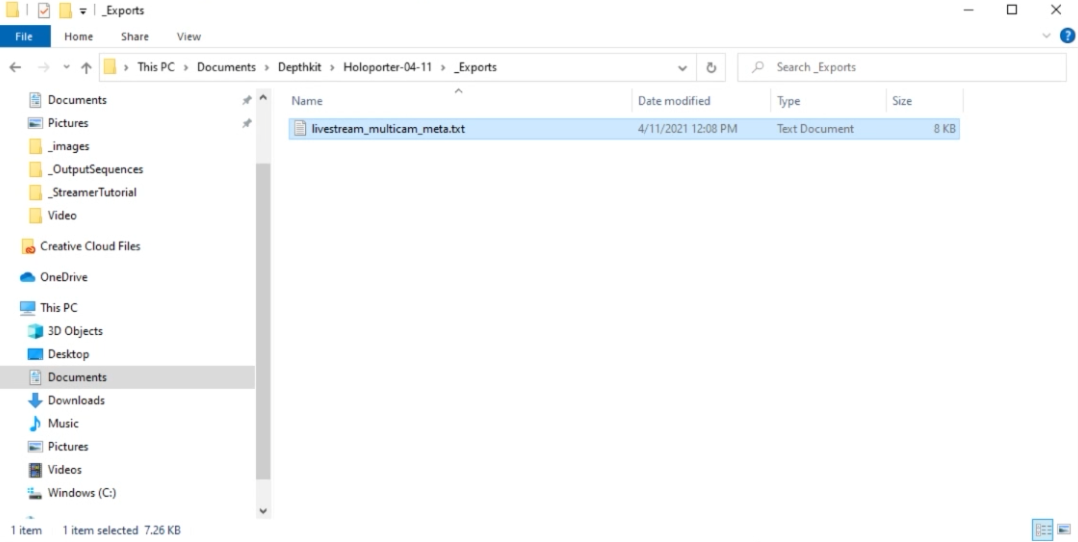
This Metadata file will need to be updated and replaced every time you adjust calibration settings, change depth stream configuration, or change your Depth Preview Ranges. We like to rename it with a date when we bring it to Unity to keep things organized.
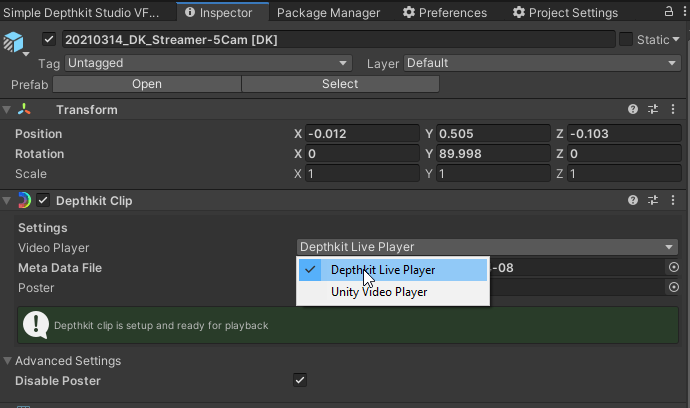
Setup a Depthkit Studio Clip as you normally would, with the following customizations unique to Livestreaming:
- Add the Livestream Metadata we copied into the project earlier.
- Switch the Video Player to Depthkit Live Player.
- Disable the poster frame under Advanced.
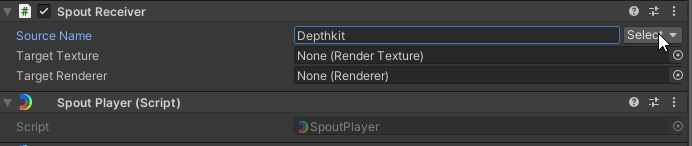
- Find the Spout Receiver Component and select Depthkit as the Source Name.
And presto! Like magic, you will see yourself suddenly appear as a live hologram in Unity.
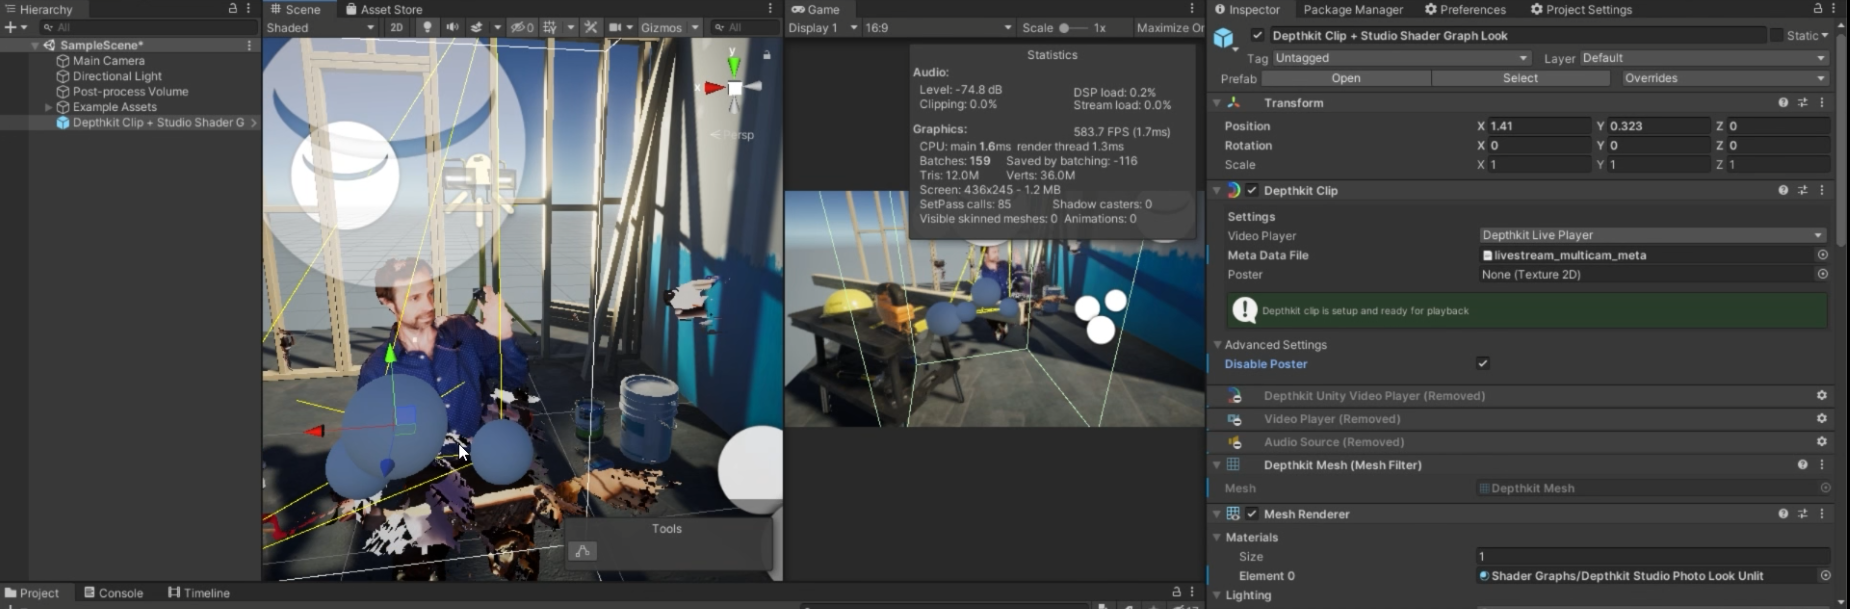
Follow the best practices in the documentation for setting the surface reconstruction settings. We like to use the same single-index-finger test mentioned during calibration to ensure good calibration once we are in Unity, as well as look at the blend on the subject's eyes and nose.
Outputting the Unity scene
The scene doesn't look very exciting yet, but that's ok — we'll come back to how to make it look cool with environments and camera moves. Before we go down that rabbit hole, we want to finish setting up the broadcast pipeline.
The next step is to setup a Spout output on the camera to stream out of Unity. In URP and HDRP you'll need to make a copy of the camera that's dedicated to the output stream. In Built-in RP you can simply add a Spout Output right to the Main Camera.
In Built-in RP
- Add a Spout Output to the main camera. You're done!
In HDRP or URP
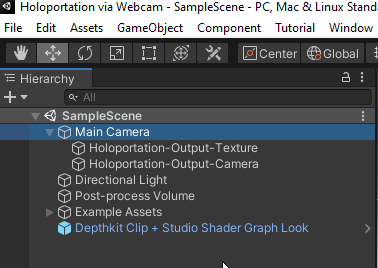
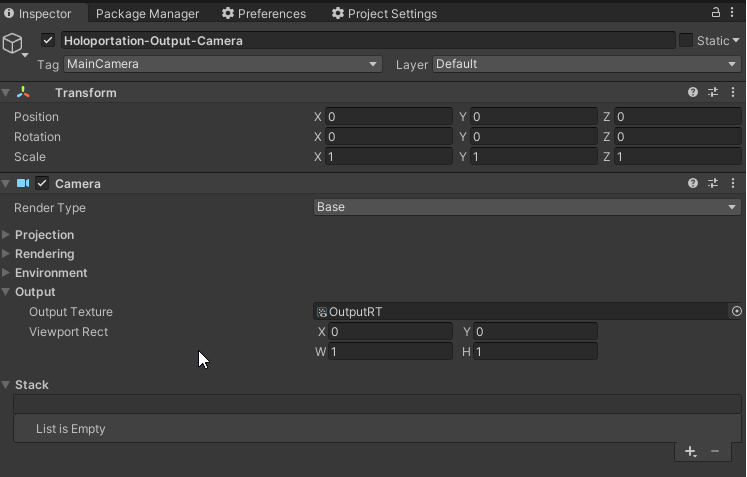
- Create a copy of the main camera, and nest it under the Main Camera, ensuring the transform is 0'd out. Give it a name like 'Holoportation-Output-Camera'
- Create a RenderTexture, set it to 1920x1080, and add it to the Output Texture on the nested camera.
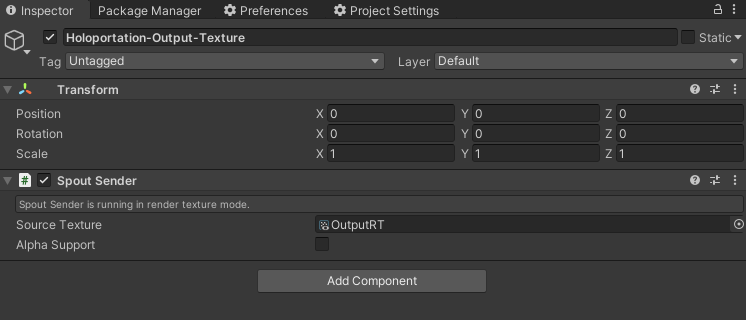
- Add an Empty Game object, also nested under the Main Camera, give it a name like 'Holoportation-Output-Texture' — this is the name that will show in OBS later.
- Add a Spout Output Component to this Game Object.
- Set the Source Texture on the Spout Sender to the same as that set to the Main Camera RT Output Texture.
Let's leave Unity now and fire up OBS to receive the stream.
Receiving the Unity scene in OBS
If you don't already have it, download and install the latest OBS. You'll also need the Spout2 input plugin for OBS which you can download here.
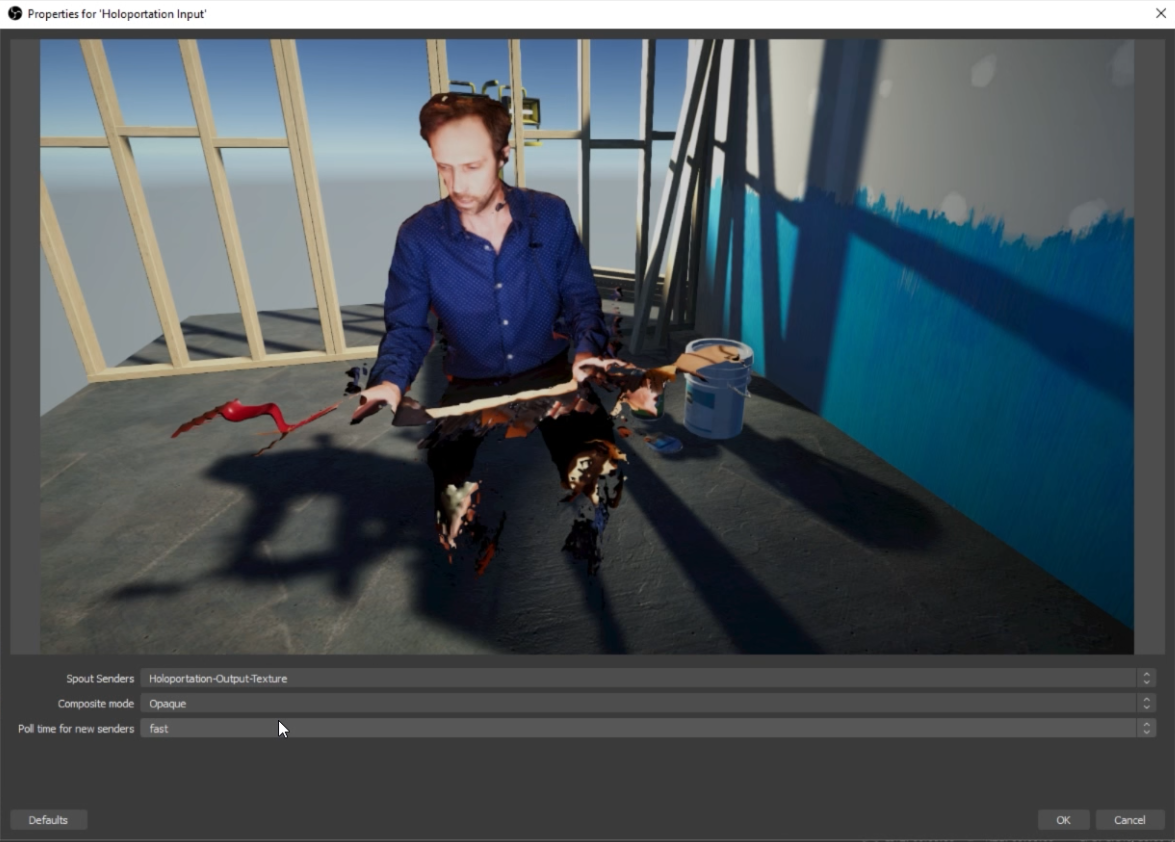
Add a new Scene (e.g. 'Hologram'). In that Scene, add a new 'Spout2 Capture' Source. In the source properties, select the name of your Spout output from Unity. If you don't see it make sure that Unity is running in play mode.
Adding a normal webcam
We also find it helpful to have our normal webcam available in OBS, so we create another scene called 'Normal Webcam' and add a 'Video Capture Device' and configure it for our USB Webcam. Now you can switch between a normal webcam and the hologram stream instantly in OBS during conversations.
This is particularly helpful when introducing the hologram stream to new audiences, and some explanation and set up is required before diving into the 3D world.

For best performance, run the Unity project from a build.
Configuring OBS virtual camera
Now that you have your scenes set up, click 'Start Virtual Camera' in OBS and your virtual stream is now available as a webcam. Below are screenshots of how to configure common video platforms with the camera.
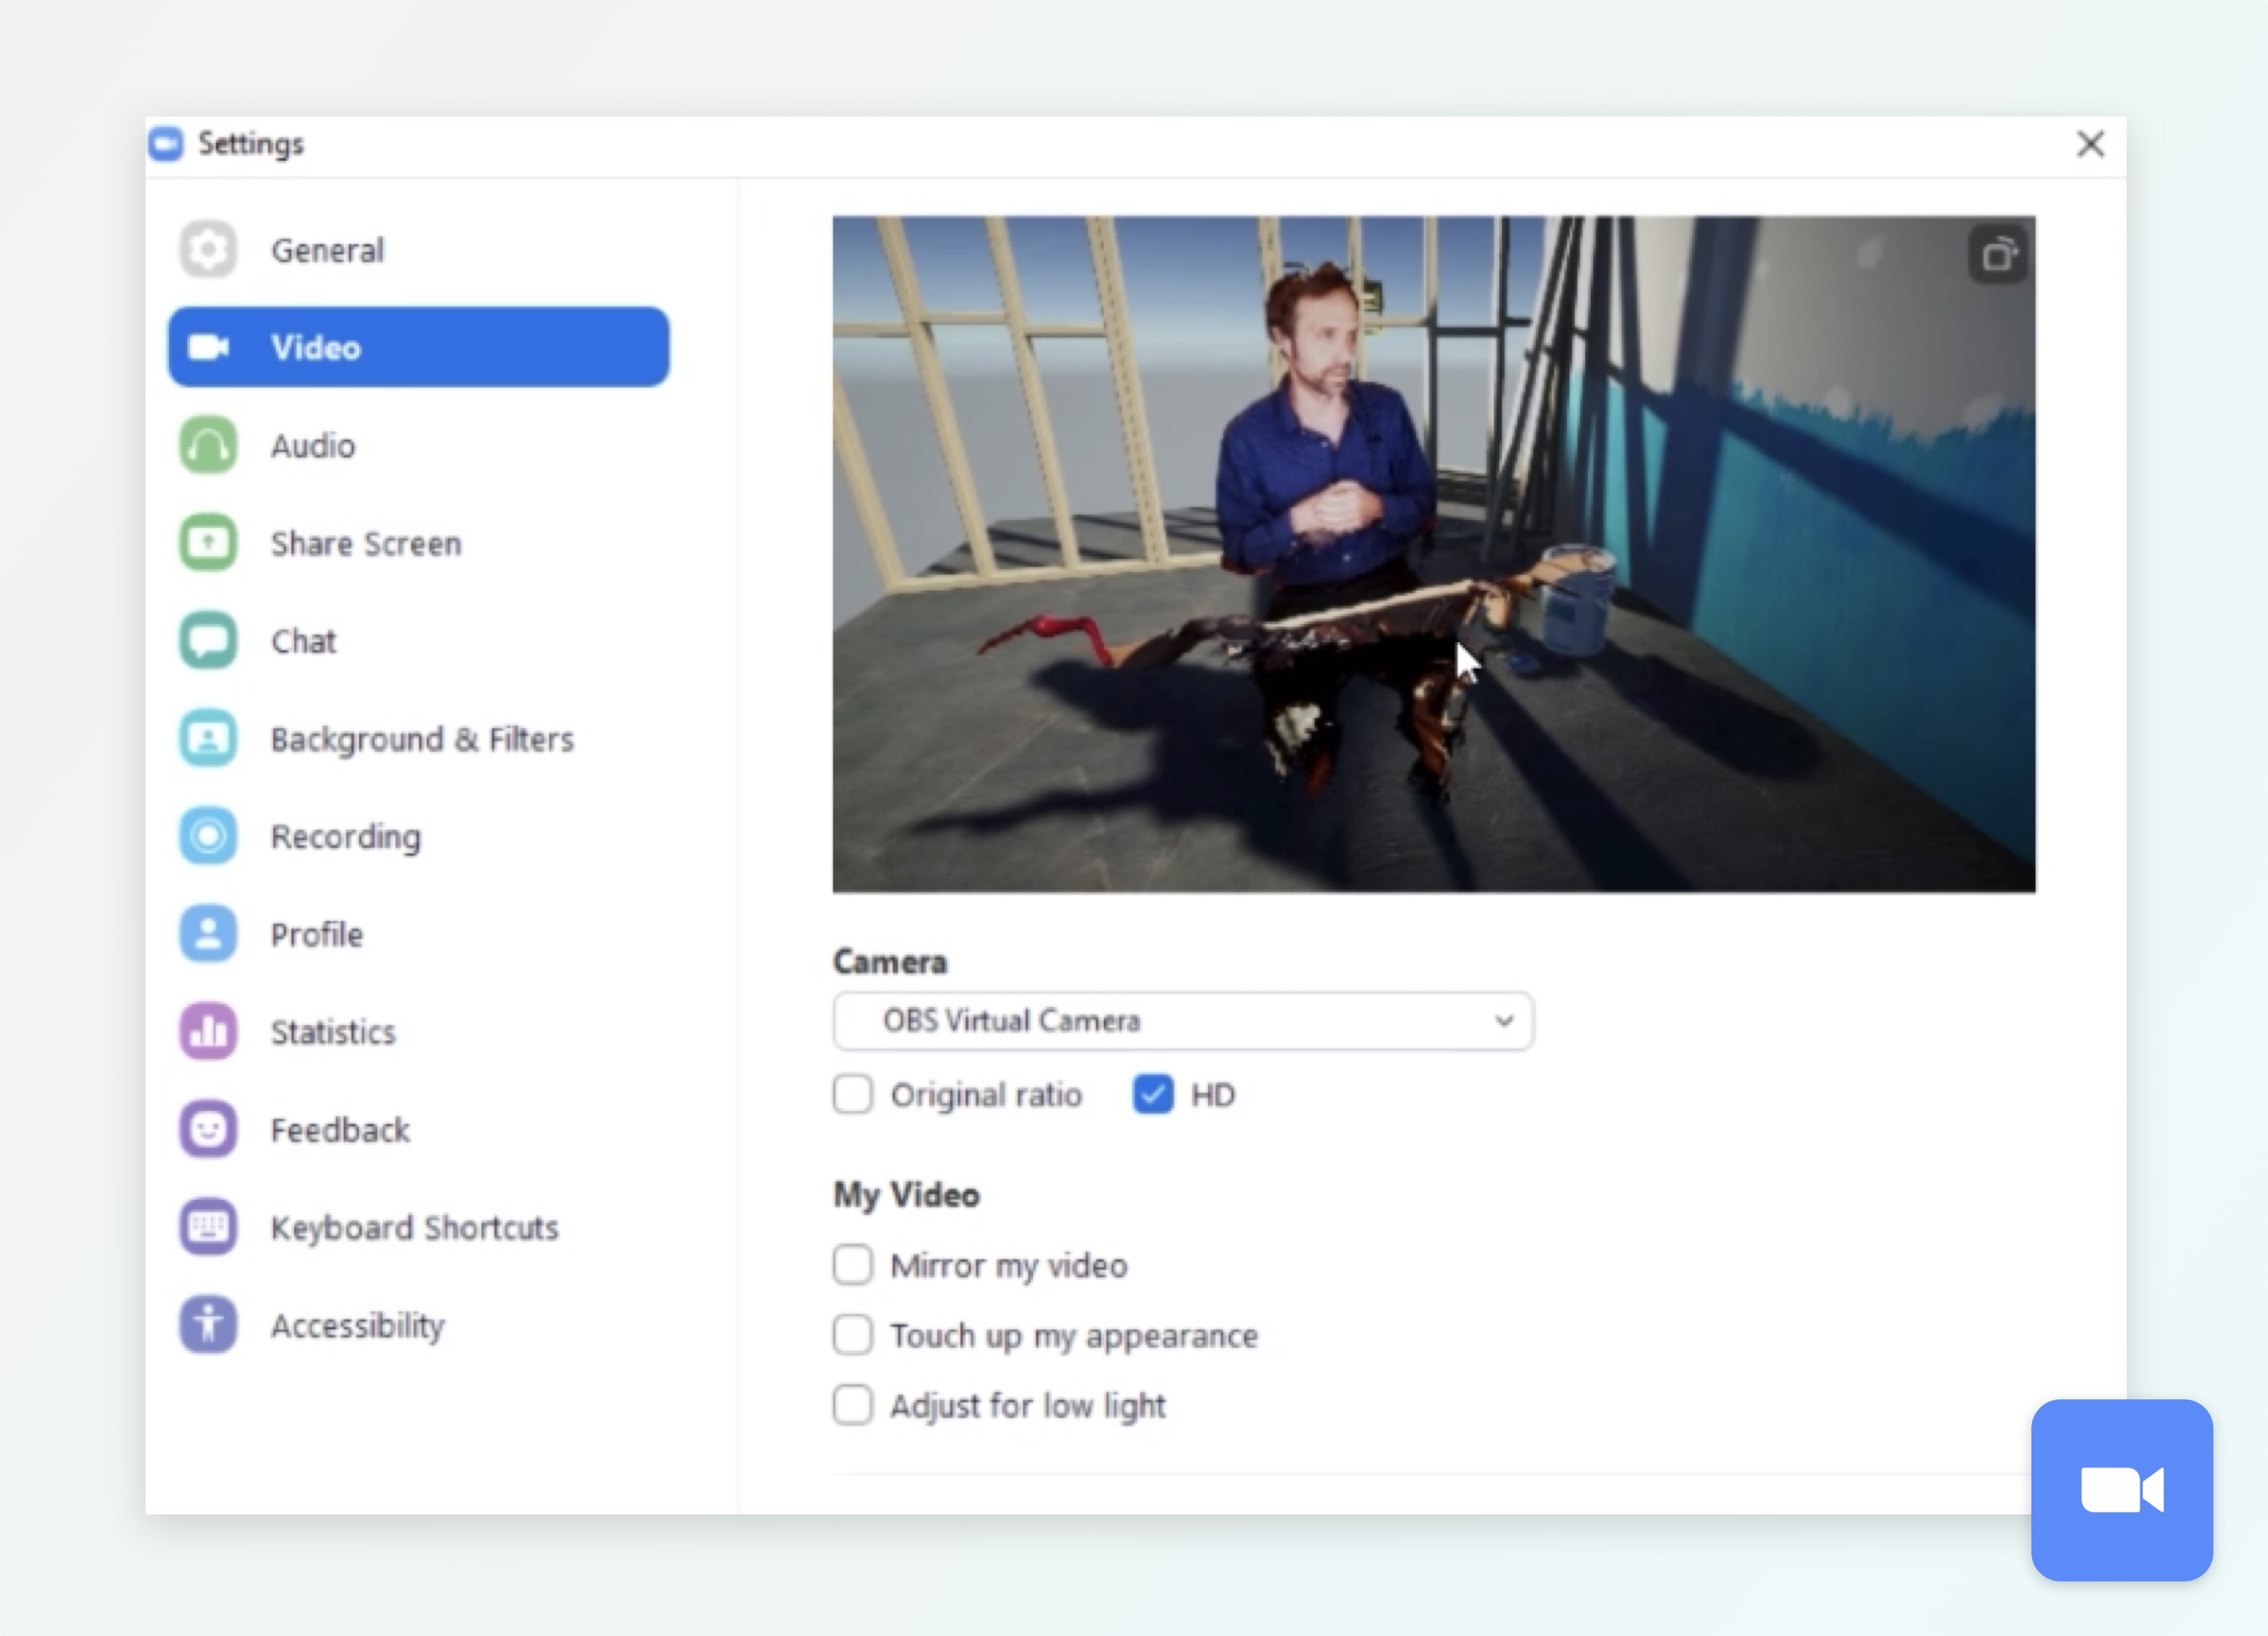
Zoom
Select the OBS virtual camera under Settings > Video in Zoom.
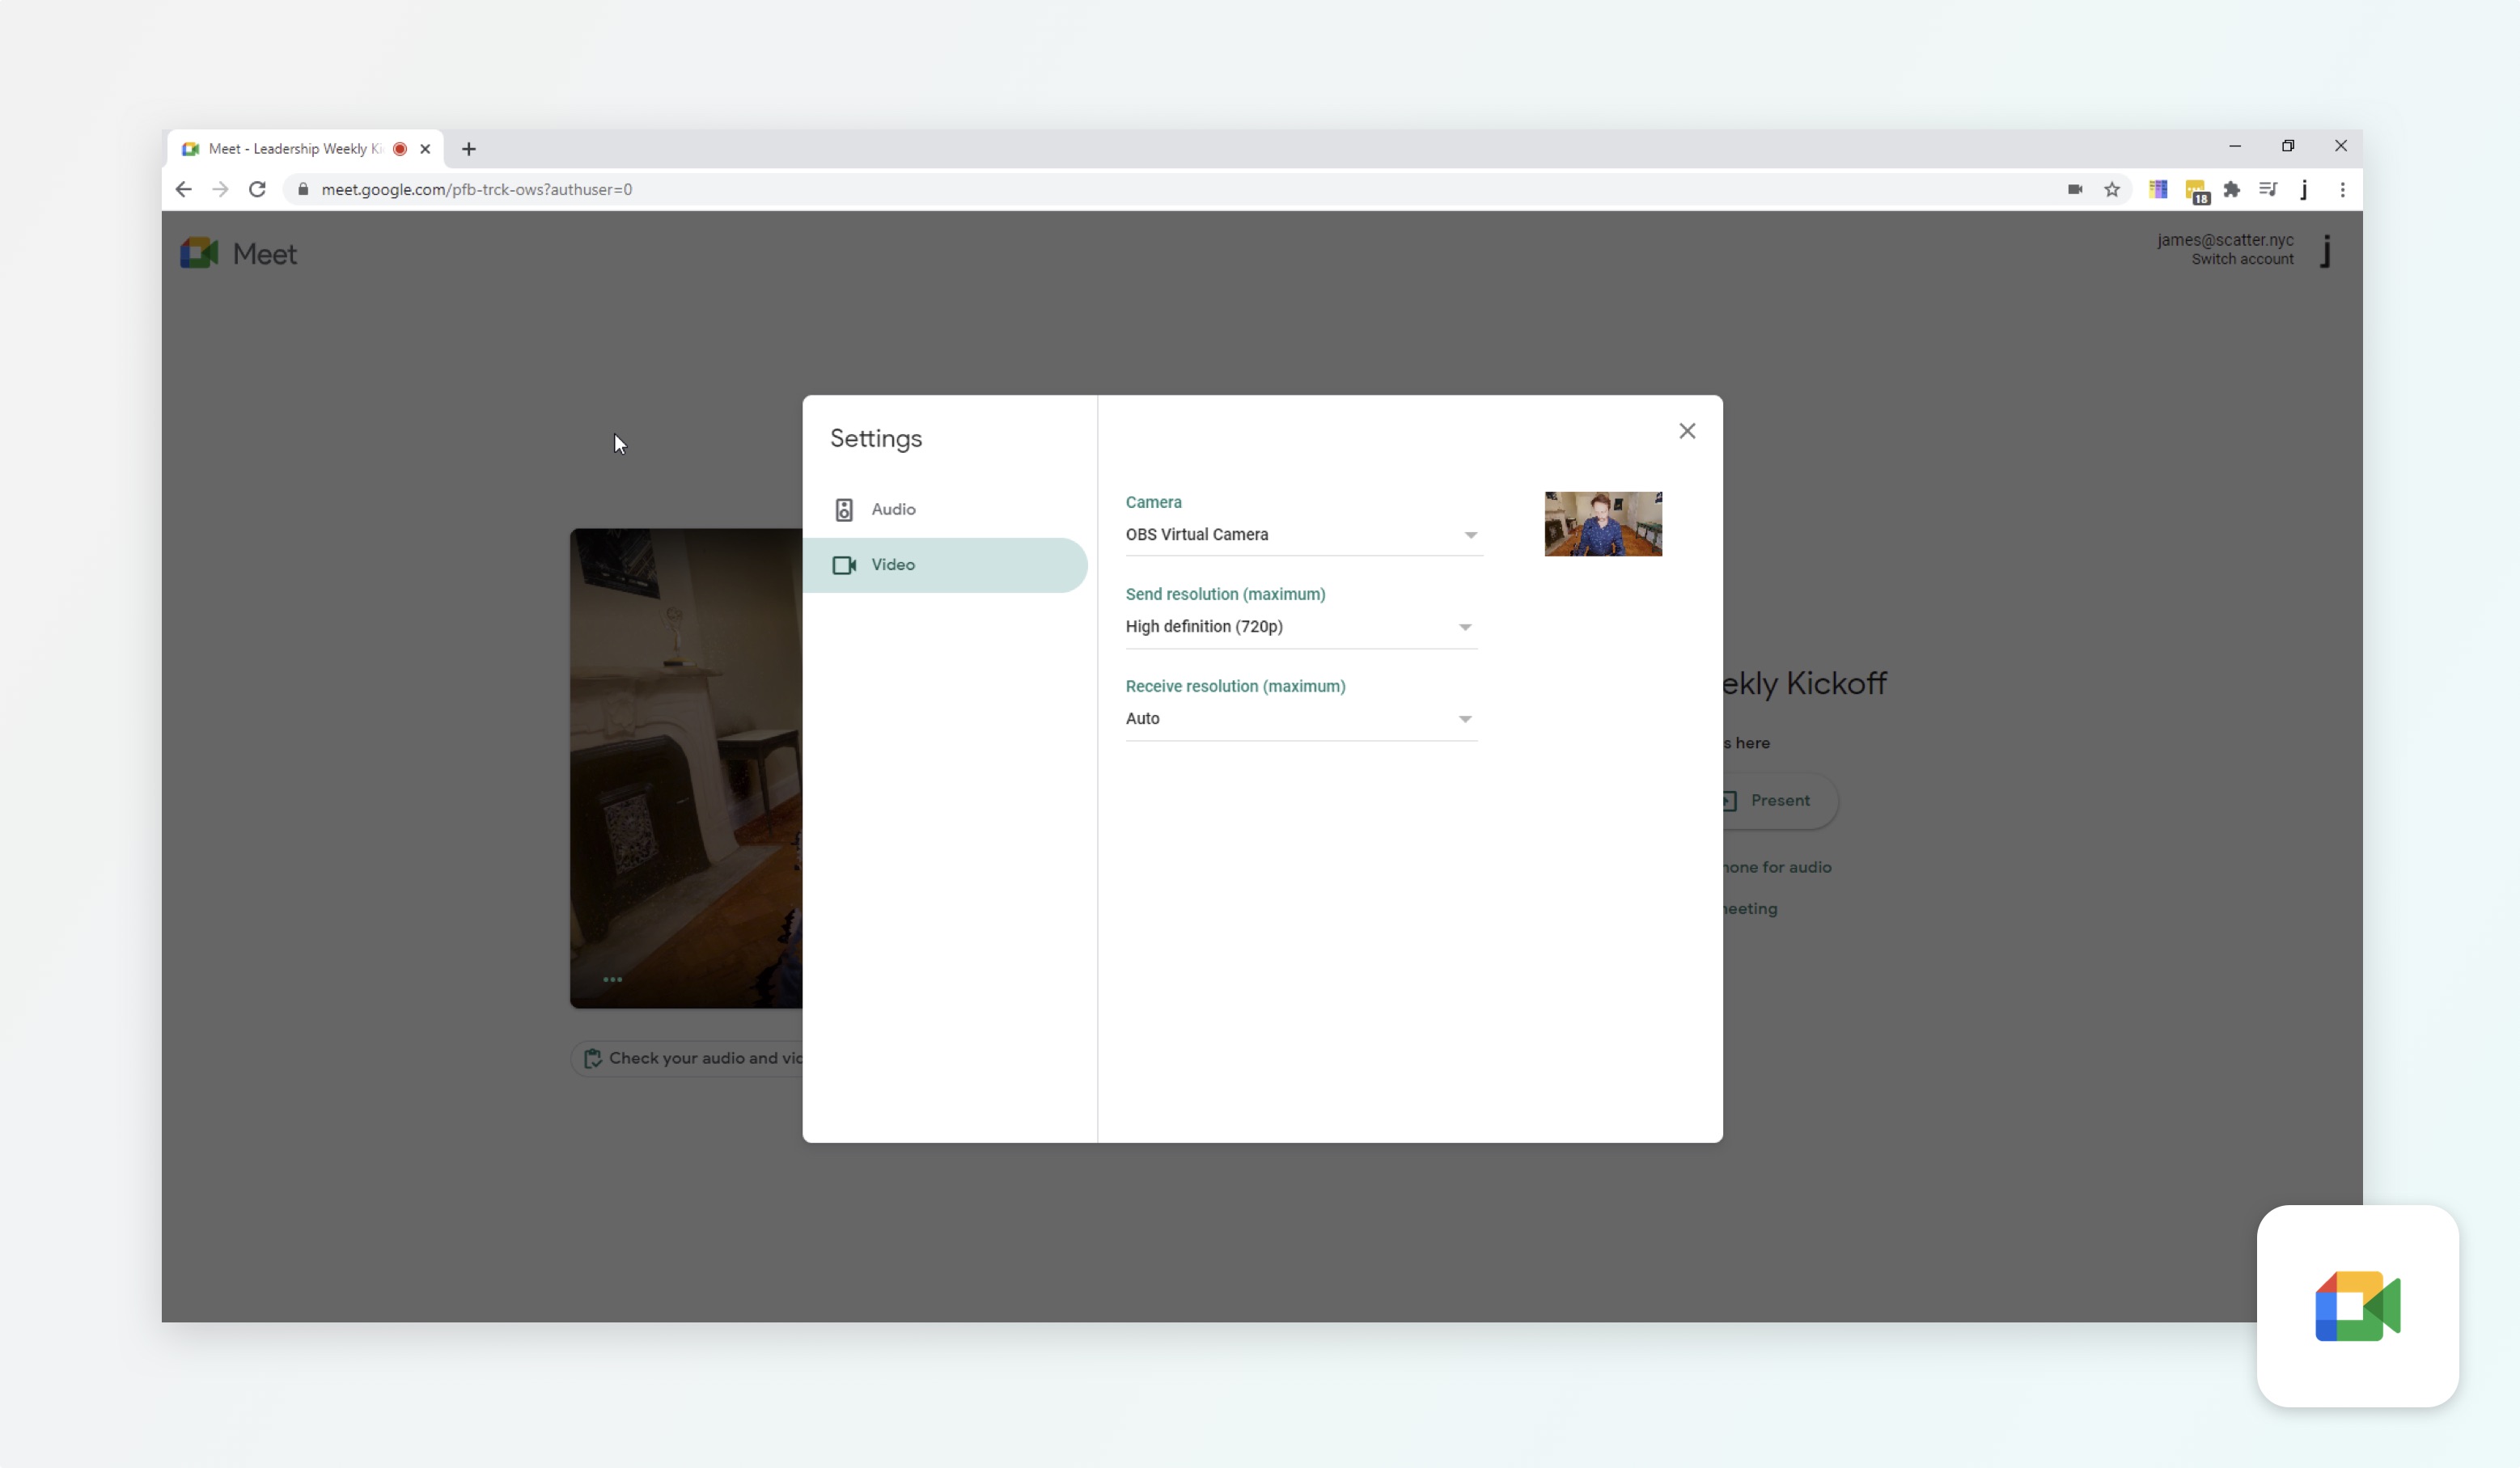
Google Meet
Select the OBS Virtual camera under Settings > Video in Google Meet.
Facebook Live
For Facebook Live, we have experienced an issue where the camera cannot be found right away because it defaults to one of the Azure Kinects. Simply hit Retry, then at the bottom in the Setup panel you'll be able to specify OBS Virtual Camera.
_Live_Producer___Facebook.png)
Creating environment & interactions
Now that we have the basics set up, let's add some flair to the scene.
The environment pictured below features an apartment, then transitions into a forest scene surrounding it.
Backgrounds
You now have the power of Unity at your back to trick out your space any way you'd like. While infinite imaginary 3D worlds await you, we always like easing our viewers into the novelty of a holographic livestream. One great way to do that is to scan the actual space you are in and add it as the initial background.
There are three ways to do this.
1. Depthkit Background Plates
Depthkit has a feature that lets you export averaged static background models from any capture. If you take a short multi-cam capture and export each individual perspective as an OBJ Background Plate, they will line up in Unity perfectly to scale. Don't forget to pull your depth preview ranges out before exporting. Depthkit's Exporting guide →
While this is quick and readily available in Depthkit, it doesn't create a complete scan or unified geometry. More specialized tools for capturing environments are recommended to get the best results.
2. iPhone LiDAR
My tool of choice for room scanning is the Polycam app for iPad Pro or iPhone 12. This is fast, easy and pretty high quality.
For importing Polycam scans into Unity, we have had the best luck using OBJ exports. We also like exporting a pointcloud as PLY in combination with Keijiro's PCX visualization to create fun particle based transitions between spaces.
3. Photogrammetry
The most advanced form of static capture is photogrammetry using a professional camera and a tool like Epic's Capturing Reality or Agisoft MetaShape.
Camera movement
Now that you have a space for your hologram, it's no fun if your viewers can't see into different parts of the 3D world you are in. We have to add some camera movement to make that possible.
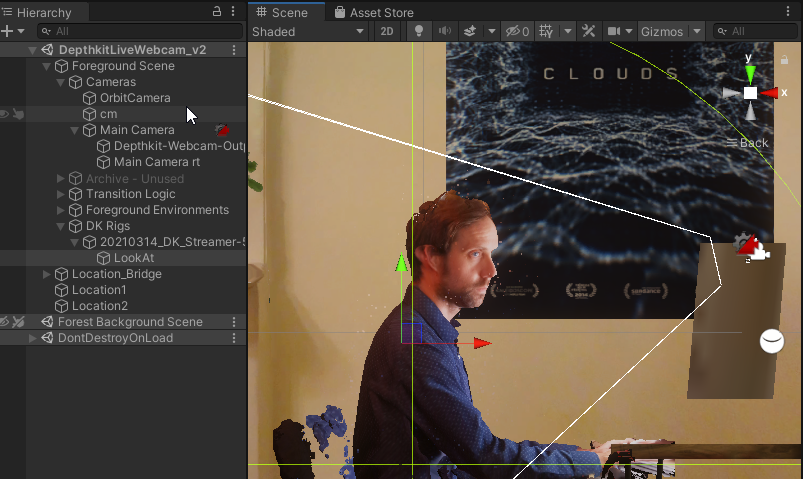
We'll share our simple camera animation system that we illustrate above, which allows you to spin around the subject from eye level or above. This requires Unity's Cinemachine and a little bit of scripting.
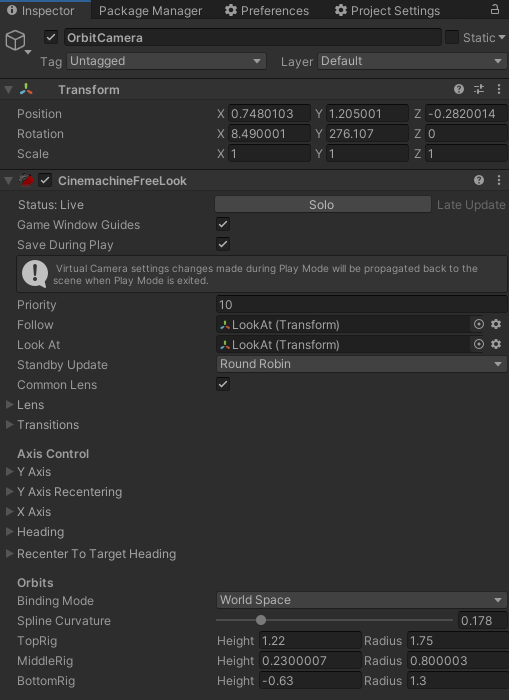
We use a Cinemachine Freelook Camera with a Look At target placed right at chest level:
The Cinemachine Orbital behavior is configured as follows:
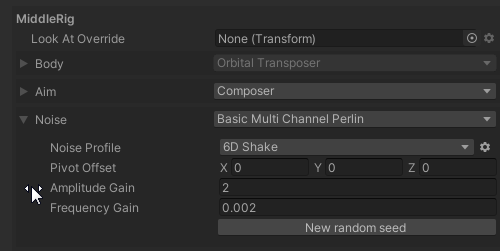
We have added some camera noise to the middle rig.
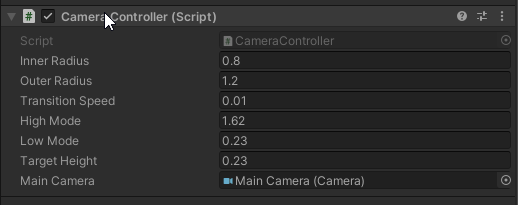
This simple camera controller script attached to the FreeLookCamera facilitates spinning around the capture with the arrow keys.
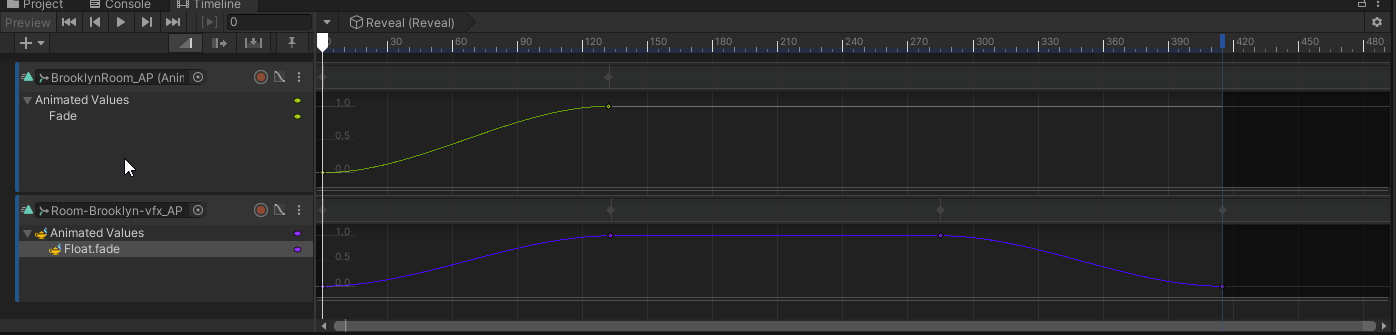
Transitions
One of the most magical possibilities in the holographic video format is the ability to transition spaces. In the demonstration above, the transition between spaces is done using Unity's Timeline plus a special dithering dissolve shader graph. The dither dissolve, also called 'screen door' effect, is a clever system for fading transparent geometry that gets around the challenges of transparency and triangle draw order.
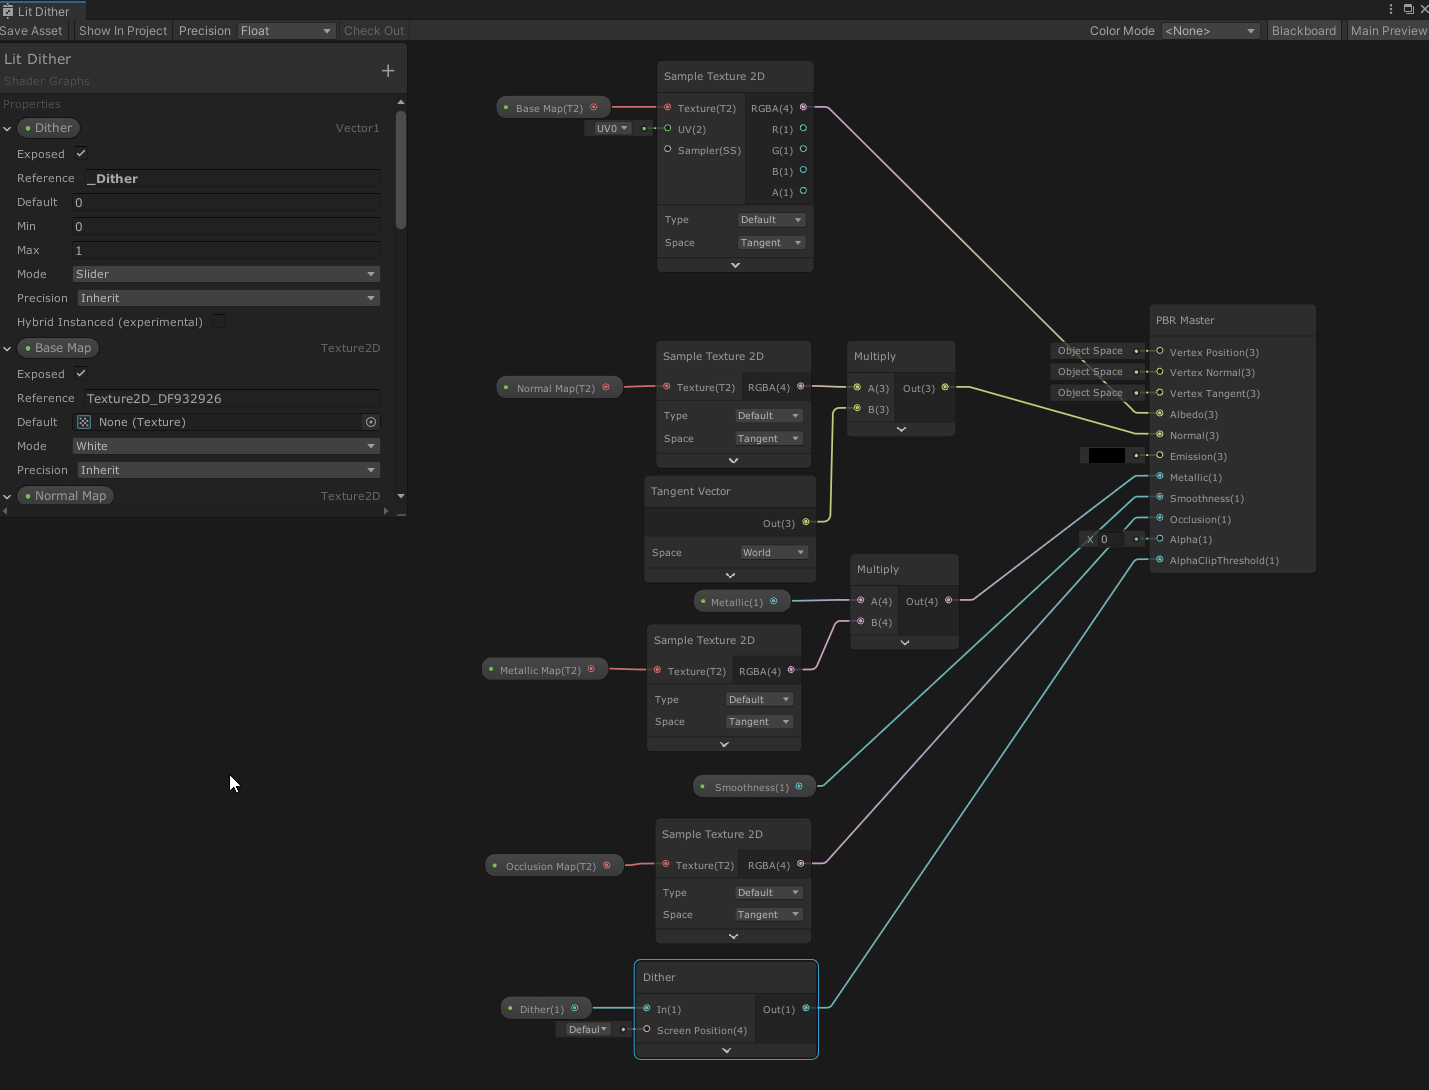
Lit and Unlit Dither Shader with Fading Script
All the Materials on the foreground scene use a custom Dithering dissolve shader that allows them to be faded out to reveal the background. All materials using this shader get a special _Dither variable that feeds into the Alpha Clip of the PRB Master. A script attached to the top level game object for the scene collects all the mesh renders and sets their _Dither level programmatically. That can then be animated on the timeline to create the transition.
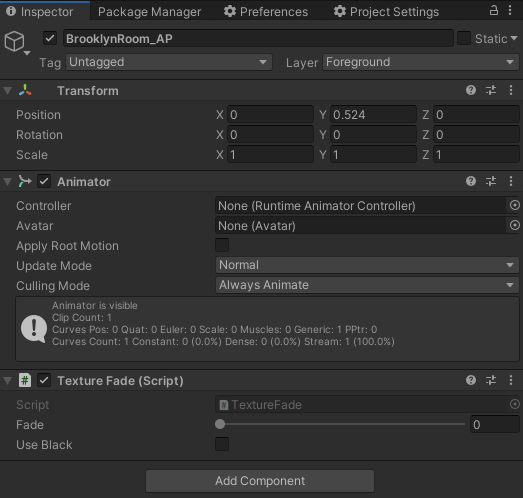
Download the Lit and Unlit shaders for URP here, as well as the TextureFade script that allows them to be animated on the timeline.
That's all for this tutorial. Please get in touch at support@depthkit.tv if you have any questions.